17 Stylish Entryway Table Ideas

Many people underestimate the charm and functionality of having an entryway table in their homes. Not only does it give you a place to hold items you’ll need each day as you leave the house, such as keys, wallets, and sunglasses, but it can also improve the aesthetic of the space. 

This list demonstrates seventeen ways that you can use an entryway table in your home. No matter your home’s style, size, or needs, you’re sure to enjoy these entryway table ideas. We’ve gathered entryway tables of all kinds, including options for tight entryways that have limited space and in unique colors or designs for a one-of-a-kind entrance.

Sleek Black and Gold Option

If you’re looking for a sleek, modern entryway table, you’ll want to use furniture in colors like black and metallics like gold. 

Nothing is more modern than a four-door black cabinet with gold accents and gold curved legs. This table looks the best in larger entrances with bold wall colors. 

Keep the top free of clutter to keep the modern feel, using one decor piece, like a simple vase and white contemporary wall art.

Tables With Drawers

There are multiple types of tables with built-in drawers, which are perfect for when you need a place to keep stuff off the top of the table.

Drawers give you private storage and free up the table for decor, plants, candles, or holiday items. The number of drawers can vary depending on the length and size of your table.

If you want other places to keep stuff, you can pick tables with a bottom shelf. 

End Table

If space is a premium commodity, you may have to get creative with the type of entryway table you use. For example, instead of looking for long rectangular tables, think outside the box.

End tables can make for excellent space-saving choices for small rooms. These types of tables give you enough space for the essentials using two shelves for a simple yet cute entry table.   

Ornate Table

If you love fancy, detailed woodwork, you’ve got to get an ornate entryway table with a marble top and curved legs with detailed engraved channels and swirls. 

This table type is the epitome of old-time luxury that’s sure to earn a gasp of envy from all visitors. White paint and dark marble make the biggest statement. 

Weathered Table for a Farmhouse Style

If your house has heavy farmhouse accents, keep the theme going using the right table for your entryway. The best thing about farmhouse chic is that you can pick up a used one from a thrift store or yard sale. Look for designs with multiple small drawers or lower shelves for extra storage of paperwork, shoes, and even a plant and bowl.

And if the table happens to have the paint peeling, faded, or scratched, that’s even better. The weathered look is very farmhouse chic and having it already done prevents you from having to do the work yourself. But, of course, you can also find new ones already distressed too.

Long, Slender Table With a Modern Curve

If your entryway has a long wall, but you need to save space, you might need a long, slender table. A darker wood gives the table a rustic vibe but having the ends curved upwards adds a more modern touch.

Thin wood block legs keep the stable table while also adding modern flair with curved undersides. You have enough room for a few books, baskets, bowls, and vases. But you won’t have storage underneath. Instead, you can add a plant and some woven baskets placed on the floor to keep the space from looking like an empty gap. 

Rounded Table

Rounded entryway tables are an excellent choice if your entryway is a bit cramped or has severe, straight lines. These tables have a simple yet graceful charm void of the sharp angles of standard tables. 

You still get plenty of shelves hidden behind the double cabinet doors, plus two drawers for more places to keep things out of sight. And there’s also plenty of room on top to add decor and functional pieces like a lamp or succulent garden surrounded by a tray for holding items.

And because of the rounded front face of the table, it fits easily into a corner of the room or along a short wall cutout framed by doorways. Square or rectangular tables can be more challenging in these areas.

Natural Look With a Tree Branch Table

If you’re looking for an attractive, unique way to bring the outdoors inside, there are tables designed to look like trees. 

The legs look like wide branches, and a wood plank shelf provides a display room. This style of table isn’t going to appeal to everyone. But it is perfect for rustic and farmhouse styles, which use a lot of natural-looking materials.

You may have to do a few different searches to find the right type of natural tree branch table to fit your space and style.

Wire Shelving as a Shoe Rack

You can also use a shoe rack for an entryway table alternative. For example, if you have a ton of shoes piling up near your front door, a wire shoe rack could be the perfect dual-purpose solution. 

Look for a tall style with enough room on top for a wood shelf, or find one with the shelf built-in. You can use this shelf for a bowl that can hold your keys and other items. And the multiple shelves underneath give plenty of room for shoe storage.

You can find multiple sizes and shelving numbers depending on the number of shoes you need to store. Or you could even get lucky and find a wire shoe rack stand with an additional compartment for holding things like umbrellas.

White for a Country Chic Style

If you prefer something simple in design, look for a country chic table in classic white paint. White goes with any country design, but it also works with coastal themes, making it versatile during remodels.

You’ll want something simple but fully functional, with a thin profile, a shelf on the bottom, and bordered channel drawers for extra storage.

Decorate with white accent pieces on the top and bottom, using lamps, candles, or other country-themed pieces. 

Intricate Cabinet In Your Hallway

No rule says that you have to use a rectangular-shaped entryway table. You can also use an intricately designed square cabinet. 

You can get a Bazinga factor by picking a cabinet with gold-tipped legs, a white finish, and a fancy mild-colored pattern over the double doors. 

The square shape helps the table stand out as something different without taking up a ton of space in your entryway.

Bench For Short Entryway Table

If you care more about filling an empty void in your entryway and less about a traditional table, think about swapping a table for a bench.

A simple bench can pull double duty by serving as a place to sit while putting on shoes or taking them off and as a low table for a key tray, a few plants, or to act as a visual anchor for large paintings.

You can also get elaborate with your bench design if you have a larger space to fill and pick a bench with a built-in coat rack, a cushioned seat, and a shelf underneath for storing shoes. Some benches may even have a seat that lifts for additional storage.

Natural, Rough-Hewn Table for Rustic Chic

Rustic chic is another popular trend that’s easy to achieve using a wood table left in its unfinished natural state. These tables are typically thin and tall and look best in a dark wood shade.

The simple design of wood plank shelves on the top and bottom and narrow legs with no adornments like drawers, curves, or elaborate designs enhance the rustic look. 

These no-frill tables give you the bare minimum for storage, with only the tabletop available for decor or items. 

Symmetrical Dark Wooden Console Table

Another option is to go with a dark symmetrical console table made of sturdy wood. Two durable pillars connect the woodblock base and tabletop for a simple yet stylish slender entryway table.

Adding a plant and some woven or wicker baskets adds color and storage while helping make the table less basic. A rectangular or long oval bowl gives you a place for keys and glasses.

You can get creative with the decor for these tables to suit your design preferences, adding additional accent pieces for a more dynamic design or fewer pieces for a minimalist approach.

Tall Table With Lots of Storage

If you have ample entrance space to fill, consider going with a big, tall table that includes lots of storage. Multiple drawers and large shelved compartments covered by doors adorned with simple round knobs keep everything hidden away and organized.

A thin, tall entrance table in a smooth white makes a large room size seem less dominating, and it doubles as a decor piece by looking stylish. 

Since you have all the extra storage, you’ll want to keep the top free of a lot of adornments, limiting it to one or two simple pieces. 

Entryway Tables With Mixed Materials

Adding an entryway table made of mixed materials is an easy way to decorate various styles, including modern, rustic, industrial, or farmhouse. It’s also great for smaller rooms.

You can choose from a wide range of styles, such as a smaller table with ultra-thin minimal profile black metal legs with a pale wood tabletop.

Metal and wood always blend well together, no matter the colors. However, you can get a more rustic feel by looking for a thicker gray or black metal with a darker wood surface. 

Gorgeous, Artistic Piece

Adding a stylish entryway table as a focal piece ensures your entryway has a Wow factor as soon as the door opens. And you can get as creative as you want since it’s meant to be a work of art.

Consider finding a wood table with intricate carvings or sculpting work on the front doors, which give you closed storage with shelves.

Etsy is an excellent place for one-of-a-kind pieces, or you can procure something from a local artist. Another interesting artistic idea is a sealed natural wood tree trunk, with a hollowed strip running down the middle, filled with a unique scene or paint.

Conclusion

There are many uses for an entryway table, whether it’s for holding essential items you don’t want to lose like car keys, glasses, and purses, store shoes, or keep paperwork, pens, and other stuff out of sight in drawers. Entrance tables are also helpful for enhanced visual appeal. No matter the size of your entryway or your home interior’s style, you can find a table for your area.

20 Different Types of Wall Textures You Need to Know (Custom Graphics)

With the rising popularity of home improvement homes and DIY hobbyists, more people are starting to want something other than smooth walls and the outdated look of popcorn ceilings.

Texturing your drywall helps breathe new life into your room while helping to brighten up space. We’ve put together a list of twenty different drywall texture types you can use for your walls and ceilings. Whether you’re remodeling or just wanting to identify a texture when you see it, you’ll find this guide helpful.

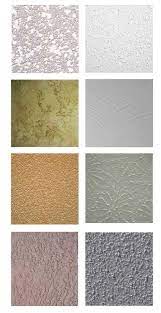
drywall texture typesdrywall texture types

1. Comb

comb wall texturecomb wall texture

Comb wall texture is a neat visual effect used to give walls or ceilings a detailed, unique texture style of swirls, half fans, arches, or rainbows.

Producing a combed texture is simple; using a small-toothed trowel that resembles a comb. However, you will need two people so you can get the job done before the mud dries.

2. Popcorn

popcorn wall texturepopcorn wall texture

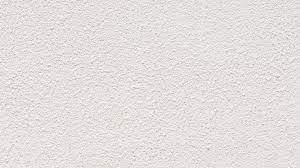
One of the most common – and disliked – textures are popcorn, also called cottage cheese. This styrofoam and mud texture consists of many round, slightly extruding hardened plaster pieces that resemble popcorn kernels.

Popcorn is most often applied to ceilings using a sprayer to cover repairs and provide slight dampening. However, many people attempt to scrape this off to get a smooth surface. You can also cover it with new drywall for a faster, easier fix.

3. Orange Peel

orange peel wall textureorange peel wall texture

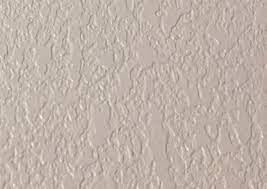
Orange peel is a wall texture that comes in various forms – fine, medium, or heavy. This texture has a wrinkled, cracked surface, similar to orange skin, including dimples and mounds.

This texture has become one of the most common wall surfaces for interior walls in living rooms, studies, and dining rooms. The application requires spraying the wall with a thin mixture of water and drywall mud then going back over the surface with a roller brush.

4. Sand Swirl

sand swirl wall texturesand swirl wall texture

Sand swirl is a neat wall texture that gives your walls a unique character. This texture combines sand spray and comb techniques to give your walls depth and individuality. You can create spirals, Cs, half fans, or any design you imagine.

To create a sand swirl, you have to mix sand into the mud to produce a bumpy texture. You have the option of premixing this together in a bucket and then applying it to your wall. Or you can dip a medium to thick bristle brush into a bucket of sand, which you then apply to the wall like paint.

5. Mud Swirl

mud swirl wall texturemud swirl wall texture

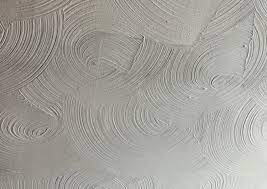
Mud swirl is a technique that’s been around for decades. While primarily used for ceilings, you may see some homes with mud swirl walls, too (typically in apartments). This design features a pattern of half-circle swirls.

To create a mud swirl, first prep your walls by sanding away any imperfections, which will show through the texture. Then, after applying a layer of very thinned out mud, use a medium bristle brush to create your swirls. Be careful to overlap each circle so that there are no empty areas.

6. Knockdown

knockdown wall textureknockdown wall texture

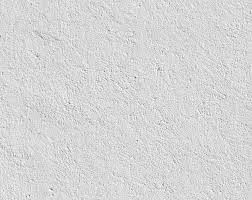
If you like the rough-textured look of stucco, you may enjoy knockdown textured walls. This texture design gives your room dimension and warmth. It can also help hide repairs or flaws.

But the installation process can be time-consuming. To produce a knockdown pattern, you’ll need to start with two layers of primer. Then spray a layer of thinned drywall mud onto the surface. Finally, use a finishing drywall trowel, knife, or specialized knockdown tool to smooth the bumps before the mud hardens.

7. Skip-Trowel

skip trowel wall textureskip trowel wall texture

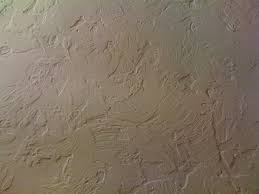
Skip trowel texture forms a textured pattern on your walls full of ridges and crevices. This design is more of an artsy type that won’t appeal to everyone.

DIY’ing a skip trowel texture is a simple process. You start by applying a layer of drywall mud over the surface. Then while it’s still wet, go over it with a clean trowel or drywall knife, held at an angle. This process removes chunks of mud to form a unique raised texture. For a more dramatic look, use a thicker layer of mud.

8. Hawk and Trowel

hawk and trowel wall texturehawk and trowel wall texture

The hawk and trowel texture is a popular choice for sprucing up bedroom walls. It creates an exposed or rock-looking design. The name comes from the tools you need to make the unique look – a hawk – a flat plate with a handle attached – and a trowel – flat metal rectangle.

It is possible to DIY this, but we recommend practicing on a scrap before attempting on walls, as it takes practice to do it right. To apply this texture, start by adding mud to the hawk’s center, which you then transfer to the trowel to apply to the wall in quick movements. Here’s a helpful video to demonstrate the process.

9. Santa-Fe

santa fe wall texturesanta fe wall texture

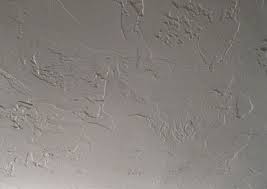
Another familiar wall texture is the Santa Fe, which resembles an aged, double layer wall with random grooves, holes, and swirls. This textured style was one of the most applied in 2019 for balconies and mudrooms. But it’s rarely chosen for the main living spaces due to its unfinished look.

To apply Santa Fe to your walls, use an 18″ wide curved drywall knife to apply a flat thin layer of mud over your smoothed, prepped sheetrock. You want between 60% to 90% of the wall covered with mud but not the entire surface. Do not touch up areas where the knife skipped.

10. Double Skip

double skip wall texturedouble skip wall texture

The Double Skip wall texture is a thicker version of the Skip Trowel, which we covered in number seven. Due to its thick, rough look of irregular circles forming uneven lines, the Double Skip texture is mostly used on ceilings in the living room or bedroom.

This style is ideal for providing better insulation, but it collects cobwebs and dust more than other textures. To create a double skip, you do the same process as you would for a skip trowel texture twice, hence the name.

11. Slap Brush

slap brush wall textureslap brush wall texture

Slap brush is a rough-finished texture commonly used to hide imperfections or wall defects. You typically see this texture used in bathrooms, where it resembles peeling paint, with pits, rough ridges, and cracks.

This application is a moderate DIY job that starts by applying a smooth layer of drywall compound, such as mud, over the entire wall using a roller. Then, use a stomp brush or panda claw to slap the wall, producing textured ridges. You can make a random or organized pattern.

It may take some practice to get used to the proper technique, but you can learn different patterns and designs while learning.

12. Rosebud

rosebud wall texturerosebud wall texture

The Rosebud texture is a fancy form of the brush stomp method, which we cover in number 14. This design creates a floral pattern on your walls, with a center bud and flowing petals.

To create a rosebud texture, dip a rounded stipple brush into drywall mud and then stamp it onto the wall. You can twirl it to create swirling petals or press hard enough to make the bristles flatten for a broader look. Continue the pattern evenly without overlapping the stomps.

13. Crows Feet

crow's feet wall texturecrow's feet wall texture

Crows feet are another stomp brush technique, but it requires a crows foot brush, which gives this texture its name. A crows foot brush consists of two oval stomp brushes mounted side by side.

To create crow’s feet, dip the brush into the mud and then stamp the surface. It’s the same process as slap brushing and rose bud. The difference is the look, which produces larger stomps. Many people apply crow’s feet to the ceiling because it takes less time due to the larger swirls.

14. Stomp Brush

stomp brush wall texturestomp brush wall texture

Many people find it fun to create a stomp brush texture. And it’s a great technique to use to create a random design and be creative. But you can stick to an orderly pattern if that’s your style.

Creating a stomp brush texture is crazy-easy. All you do is dip your brush into drywall mud and press it against the wall, hence stomping. Then sharply pull it back down to create ridges.

15. Spray Sand

spray sand wall texturespray sand wall texture

Spray sand is a subtle accent texture that won’t crack or peel. It’s more common for ceilings, but some people may also enjoy the look on their walls.

You combine sand with thinned drywall mud, primer, or water inside a hopper gun to apply spray sand. Then you spray the mixture on your surface. While a hopper gun can make the job faster, it may take some practice before you’re ready to use it on a permanent structure.

16. Lace

spanish lace wall texturespanish lace wall texture

Lace texture produces a multi-layered pattern with a stucco-like feel that resembles antique or Spanish lace, prompting the name. Many people use this textured pattern to hide cracks and blemishes in the wall.

You can DIY this technique, but it’s very time consuming to produce intricate lace designs. Start by spraying a layer of mixed water and drywall mud onto the surface. Then use a finishing knife to knockdown, or flatten the spatter lines to form a lace pattern.

17. Smooth Wall

smooth wall texturesmooth wall texture

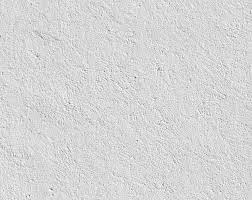
Smooth finishes are the most basic and standard wall texture seen in homes. This style is often referred to as a Level 5 finish.

Now, despite how simple a smooth wall looks, a lot of work goes into the process, which is why textured walls are more common. To get a smooth wall, apply a skim coat of mud along the entire wall, being sure to smooth out any raised areas. It’s harder than it sounds!

18. Multi-Colored Lace

multi-colored lace wall texturemulti-colored lace wall texture

Many designs rely on multi-colored lace for dramatic color contrast. You use two different colors to form a two-toned textured lace pattern (#16). This texture can go on ceilings or walls.

Again, you will need a lot of practice to master this technique. But it’s not too tricky once you get the hang of it. You start with a layer of paint or drywall mud. If using mud, mix it with a color or paint it beforehand.

After the layer is dry, apply a different colored coat using a thick-nap roller or spray. Then, use a knockdown knife to create your lace patterns.

19. Venetian Drywall Finish

venetian drywall texturevenetian drywall texture

Venetian drywall gets inspiration from ancient Venetian plaster, which used marble dust to produce polished, shiny walls. While it’s rare to see Venetian plaster used today, Venetian drywall looks just as good.

To get a Venetian drywall finish, you have to use a Venetian plaster putty compound, a mix of water, and fired marble dust. Dip a steel trowel into the plaster and apply it to the wall at an angle, working from the top left corner.

Make short X strokes, overlapping but of varying lengths if you don’t want a consistent pattern. After drying for five hours, apply a second coat and dry. Then sand the walls using 400-grit sandpaper. Finally, burnish the surface by holding your knife at a 30-degree angle and make long, bold strokes in any direction. Check out this video for a demonstration.

20. Bas-Relief Drywall Finish

bas-relief drywall texturebas-relief drywall texture

Bas-Relief drywall finish is when there’s a sculpture built into the wall. Despite the intriguing look, this is not a typical wall texture for home renovations or new builds.

This technique is not suitable for DIYers due to the skill of craftsmanship and the risk of damage. But you may come across this style in older homes or museums. Even if you don’t use it, it’s cool to know about and see.

Drywall Texture Types FAQ

Now that we’ve looked at twenty common drywall texture types let’s look at a couple of common questions people have about texture.

What is textured drywall?

Textured drywall means that the walls are not smooth. Instead, they have a layer of texture, usually drywall mud, that creates a raised or rough surface. This texture applies through a sprayer or roller, and brushes, combs, and other tools can create unique patterns.

What is the most common drywall texture?

The most common type of drywall texture is the orange peel, which is number three on our list. However, in higher-priced homes, you may see knockdown texture (#6) used instead.

Conclusion

Texturing a wall is usually easier and faster than trying to achieve a perfectly flat, smooth wall texture. Some types are more common, like stomp, orange peel, and popcorn, while comb and lace styles create stunning unique textures. Regardless of the style, textured walls provide better light reflection and soundproofing.

23 DIY Outdoor Privacy Screens You’ll Love

Outdoor privacy screens are a great way to shield your outdoor living spaces, whether you’re trying to block the view from neighbors or a busy road. 

This article will look at some easy DIY outdoor privacy screens that you can create with little to no experience. There are many ways to make a privacy screen at home, using materials you may already have on hand. You can use privacy screens in many areas – porches, decks, windows, out in your yard, along fence rows, or to hide air conditioners or garbage cans. 

DIY Outdoor Privacy Screen Types

Here are some easy types of DIY outdoor privacy screens. Any of these options will give you privacy, although some materials will be more seclusive than others. Which design works best for you will depend on your privacy needs and your tastes.

Thick Fabric

Fabrics are a great way to make a budget-friendly outdoor privacy screen. Fabrics have the advantage of adding privacy while still allowing wind flow. 

While you can use any fabric, the best type is something thick and waterproof, which will be more durable against the elements. There are also fabrics designed for outdoor use, such as dense mesh.

You can choose any pattern or style, allowing you to customize your screen to your tastes. And it’s easy to change the fabric if you want a new look. 

To create a privacy screen using thick fabric, you have a couple of options. First, you could attach the top side of the material to a structure and smooth it out. Then attach the bottom sides to something sturdy. 

You can also attach a thick fabric to a large screen, which gives the fabric more structure, meaning less chance of the fabric tearing or coming loose due to high winds.

Thin Fabric

Thin fabric can also be a suitable outdoor privacy screen that will give you plenty of fresh air while blocking your area from prying eyes. 

You can hang it in multiple ways for this type of privacy screen, similar to thicker fabrics. Due to the thinner construction and flimsiness, the best method for making a DIY outdoor privacy screen using light fabrics would be to use a sturdy frame.

You can build a stand for under $100 (depending on material price) using a few pieces of wood for your frame (two long for the sides, two short for the top and bottom). You can use staples, nails, or screws to attach your fabric. Or use tacks if you want to change the material out to match the seasons effortlessly.

A fun twist is building multiple frames and connecting them using hinges to create a large privacy screen that you can fold up for easy storage and transport to different areas of your yard.

You can also use fabric curtains connected to curtain rods to provide privacy on your pergola, deck, patio, or porch. 

Metal

Metal is another material you can use to DIY build an outdoor privacy screen. And due to its durability, metal is low maintenance and suitable for exposure to outdoor elements.

While metal looks best with rustic, country, farmhouse, or modern style homes, it also blends well with many other architectural styles. 

You have a wide range of options when using metal for your privacy screen. You could use plain corrugated silver panels that you can paint any color. Black goes great with modern themes, while raw metal goes well with farmhouse and rustic themes.

Or you could go with more detailed metal designs. You can easily find metal panels with design cut-outs, which allow for light and visibility while still providing shade and privacy. These secure to a sturdy frame, like your porch, pergolas, or decks.

Pro tip: Want to add a touch of whimsy to your outdoor area? Secure long pieces of ribbon to the top of your metal structure. When the wind blows, the ribbons flutter gently. Adding a windchime ensures you get music with your show.

Fogged Glass

You can also use frosted glass for a privacy screen. Frosted glass allows light to filter in without being transparent enough for people to see your business. You can add frosted glass panes to a frame you build or get creative and frost the glass in some old doors.

While you can buy glass that’s been frosted using a sandblaster done by professionals, you can also DIY fog glass yourself. There are three different methods.

The first way to fog glass is to use a product made by Rust-Oleum. This oil and acrylic semi-transparent paint produce an etched glass effect on your glass. It’s cheap to buy and easy to use.

Another option is to use window film – a non-adhesive material that adheres to glass with static electricity. This method is easy for beginners because you can remove it and reapply if you mess up.

The final method is an etching, which is a permanent transformation of your glass. You can use a glass-etching cream to frost your glass. But it can be tricky to use for newbies. 

Lattice

Lattice is a material that you either love or hate. This material is wood or plastic pieces laid over each other to create small diamond pattern holes.

This type of privacy screen won’t give you total privacy since you can see through it. But there are plenty of ways to add elements to provide more seclusion. 

You can plant climbing rose bushes, vines, or even fruits like blueberries, blackberries, or raspberries. If you’re good with the openness but want to give your trellis more character, attach some pots filled with fragrant, pretty flowers. Or you could build planters on the sides or in front. 

And you can stain or paint the wood to match any color scheme or personal taste. You can find lattice material pre-assembled at any home supply store in various sizes. Installation is as simple as nailing the material to structure posts.

Wood/Slats

Using wood slats is another easy, affordable DIY way to create a privacy fence. You can use new wood or reclaimed wood, which gives your fence character. 

To create a privacy screen using wood slats, you build a sturdy wood frame (if you don’t have posts where your fence can secure) and nail the planks horizontally across the space. 

You can control how much privacy and light you have by increasing or decreasing the space between each plank. Attaching potted flowers to the planks is a great accessory. 

And you can get creative by building wood screens with various accessories like storage, seating, plant holders, lights, or curtains.

Fake Greenery

Using fake greenery is a fantastic way to get the coverage of plants without maintenance. There are a wide variety of options when it comes to artificial plants.

You can use fake vines, shrubs, bushes, or even flowers to give your area privacy and beauty. But be sure to pay attention to the material to ensure it’s safe for outdoor use. 

There are limitless ways to connect fake greenery to your area. You can put them in attractive pots, flower boxes, or buy a system that’s already got the plants attached to a frame. 
Fake plants are great for low maintenance situations. If you won’t be using your outdoor area very often or you don’t have the time to devote to pruning, watering, and maintaining your outdoor area, fake is the way to go.

Live Plants

Growing plants provide incredible privacy while also providing a gorgeous view. Whether you want to use hedges along your property line, trees, or flowers, there’s a way to create a privacy fence. 

If you don’t want to put your plants in the ground, you can build stands that hold pots. Some of these are portable, allowing you to move them around to wherever you’re sitting. Others are permanent structures, such as chain links or chicken wire fences. 

The main thing to consider when using live plants for your privacy screen is maintenance. If you don’t want to spend a lot of time keeping your plants healthy, look for low-care plants like hedges, succulents (cactuses), or small evergreen trees (no leaves to clean up in the fall). 

We provide more information on using different types of plants to make privacy fences in the following sections. 

Pro tip: Need help picking out the suitable hedges for your privacy fence? Check out this link to learn about 27 types of shrubs. 

Design Elements to Consider for Your DIY Outdoor Privacy Screens

When deciding on what type of outdoor privacy screen you want to build, you’ll need to consider the size of the area you wish to seclude. 

You’ll also want to think about your home’s design to ensure you pick a privacy screen that blends well with your environment. Next, consider the following design elements.

Choose a Frame

When planning your DIY outdoor privacy screen design, the first element to consider is the frame. Your frame needs to be sturdy enough to support the weight of your materials while being resistant to outdoor use, including the sun and weather.

Wood

Wood is a cheap, durable solution for a frame for outdoor privacy screens. Anyone can build a frame made from wood, no matter the experience level. And wood is available at many locations and in a wide range of species and colors. 

You can use wood to design a wide range of frames, from slats run horizontally or vertically to frames with built-in flower boxes or benches. There’s no limit to what you can design using wood, whether it’s new lumber or reclaimed pieces painted or stained.

Metal

Metal is another material that works great for DIY outdoor privacy screens. You can buy metal pieces already assembled that you screw into your desired structure. Or, if you know how to weld, you can design a metal frame of your own. 

Metal is great for modern or industrial themes and is easy to incorporate into any space, no matter how big. If you have an apartment or small patio, 

Plastic

Plastic is another material that you can use to make frames for a privacy screen. Plastic is an excellent material for the outdoors because it’s impervious to weather. And it’s a cheap material, so it’s great for those with a limited budget.

The downside of plastic is that you’re stuck with the shape. Unlike metal or wood, you won’t be able to do much with it to get creative with your design.

Natural Elements

Using natural elements is a great way to create a zen retreat. Surrounding yourself with nature is an excellent way to improve your area’s air quality while improving your mood and reducing stress. 

Branches

You can also build a partial privacy screen using thin tree branches. This design is quite simple and won’t cost much. 

To make a privacy screen of branches, all you’ll need to do is round up enough branches for the height you prefer and nail each branch horizontally to sturdy crossbeams.

This style of privacy screen allows some light in due to the small gaps between each branch. You can control the spacing by nailing the components closer together or spaced apart. Leave them in their natural state for a rustic look. 

Vines

Vines are an easy and attractive way to create a privacy screen that will still allow light to shine. You can use climbing vines anywhere there’s a structure for them to grow up. 

You can use vines to block the sides of your porch, provide coverage of fences with open spaces, or get privacy in a pergola. Suitable species include Ivy and Chocolate vines.

But you’re not limited to just these examples. This option is great for apartments, condos, and other places with a need for privacy, but there’s limited space.

If you want to use vines but don’t have a suitable place, you can build a simple structure using wood and some cheap chicken wire. The great thing about making a stand-up frame is that you can move it around. 

Pro tip: It’s important to remember that it may take some time for your vine screen to be thick enough to provide complete privacy. Vine types grow at different rates, depending on the species.

Plants/Flowers

If you want to enjoy being surrounded by bright blooms and rich fragrances, consider using flowers and plants to create an eye-catching privacy screen. 

Some roses grow upwards along with structures, making them great for trellises, lattices, or ironwork. Clematis vines grow large blossoms in the spring and come in a range of colors. 

Flowing Water

The sound of flowing water can give your space peace and tranquility while drowning out nearby noises from neighbors or busy roads. There are plenty of ways you can DIY a privacy screen with flowing water for patios, decks, balconies, or porches.

You can create a stand-alone water-screen using this guide. And then decorate the space according to your tastes.  

Repurposed Materials

Using recycled materials is a great way to create a privacy screen while saving money and doing your part to keep reusable materials out of our landfills.

Old Shutters

Old shutters are an excellent way to create a privacy screen around your outdoor area. If you don’t have any lying around, search Facebook marketplace or search at antique shops. 

You can use as many shutters as you want to create a custom size screen. Attaching them with hinges makes it easier to open and close so you can move around.

Wine Bottles

You can create a unique privacy screen using recycled bottles like wine glasses. Choosing bottles in different colors and sizes allows you to enjoy dancing colors from the different angles of the sun. 

While affordable and fantastic for the Earth, this option can be tricky to DIY. Some designs require you to drill holes through the bottles, which is challenging. Here’s a guide that teaches you the steps to create your bottle privacy screen.

Chicken Wire

Chicken wire is a cheap material made of lightweight metal, designed with large holes. This material is excellent for attaching to the sides of porches, pergolas, gazebos, or decks. 

However, due to the many holes, this material won’t provide much privacy alone. You can make the material offer more security by adding flowers, artificial greenery, fabrics, or other accessories. 

Curtains

If you have some old curtains stuffed in the back of your linen closet, pull them out and give them a new purpose as an outdoor privacy screen. 

There are many ways you can use curtains for privacy. You can hang them on curtain rods, attach them to posts using screws or nails or other secured methods.

Doors

Old doors are a great way to create a privacy screen. There’s no right or wrong way to do this design. You can choose doors that match or doors that are opposite. 

Flea markets, antique shops, and online are great places to find used doors that won’t cost much money. 

Mirrors

Mirrors are excellent for reflecting your garden’s view and for creating faux doors while giving privacy. This article provides multiple ideas for how to use mirrors in your outdoor area for style and seclusion.

Another advantage of mirrors is the various ways the sun will play off the surface, creating neat light effects. If you don’t want to use real mirrors, shower doors are a suitable choice that’s great for weather resistance.

Fixed vs. Freestanding

When deciding on how you want to design your outdoor privacy screen, you’ll need to pick whether you want your screen fixed or freestanding.

Fixed screens are a permanent structure that stays secured in place. These screens can go on porches, decks, patios, pergolas, or gazebos. Wood and metal are excellent materials to use for fixed privacy screens.

Freestanding screens have a frame that secures the privacy screen. Due to the support of the frame, you don’t have to attach the screen to a permanent structure. The benefit of this style is that you can relocate your privacy screen to a new area, as needed, reducing the need for multiple screens. 

DIY Outdoor Privacy Screens FAQ

We’ll wrap up this article by covering a few frequently asked questions people have about using DIY outdoor privacy screens. 

How do you make an easy patio privacy screen?

A large number of our suggestions for outdoor privacy screens are simple to DIY, with minimal experience, materials, or effort. The easiest way to create an outdoor privacy screen is to hang curtains. This option gives you privacy as needed.

How can I make a cheap privacy screen?

Many of our suggestions are also cheap to make. Again, curtains are the most affordable solution. But you can also create a primary wood privacy screen for a low amount of money. And many of our suggestions using repurposed materials are not only cheap but also a great way to recycle.

How do I block neighbors’ view of my yard?

Privacy screens are an easy, effective way to shield your yard from the view of neighbors, roads, passersby and create separation between different areas of your yard. You can use materials to build a privacy screen or use natural elements like flowers, shrubs, or trees. 

Conclusion

Outdoor privacy screens are the easiest way to give your home and yard privacy. There are multiple ways to create a privacy screen using various types of materials. We’ve given you numerous ideas for how to DIY an outdoor privacy screen. 

20 Dining Table Ideas for Small Spaces

Does your small space have you down in the dumps? Are you struggling to find a way to have the benefit of a dining table when there’s little to no extra space to set one up? 

Plenty of people find themselves in the stressful situation of decorating a small space with the necessary furniture without making the area feel cramped. Today, we’re here to give you twenty dining table ideas for small spaces. No matter the size of your room or your design tastes, there’s sure to be a solution on this list that will work for your situation.

We’ve got tables that fold. And we have tables with shelves and drawers. Wine drinkers, we’ve got a few tables that double as wine racks. Families of four or more, we’ve got great ways to save space while having a table big enough for everyone. Want something that folds out of the way to give you all your floor space back? Hey, we’ve got that too! Check it out. 

Foldable Dining Table

A foldable dining table is an ultimate choice when you have a tight space to fill but many people to sit. This table style provides enough room for up to six people to dine comfortably. 

Then once dinner is over, they fold down slim, making it easy to store them away in a closet, propped against the wall, or shoved under your bed. You get all your floor space back, which can keep your small area from feeling cramped.

And the lightweight design and simple look make it easy to sit up and take down, so there’s no hassle once it’s time to put it away. This option gives a new meaning to telling your kids to get the table ready! 

Collapsible Classic

If you like the classic design of a dining table, you can have the best of both worlds – the classic look and space-saving with this great design. 

You’ll want to look for a polished hardwood table with an elegant pedestal and decorative feet. A beveled top adds a sophisticated look. This style gives the ultimate feel of a classic table.

But they can also help save some space. Look for a table with a design that consists of 10″ drop leaves that make the tabletop only 22″ wide. These leaves fold down, making the table much more slender so it doesn’t swamp your space.

Floating Table

For a unique space-saving idea, feast your eyes on a floating table. This design is the answer for rooms that are super tight on space. 

This style of table mounts to a wall and folds down to use as a table. When you’re not using it,  the table folds up against the wall, so you have floor space.

While this solution is excellent for small areas, it might not be suitable in places where you’re not allowed to place holes in the walls. 

You won’t fit many people around this style of table, and you’ll need to figure out appropriate seating, such as a small chair or stool or even a fold-up chair. But if you live alone and there’s no other alternative, a floating table, which you can also use for a desk, might be the choice to make.

Leaf Dining Table

Tiny kitchens often require creative thinking in terms of tables. A great solution is to choose an utterly foldable drop leaf dining table that folds against a wall for easy storage. 

The natural wood grain finish gives this small table style and a pleasing aesthetic while having enough room for three people to fit comfortably. 

And the slender design when it’s closed means you won’t even notice it’s there in terms of floor space. You might need to get creative on seating so the chairs don’t clutter your room. Small stools make a great solution, and you can use them for additional seating if you have guests.

Dining Table That Can Also be a Desk

Do you work or go to school from home? Then how about choosing a dining table that can also serve as a desk when you’re not eating meals? You get two for the price of one, without having to waste space using two different pieces of furniture. 

Choose a smaller-sized rectangular dining table in a simple light design so that you can quickly push it against a wall to use as a modern-style desk. 

Four bare wood legs and a thin acrylic tabletop give you everything you’d need in a dining table that doubles as a desk. And by pushing it against the wall, you’re able to hide away in a corner, out of the direction of all the noise and bustle of other people being in the same area.

Antiqued Finish Self-Storing Dining Table

If you want a dining table that looks like a showpiece while being multi-functional, consider a counter-height dining table with a butterfly leaf top, perfect for seating four people.

Not only is this table higher up, so it’s comfortable for pre-dinner entertaining, but the top folds down to give you extra room when you’re not using it. And underneath the tabletop is a wine rack that can hold eight bottles of wine, plus additional storage in the double cupboard.

Choosing an antiqued finish gives your table an older, well-used look that fits well in rustic, country chic, or mountain-style homes.

Stools

Choosing a dining table with stools rather than chairs is another great space-saving item. Stools can slide under the table, so nothing sticks out to cramp your space, perfect for people who dislike clutter.

Picking a drop leaf table that changes in width (18″ to 36″) gives you the option to widen the table for extra guests while narrowing it down to save space when not in full use. 

Many types of dining tables can use stools in place of chairs, giving you a wide range of styles to complete.

Drop Leaf Table

A drop-leaf table is a perfect accessory for small spaces due to its innovative design. When not in use, these tables fold down against the wall, giving you back critical floor space. But when open, there’s enough room for three people to sit and dine. 

Now, this table wouldn’t be ideal for large families, but it’s the perfect accompaniment for a small family or a couple. It’s also excellent for dorms, apartments, lofts, and flats where you need a dining area, but you don’t want to lose space with a large permanent table.

Multi-Purpose Convertible Console Table

A convertible console table gives you an excellent double-duty piece of furniture. When you’re not using it for a dining table, these tables easily fit against the wall in a hallway or behind your couch or lounger.

When you’re ready to serve a meal, pull the console table out and open the sides. You can easily have enough room for four people to sit without feeling cramped.  

Console tables typically go behind the couch to hold decor pieces, remote controls, and books, but why not pull it out for your dinner table too?

Six-Seater Option

We don’t want anyone to feel left out, which is why we present this option for a growing family, with enough room for up to six people or for hosting large holiday parties or game nights with friends. 

You can get a fantastic look by picking a Huntsman table, which gives your space an antique vibe due to the rich distressed finish. These tables can extend from 68″ to 96″ using a smart sliding extension. Replacing chairs with benches helps improve space-saving. 

But if you’re super limited on space to the point where you don’t want a table at all in your area, this might not be the one for you, despite its gorgeous look.

Space Saving Dining Set

A space-saving dining set is an ultimate solution for families who need a table that can fit everyone without taking up a ton of living space. 

This contemporary dining set consists of a square table and four matching chairs that store underneath the table when not in use. The blend of metal and manufactured wood will look great with any modern or minimalist design. 

But the simplistic design might not appeal to everyone. And the chairs might not be the most comfortable, especially since there are no cushions or backrests.

Glazed Tile Bistro Table

A glazed tile bistro table is the ideal solution for capturing a Mediterranean vibe right in your kitchen, making you feel like you’re in an authentic cafe or seaside villa. 

Think of how lovely it would look to have a gorgeous brushed brass base topped with marine blue marble tiles. And you can use this table indoors for dinner in your kitchen or dining room or take it outdoors for a meal beneath the stars. 

Sleek Cocktail Table

If you’re a fan of modern decor, consider a sleek cocktail table for your small space. This option is the perfect selection for couples or two roommates, but it wouldn’t work for a large family.

The modern design of white acrylic allows you to use this table for meals, a side table, or serve snacks and drinks to guests. But it’s also fantastic for outdoor use since it’s durable and waterproof.

Compact Glass and Gold

If you’re looking for a contemporary table to add style and modern touch to your small home, consider a tempered glass-topped table with a geometric gold-colored metal frame. 

The look of this table makes it a work of art while being functional. You have enough room for four people to dine without feeling crowded. And when it’s not in use, it still looks great. 

Narrow Dining Table

Another suitable choice for small spaces is a narrow dining table. One with a width of 24″ still gives you plenty of room for four people without being cramped, making it perfect for small families or for hosting dinner parties for a few friends.

To make it feel like you have more space, look for a table with some extra height. This height gives everyone enough legroom, and you’re not stuck playing footsie with the next-door neighbor during a couple’s night. 

Versatile Kitchen Prep Table/Breakfast Bar

You can get an incredible multi-use function out of a table that converts into multiple pieces. For example, consider a table like this, which has numerous drawers and shelves for storage, a separate dining and food preparation space, a drop leaf for expanding the area, and wheels for easy portability. 

If you have a super tight space, you’ll want to be thoughtful with every piece of furniture you pick. Having a table that can double as an island and storage and more is the perfect solution. 

Marquetry Bistro Table

If you’re looking for a table with a bit more glam and elegance, a marquetry bistro table could be just the ticket item. The round shape saves the most space while still providing room for two to three people to dine. 

The decorative pedestal and smooth round top create a statement piece of a classic yet lovely dining table. And it gives you room for meals, snacks, an after-dinner drink, or even a place for playing games. 

Folding Balcony Cabinet Set

So far, we’ve talked a lot about dining tables for indoors, although a few of these options can also double for outdoor use. But if you’re looking for a space-saving table for a small balcony or patio, this pick is for you.

A folding balcony cabinet set consists of a foldable table and two chairs that give enough room for two and packs away into itself when you need extra space. And the material is durable enough to survive any weather conditions, so there’s no need to bring it indoors if it snows or rains. 

Black Oxbow Steel Bistro Table

Bistro tables are incredible for saving space without sacrificing style or comfort. These two-person tables give you enough room to dine without feeling cramped or taking up a ton of space. 

And the metal design means you can also use this table set outdoors for alfresco dining or to have a few drinks while soaking up the sunlight (or the stars). 

Extendable Drop Leaf Table

If you’re all about maximizing space and having furniture pieces that serve more than one purpose, you’re sure to enjoy the convenience of an extendable drop leaf table with storage. 

A fantastic option for wine drinkers is to pick a table with built-in cubbies perfect for holding a few bottles of wine. Plus, designated storage for cutlery, books, and decor with shelves and drawers. A saddle oak finish gives this sideboard table a gorgeous rustic vibe.

But this table is for permanent placement in a room, so if you need something that folds away, consider one of the other options on this list.

Conclusion

When you have a small space, it may be challenging to pick a dining table that fits your area without taking up too much room. We’ve presented twenty dining table ideas for small spaces to demonstrate plenty of options still available. While you have to think smart and possibly get creative, you don’t have to forgo a pleasing design that looks great and serves a purpose. Or better yet, choose a table that serves multiple purposes for maximum space-saving. 

Standard Dining Table Measurements

Dining tables come in a variety of shapes, heights, and widths. Placing a large table into a small room can dwarf your space. While trying to fit too many people at a table that’s too small can make for cramped dining.

We’re going to talk about the different dining table dimensions. We’ll look at measurements, the uses, and the shape. We’re also going to teach you how to take measures properly and answer a few commonly asked questions.

What is the Standard Size of a Dining Table?

Dining tables come in a range of sizes, shapes, and spaces. Most tables vary in width and depth, but most of them have a similar height.

The three basic shapes of a dining table are round, rectangular, and square. The Oval is another table shape. And while most tables have the same standard height, there are also over-tall tables called bar-height or counter-height.

Standard Dining Table Dimensions

Screen Shot 2020 12 28 at 6.02.30 PMScreen Shot 2020 12 28 at 6.02.30 PM

Image credit to Houzz.

The standard size for a dining table is between 28″ and 30″ in height. These seating dimensions make it easy for most people to sit comfortably with their feet resting on the floor.

Standard size dining tables are suitable for informal or formal gatherings. They can vary in width, depending on how many people you want to sit around your table. They can also come in different shapes.

Counter-Height Table Dimensions

Screen Shot 2020 12 28 at 6.01.26 PMScreen Shot 2020 12 28 at 6.01.26 PM

Image credit to Houzz.

Some tables have a height similar to a counter. These tables stand 36″ tall, which is the same size as most kitchen islands and countertops. Many people prefer these taller tables to complement their kitchens or breakfast nooks.

Another option is bar height tables, which elevate you higher off the ground than standard tables. This style has a height of 42,” which is the standard height for a bar. Other names for this style table are gathering or pub tables.

Many people choose to use bar height tables for entertaining, but some are also for everyday uses for family mealtime. You can use these tables in dining rooms, kitchens, or outdoor areas.

Standard Round Table Dimensions

Screen Shot 2020 12 28 at 6.00.38 PMScreen Shot 2020 12 28 at 6.00.38 PM

Image credit to Houzz.

Round tables are an excellent option for intimate seating for small groups of people. These pieces of furniture can range in size, activity, and room placement.

You can find round tables in various diameters from 36″ to more than 54-inches, from one side to the other. These traditionally have the standard height of

For enough room to seat four people, you’d need a table diameter of 36″ to 44″. To seat four to six people, you’d want a 44″ to 54″ diameter table. And for six to eight people, you’d want a diameter larger than 54.”

Standard Oval Table Dimensions

Screen Shot 2020 12 28 at 5.59.39 PMScreen Shot 2020 12 28 at 5.59.39 PM

Image credit to Houzz.

Oval shaped tables can seat anywhere from four to twelve people, depending on the size and style. These tables are best as a stand-alone piece of furniture that doesn’t match other furniture to expand the size.

A small oval table can fit four people with a size of 2’6″ to 3-foot width and a five to six-foot length. For enough space to accommodate six to twelve people, you’d do better with an oval table that’s between 3’6″ and 4’6″ in width and a length of eight to ten feet.

Some oval tables have room in the middle for adding eaves, which match pieces of wood that expand your table’s surface area. These table styles are perfect for small family dinners and large formal gatherings.

Standard Square Table Dimensions

Screen Shot 2020 12 28 at 5.58.39 PMScreen Shot 2020 12 28 at 5.58.39 PM

Image credit to Houzz.

Square dining tables have four equal sides with sharp, pointed corners. These tables vary in width from 36″ to 44″, which is enough for up to four people to dine together.

Some square dining tables stand at a counter height rather than a typical standard table height. The height can range from 34″ to 36″ tall.

This table shape would not work well in a narrow kitchen or dining room. The layout makes it easy for up to four people to sit together and communicate, but it doesn’t leave enough room for more than four.

Standard Rectangular Table Dimensions

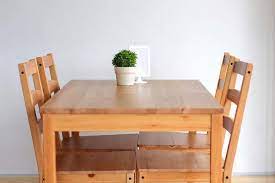
dining tabledining table

Rectangular tables are the most common type for dining rooms and are an excellent solution for seating large groups. However, they do take up a lot of space.

A great way to reduce the amount of space your table takes up is to pick a rectangular table with eaves. Eaves are extra pieces of wood that slip into your table to make it larger. Without the eaves, the table is smaller, taking up less space.

These tables range in size, making them suitable furniture for hosting dinner parties or family gatherings.

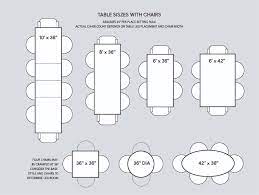
A standard rectangular table has a typical width between 36″ and 40″ and varying lengths. You should figure up 24″ of space for each place setting.

For a four-person table, you’d do well with a 48″ long table. For a table to seat four to six people, you’d need a 60″ long table. And for enough room to seat up to eight people, you’d want a length of 78-inches.

How to Calculate the Right Size Table For Your Needs

When calculating the right table size, there are a few factors you’ll need to consider. Let’s look at a few criteria you’ll need to measure to get the right size table for your needs.

Seating Space

First, think about how many people you will want to sit around your table. Consider the table’s base so you can be sure there’s proper legroom.

And make sure there’s enough elbow room, so each person has the space to move around without bumping into each other. You want 24″ to 28″ of table space per person.

Clearance

You’ll also want to consider the size of your room. There needs to be enough space for you to pull the chairs out and for people to move around without bumping into the table or other people.

Ideal recommendations for clearance between your table and other surfaces such as walls or furniture is 36″ to 42″ of space.

Proportions

To get the best look, you’ll want to consider your room’s size when choosing your table’s measurements and shape.

Long, narrow rooms look best with long, rectangular tables. Whereas square, small spaces look better with a square or circular table.

Standard Dining Table Measurements FAQ

Here are a few commonly asked questions people have about dining room table sizes. We hope these answers help you understand everything you need to know about shopping for a dining table.

What is the best size for a dining table?

The best size for your dining room table would be one that fits in your room without causing the space to be cramped or disproportionate due to a small table in an ample space. There should also be enough room for your ideal number of seats.

The most common size dining table fits four to six people with a 36″ to 60″ diameter table, either round, rectangular, or square in shape.

How tall is a dining room table?

Dining room tables can come in a standard height of 28″ to 30″, which is an ideal height that allows most adults to sit with their feet resting flush on the floor without their knees bumping the top of the table.

If you want to sit at a higher elevation, you can purchase a taller table, such as a countertop or bar height.

How wide is a dining room table?

The dining room table’s width can vary depending on your table’s shape and the number of chairs. Square tables have a width between 36″ to 44.” Rectangle-shaped tables are between 36″ and 40″ wide.

Conclusion

Shopping for a new dining room table doesn’t have to be stressful. Before you pick a table, you need to consider your room’s size and how many people you plan to seat. You want to be sure there’s enough space for everyone to move around without limiting conversation or personal bubbles.

27 Creative Ideas for Kids Bathroom

When you have an extra bathroom used by kids, giving the room a fun kid’s theme is an excellent way to decorate. Not only will your kids be more excited about being in the room, but it can also give them a sense of ownership, knowing the bathroom is their domain (and their responsibility). 

The great news is it’s effortless to decorate your space using any of these creative ideas for kids’ bathrooms. No matter your child’s age, gender, or style tastes, you’re sure to find one or more sources of inspiration in this detailed list of decoration ideas.

Night Light

Night lights are an essential accessory for kids’ bathrooms. So, whether it’s because your child is afraid of the dark or so, they can find the light switch or even so they can use the bathroom at night without turning on the blinding bright light. 

You can pick one that plugs into the wall or find one that props on the sink or toilet. Motion sensored night lights are great for times when you don’t want a light constantly working. But younger children may prefer a light that stays on, so there’s no risk of being in the dark if they stop moving.

Towel Hamper

Teaching your children when they’re young to clean up after themselves is easier when it’s fun. For example, choosing a cute towel hamper for the bathroom helps inspire children to pick up their dirty clothes rather than waiting on mom or dad to do it. 

A hamper on the ground is excellent for everyone, including small children. Pick a design with a fun picture or shape for extra decor. But a hamper designed like a basketball goal and hung on the door is fun and great for space-saving.

Fun Towels

Towels are an excellent way to individualize bathtime and teach kids about being organized. So get creative with your kids’ towels and choose ones with fun characters, bright neon colors, polka dots or other patterns, or even hoods. And add personalized hooks on the wall or door for an easy place to keep the towels organized.

Fun towels can make it easier to encourage your slippery child to leave the joys of the tub and dry off. And by giving each child a unique towel, there’s no drama due to mixed-up choices among the kids.

Mess-Free Shampoo and Soap Dispensers

Nothing is worse after kids’ bathtime than realizing they’ve wasted all of the shampoo and conditioner, leaving you to do some shopping and cleaning to get rid of the scum. Adding shampoo, conditioner, and soap dispensers to the bathtub reduces wastes and mess while making it fun for kids to get clean. 

You can find dispensers that stick to the side of your wall for easy access. Some models may have a battery and use motion sensors to dispense the soap. In comparison, other models may have a button that your kid must press. But be aware that mischievous children may still find ways to make a mess and waste all the supplies using them if they have the mind to do it.

Fun Shower Curtain

Shower curtains are an excellent focal piece for your bathroom’s decor, making them one of the essential design pieces in the whole room. If the idea of cartoon characters and other more childish themes aren’t suitable for your kids’ bathroom, you can go another creative route with a fun shower curtain. 

Curtains with fun phrases are great for older kids who aren’t into pictures or find something silly in the same interests as your child, such as animals. Or you can keep it simple and go with fun colors instead.

Aquatic Theme

Aquatic themes are a popular choice for kids’ bathrooms. You can find some fun, colorful decor with fish, octopuses, starfish, or shells. When you’re debating different themes, you can often find multiple decor pieces – shower curtain, garbage cans, towels, rags, soap dishes and toothbrush holders, and pictures. Then add a wave pattern border to tie the room together.

Making your kids’ bathroom into an underwater paradise is a great way to encourage children to enjoy bath time in their bathroom. Give your kid a snorkel, some goggles, and a few toys that go underwater, and your child will have joy during each bathtime – your only fight may be getting your child to get out.

Everything Accessible

Children will find any excuse they can to climb up on something. To dissuade them from such dangerous behavior, ensure that everything they need is easily accessible and in reach. So, skip the decorative storage ideas you found on Pinterest and keep everything simple and close at hand. 

Rather than risking damage to your drywall with mounted baskets or racks, consider using free-standing floor towel racks or simple hooks hung on the wall or door. A step stool helps reach the sink, and motion sensor soap and toothpaste dispensers reduce messes and struggles. 

Colorful Tile

Many of the designs we’ve listed so far revolve around room decor pieces. But another great way to decorate your kids’ bathroom is with the tiles. Making your kids’ bathroom fun is a great excuse to go bold with colors and designs, whether it’s adding a colorful mosaic to the shower or covering the floor with blue tiles to look like an ocean. 

And if you’re nervous about making permanent dramatic changes, you don’t have to be when you use removable options. For example, you can change your kids’ bathroom tiles every few years as their ages and preferences mature or when it’s time to upgrade the bathroom into one for guests as you face an empty nest.

Step Stool

Step stools are excellent for kids’ bathrooms because it allows your children to start being more independent and develop healthy sanitation habits. You can go with a simple wood stool or pick up something more fun, like a plastic dinosaur or crown shape or one with bold colors or pictures. 

Step stools help children reach the sink to wash their hands and brush their teeth without risking injury to themselves or you during the awkward holding. And it can reduce the risk of bathroom floods from sinks left running because your child couldn’t reach the faucet to turn the water off.

Multiple Sinks

If you have more than one child, you may want to consider doubling up on sinks to speed up the process of morning and bedtime rituals of washing your face and brushing your teeth. If the space is big enough, you can go with separate sinks and vanities. This idea is excellent when you have children of different genders. 

But you can also go with a double sink if you have more ample vanity space. Having two sinks can also end the battle of “they’re on my side” while speeding up the getting ready process. You can even personalize each side, so there’s no confusion on whose side is whose.

Colorful Reminders

Children tend to be forgetful when they’re in a hurry – which, let’s face it, is all the time. So there’s no better way to give them gentle reminders than by hanging colorful pictures on the wall. Your images could remind kids to wash their hands, flush the potty, or brush and floss their teeth. 

Even if your children cannot read, they can still enjoy the pictures, offering instructions and reminders. And as your children get older, you can swap the reminders out with more mature versions.

Mermaid Theme

What little girl doesn’t love the mystical idea of mermaids? A bathroom is a perfect place to indulge this passion since it’s water-related. There are numerous mermaid designs that you can use for your kids’ bathrooms, from shower curtains, towels, and rugs, to dishes, wall stencils, pictures, and even scale-shaped tile or wall texture. Like starfish, seashells, and pearls, Iridescent jewel tones and ocean decors help complete the design for a more mature theme.

Adding sparkly lights and shiny tiles can work for younger children and be something glammy as the girls get older and start to move into glitz and class. 

Unique Hooks

Hooks are much easier for children to use than racks, as the design usually allows the towel to slide right off without pulling the hook out of the wall. A creative way to decorate a child’s bathroom is to use decorative hooks rather than plain ones. 

You can find individual hooks in unique shapes like animals or find decorative racks with multiple decorative hooks. There are even over-the-door hooks if you need something that won’t take up any space.

Fun Touches

Sometimes, it’s the little things that count, and that’s also true when decorating children’s bathrooms. Small fun touches are an easy but excellent way to get your kids excited about using their bathroom. So look for small things you can do, like adding fish toothbrush holders with suction cups on the bottom. 

Safety Features

Bathrooms can be dangerous areas for little ones, making it necessary for you to take specific preventive measures. But numerous products allow you to keep your kids safe while looking fun, such as rubber animal-shaped faucet covers. These covers prevent the injuries bound to occur when your child’s obsession with the faucet inevitably leads to them bumping into it.

Bright Primary Colors

It’s no secret that kids love colors. So, what better way to indulge their joy than by using bright primary colors for decorating the bathroom. Classic colors include red, blue, and yellow. But you can also go with shades of orange, pink, purple, or green as well. You can use the color for the rugs, accessories, and towels against a muted wall color.

Something they’ll Grow Into

Given the way kids’ minds change day by day, some parents may decide to skip the childish themes and instead pick something that will last for years. Therefore, it’s better to decorate the room for now, and the future with glam touches that older children will appreciate. 

Go mature with the wall color and tile, such as simple white walls and vanity with shiny tiles. And then choose accent colors that your kids will enjoy now and later. Finally, add bright lighting and a glamorous mirror and shelving. 

Sharks

Sharks are always a successful choice for bathroom decor for boys, but they can also work for many young girls. But, of course, there’s also plenty of adults who would appreciate the theme. 

And because the theme is so popular, it’s easy to find shark items for all ages, whether you want cute adorableness for younger children or real sharks looking aggressive yet glorious for older kids. 

Toys

Toys are always significant bribery for kids who hate bath time. So adding bathtub-friendly toys is an excellent creative idea for kids’ bathrooms. 

Whether you add a bubble-blower to the faucet, give your kids’ soap crayons to write on the walls (a genius way to reduce the amount of cleaning you’ll have to do), or provide foam letters, shapes, and animals, bathtime will be more fun and less drama.

Non-Slip Mat

The tub can be a slippery place, a significant hazard, and a concern for little ones. So adding a non-slip mat in the tub is an excellent choice for your peace of mind. And you can find plenty of different themes and styles, from a solid mat to sticky shapes that make the tub slip-free and fun for your kids. 

Decals

Vinyl decals are an easy creative way to decorate your kids’ bathrooms. You can find these in a vast range of choices, from beloved characters like Nemo or the Frozen cast to animals and letters. And because they cling to the wall, there’s no damage to repair once you remove them, making it easy to redecorate any time your kids want. And another cool thing about decals is that they can go on any surface – walls, tub, tile, mirrors, windows, and floors.

Favorite Characters

If your kids’ have a favorite cartoon character, you can typically find bathroom decor in a corresponding theme. So whether you’re looking for a shower curtain with the character or pictures hung on the walls, you can use the colors of the pieces for the room accents. 

Guest Bathroom

If you only have two bathrooms, meaning guests will also share the toilet with your children, you may want to find a way to make the room classy and guest-friendly while still appealing to kids. For example, skip the cartoon character decor and limit the choices to bright colors and a stylish pattern. And use storage to keep the kids’ bath toys up when guests need to share the space.

Good Rug

A cozy rug is the best part of getting out of the bathtub. No one likes to go from the warm shower to a cold floor. And wet floors can lead to slips, injuries, and large messes to clean. You’ll want to pick a thicker rug that can handle the wetness of dripping children with a grippy backside, so there’s no risk of it sliding once your kid steps on it. In terms of design, the sky’s the limit. You can pick fun characters or cartoons or keep it simple with a bold-colored design.

Color to the Kids Bathroom Vanity

Another fun way to decorate a kids’ bathroom is not to be afraid to use color. Skip the dull standard colors for the vanity and go with something fun instead. For boys, a navy blue color is excellent, or a dusty rose for girls. Dark turquoise works perfectly for a unisex bathroom. 

Bath Toy Holder

If your kids spend a lot of time in the bathtub playing with toys, a bath toy holder could be your best friend by making the bathroom less cluttered and more organized. Adding a holder with suction cups allows you to hang it above the tub for mess-free drying. In addition, a mesh front allows air to dry to prevent the toys from molding.

Low Shelving

The best way to set up a child’s bathroom is to ensure everything is within easy reach, so there’s no risk of your child climbing or breaking something while trying to get their stuff. Placing low shelving ensures that everything is close at hand and helps keep everything organized. 

Setting the bathroom up with stuff on low shelving so that children can get their stuff is also excellent for encouraging independence. 

Conclusion

Decorating your kids’ bathroom can help encourage better grooming and sanitation habits, increase independence, and make the space fun and inviting. When children feel comfortable in a room, they’re more likely to enjoy being in there. 

Whether you’re trying to find ways to decorate the room with accents like rugs, shower curtains, and pictures, or you’re thinking of something more permanent like tiles and wall colors, there are numerous creative ideas for kids’ bathrooms. Take inspiration from your children’s current interests, favorite colors, or characters to help come up with a theme. Or let them pick out the design themselves to guarantee your ideas will be a hit. 

30 Stylish Corner Fireplace Ideas

A fireplace provides many benefits – warmth, style, and a cozy ambiance. But when you have a small space, a fireplace may seem out of the question. You don’t want to waste valuable wall and floor space on a large decor piece. 

Placing a corner fireplace is the perfect solution, allowing you to get the stylish focal point you desire without cramping your area. Even if you have a large room, you can still benefit from a corner fireplace. We’ve put together a list of stylish corner fireplace ideas, from old-fashioned elegance, simple and rustic, basic modern and minimalist, and many other designs. 
Modern and Minimalist

While fireplaces may seem outdated and out of fashion for many people, there are plenty of ways that you can decorate your fireplace to achieve any decor theme, including a modern, minimalist approach. 

Modern styles are all about clean lines, while a minimalist theme means pieces that serve a purpose with no clutter. You can achieve this feel by starting with a gas fireplace. Then add a simple wood surround in a matte black with minimal design inlays, like straight grooved lines.

Many minimalist designs forgo the use of a mantle to save space and keep the modern look. But you can go with a modern-style mantle made of dark wood or metal and use a table of the same material to tie the room together. 

Farm Style TV Stand and Electric Fireplace

Electric fireplaces benefit from being easy to relocate around the room while also not being a fire hazard for items placed on top of it. For example, a farm-style tv stand with a built-in electric fireplace allows you to achieve a cozy, chic farm feel while also being multi-purpose. 

These stands are durable enough to hold your television, with a storage shelf beneath to keep game consoles or other flatter devices. And the sliding doors allow you to cover the fireplace when not in use, so you have a stylish tv stand.

You can find farm-style tv stands in a range of natural wood colors, from darker tones with red hues to lighter pine colors or even painted white. 

Rich and Elegant Manor Estate

If you’re looking for ways to convert your simple living room into an imitation regal manor estate, having the right fireplace is essential. 

To achieve this look, you’ll need to have a rich wooden surround with intricate engravings and a sturdy mantel. Simple black square tile inlay can enhance the wood surround. Then surround the fireplace with large wood bookcases in matching wood. 

And finish the look with antique decor pieces and age-themed furniture. Darker colors are also standard, such as shades of red, maroon, and burgundy.  

Free-Standing

Free-standing fireplaces are often the best solution for compact rooms with no extra space for a complete fireplace. 

While many of these fireplaces are more of an old-fashioned stove in design, they can add character to any room. Add a small stone or tiled ledge to protect your floors, and add tile or stone to the back wall for a fireplace feel and added protection.  

You’ll need protection along the wall and floor to keep the materials from getting too hot. Since there is no mantel or hearth, you may want to set up a firescreen or grate around the unit to keep kids and pets from getting too close. 

Minimalistic Wall-Mounted

You can create a one-of-a-kind fireplace that fits seamlessly with minimalist furniture by going with a simple wall-mounted unit. Finding a piece that fits your style is simple, such as one with a built-in shelf and a modern rendition of a mantel, giving you a bit of storage for small accent pieces. 

Having a fireplace mounted to the wall frees up floor space and keeps the danger of burns away from people (especially children) and pets. 

And by using a gas or electric fireplace, many of them have options that allow you to play around with the flame colors to get a color combination that sets the mood in your room perfectly. You can even find some options where the flames are in sync with the music.

Unique Firescreen

An easy and affordable way to spruce up any fireplace is with a firescreen. While this item’s primary purpose is to prevent embers and flames from coming out of the fireplace and into your room to catch stuff on fire, it can also serve as a focal piece. 

Picking a firescreen in a unique, decorative design instantly improves even the most basic fireplace aesthetic. However, if you want to give your fireplace a facelift without having to spend a fortune remodeling with new materials, changing out the firescreen is the best step.

Firescreens come in a wide range of colors and styles, with some having elaborate portraits painted onto a solid surface or having a metal frame in a unique shape, like tree branches.

Concrete

You can find a large selection of elaborately carved (molded) concrete mantels that can help you get an easy, elegant piece to warm up any room. 

If frills and moldings aren’t your things, you can also find concrete fireplaces in a modern, boxy design of clean lines. These look great with black or white mantles or metal pieces. 

While concrete is gray in its natural form, you can find painted designs. Or you can DIY paint a concrete fireplace to match your room’s color palette. 

Patio Pavers

Adding patio pavers gives your fireplace a sleek, unique look that’s sure to garner attention. The color of your pavers is crucial for a put-together design – white, black and gray for clean lines or warm colors if you have a lot of wood pieces. 

You can also go with an asymmetrical look for more contrast by using sheets of pavers. Or create your patterns using old broken pavers. 

Recycling old pavers to resurface your fireplace and threshold is an excellent money-saving technique for those on a budget or environmentally conscious and prefer to reuse old materials.

Wall-Mounted Glass

You can also get ultra-modern by going with a sleek wall-mounted glass surround electric fireplace. This style of fireplace works as an excellent focal piece, whether in use or when off. 

Although powered by electricity, you get the same crackles and pops that you would get with a wood-burning stove – without all the labor, messes, and dangers of a fire.

And the sleek design leaves floor space free, allowing you to save room for extra furniture or decor pieces like a metal and glass table topped with bronze or stainless steel sculptures.

Golden Screen

Adding a golden screen to the front of your fireplace can give your space a warm, royal feel. Many different styles and patterns are available in a gold finish, allowing you to glam up any room. 

And you can also find these in different sizes, from a single piece to a three-piece, allowing you to find a screen that fits your fireplace, no matter whether it’s large or small. 

Gold goes with many color palettes and room designs, whether you’re looking for a touch of glam and glitter or something regal for an old-fashioned antique feel.

Rustic Stone Fireplace

Corner fireplaces can look stunning by using rustic natural stones. Keeping the stones in their existing shape rather than cutting them into uniformity gives your fireplace unique charm and gorgeous imperfection. 

Add a distressed wood mantle and place some greenery and a couple of lanterns on top to enhance the rustic look. Bronze poker sets and a curved open wood stacker add other rustic touches, like a smooth slate seat and raised rustic stone threshold. 

Choosing stones in different colors gives your fireplace a more dynamic contrast that draws the eye while enhancing the various shaped rocks.

Brick with Seat

Nothing beats sitting close to a blazing fire on a cold winter day. You can enjoy this luxury with a corner fireplace by building a seat along the front of your fireplace. 

Red-toned bricks always look great with fireplaces and increase the coziness factor. But you can also go with smaller stones or bricks in soft grays and browns if you prefer lighter colors.

Bricks and stones make for a sturdy, safe seating area in front of the fire. You can add a few cushions to make the seat more comfortable than sitting directly on hard rocks. But be careful not to let the fabric get too close to the fire, lest you end up with flames outside the safety of the fireplace.

Gorgeous Metal Back

If you had to forgo an elaborate fireplace design due to budget, you could still have additional inexpensive upgrades and give your fireplace more character and style.

An easy way to jazz up your simple contemporary fireplace is to add a gorgeous metal back. The metal back goes inside the fireplace to add extra protection to the walls of the fireplace. Picking one with intricate engravings or stamped can instantly add more appeal, both when you have a fire lit and when there isn’t.

The black color will dance with the reflection of the flickering flames, creating unique shadow effects behind the fire that’s sure to enchant you for hours while also bringing you peace and relaxation. 

Cozy Pot-Bellied Stove

A pot-bellied stove is an excellent alternative to having a fireplace when there’s no space on the walls or floor for the length. These black metal heaters tuck away into any corner and provide plenty of heat to keep your room warm. 

Many people love these old stoves for rustic or old-fashioned room decor. But they’re also great for enclosed porches where you may not have heat vents connected to your central unit. 

If the original designs don’t appeal to you, there are also modern versions for a fun, vintage-chic design. You can paint the stove white or another light, fun color for a modern, eclectic touch on an antique piece.

All White and Elegant

There’s something timeless and elegant about using white design pieces, and it’s no different for fireplaces. Having an elaborately carved surround painted in a classic white is simple yet dramatic. 

And when the fire is lit, the white paint will glow with warmth from the colors of the flames, helping add more brightness and ambiance to the room. Adding accent pieces in reds, yellows, and oranges enhances the colors of the fire.

You may need to clean your fireplace surround more often, as the soot from the fire will show faster on white than it would on darker tones. In addition, adding a unique firescreen helps increase the room’s elegant allure.

Half Wall

A half wall is a great corner fireplace choice for rooms with wide-open door frames and no other suitable place to put a fireplace. 

There are many ways to create a half wall, whether using wood, stone, or bricks for the wall and stone or bricks for the fireplace inlay. Many people choose to make a half-wall fireplace accessible from both sides of the wall.

The great thing about a half-wall fireplace is that you can add seating on one side or around the fireplace for additional cozy places to sit. In addition, a simple wood mantle breaks up the large expanse of stone.

Tuscan Corner

You can also achieve a Tuscan countryside nuance by using a corner fireplace. Choose smooth stones and warm, rich bricks for the fireplace foundation. 

Italian-style furniture, a heavy wood mantel and surround, plus decorative cast iron lanterns help complete the Tuscan feel. Plaster walls also evoke an Italian countryside ambiance. 

Choose nature-inspired color palettes using shades like cream, brown, beige, gold, Sienna, brick red, gold, dusty greens, and one or two bolder color accents like deep purple or blue and turquoise.

Stained Glass

Suppose you decide to go with or already have a simple fireplace. In that case, you can use stained glass to give a beautiful yet simple (and affordable) upgrade without having to do any remodeling. 

Instead of hanging a piece of artwork over your mantle, use a framed stained glass window. Of course, if you’re crafty, you can DIY build your own. But you can also buy one already pre-assembled. 

Stained glass gives you a unique focal piece, and you can tie your room’s accent pieces to the colors of the window for a complete room design. Finally, add a few candles to the mantle to help reflect the various glass shades around the room.

Marble Inlay With a Vintage Wood Surround

If you’re looking to achieve an elegant, classic fireplace design, this might be the option for you. Start with a vintage wood surround to get the traditional fireplace look. 

There are plenty of new mantles made to look vintage. But you can also hit a flea market or thrift store and find some pretty cool options. For example, repurposed mantels may require that you sand and restrain the material so that it looks new again. Or you can leave it distressed if you prefer the aged look. 

Then add a marble inlay to break up the rustic feel, so your space feels more upscale and classy. The pairing of marble and vintage or weathered wood allows the beauty of the marble to shine while still feeling cozy and welcoming.

Modern Wood Facade

A popular way to achieve a chic modern look with gas or electric fireplaces is to go with a wood facade or veneer for the fireplace surround. 

This design idea allows you to get clean, simple lines in an understated yet tasteful nuance. It’s the perfect choice for awkward corner angles, and using light wood tones can help brighten up a room, so it feels bigger. 

Choosing a thin veneer versus a thick wood mantel captures the essence of modern styles – simple yet eye-catching.

Cabin in the Woods

Building a fireplace styled after a cabin in the woods can allow you to feel that peaceful, isolated-from-the-world sensation right at home. 

This corner fireplace idea uses a colorful stone surround with a weathered wood mantle. And you can even toss down a fur rug on the floor or over the raised threshold and then add some candles or lanterns for soft, rustic lighting. 

The multi-colored stones give your eyes a treat rather than the same dull color and shape, allowing for a unique corner fireplace design. 

Perfect Christmas

Fireplaces are also a favorite for Christmas time. Children wait with glee for Santa to slip down the chimney and fill the stockings hung on the mantel. 

Make your room feel cozier and Christmasy by setting up the tree close by (within safety distances) and add some holiday decor to the area above the mantle where you usually place family portraits or other decorative paintings, like a simple wreath. 

Decorating the mantle with candles, berries, and other holiday decor makes for the perfect place to sit and enjoy a cup of hot cocoa and listen to a Christmas story next to a crackling fire. Christmas couldn’t be more perfect!

Full-Fledged Stonework

Large stones are an excellent decor material to give your small space tremendous character and style. To achieve this gorgeous rustic look in your family room or living room, you’ll need to invest in a lot of stones to build around the fireplace. 

Many people prefer to take the design from the ceiling to the floor, adding in a slab of granite or other hard, non-flammable material for a prominent seat in front of the fire. And you can use the same material for your mantle, giving you plenty of space for decor pieces.

A stone-covered fireplace can work for any room theme, whether you’re hoping to achieve a rustic look, a traditional fireplace feel, or even an elegant old-fashioned decor theme.

Small Room Corner

Even small rooms can benefit from having a fireplace if you get creative with your design. You may have to forgo the traditional fireplace shape, but you can still capture the ambiance using electric, wood-burning, or gas-powered fireplace alternatives.

The best solution for compact rooms is a stand-alone fireplace. This style sits on a pedestal, allowing you to move it around the space as you desire. The best thing about this fireplace style is that you don’t have restrictions on furniture layout if you decide to rearrange your room. 

You can easily place this gas fireplace style in a corner or the middle of the room for shared warmth. It’s the perfect solution for small living rooms, bedrooms, or lofts. 

Multiple Grates

Changing out your firescreen grates with the seasons is an easy yet fun way to decorate for the different holidays. After knowing the size screen you need, shop around to find some in different themes.

You can find metal grates with reindeer and Christmas trees for the winter holidays. Then choose a grate with falling leaves for autumn, floral designs for spring, and then something less elaborate for summer seasons. Or choose to show your patriotic side with an eagle, a flag, or firework-themed grates.

Of course, if you don’t find a style you like, you can always custom-order some made to your specifications, such as with your last name or initials, or show your team spirit with a themed grate during sports events.

Thin Veneer Stone

You can also achieve a rustic yet stylish feel by adding a corner fireplace to your room and covering it with a thin veneer stone if you have a mid-sized room.

While natural stone gives the best aesthetic, such as a stacked stone formation, you can also go with imitation pieces or tiles if you’re trying to style on a budget. And adding a simple yet attractive mantel gives you a blend of traditional and modern minimalist. 

The great thing about using a thin veneer stone is that it’s a less expensive option, allowing you to still have the impressive feel of a stone fireplace without the bulky use of large rocks.

Minimalist Fireplace

Minimalist styles are trending, primarily due to the simple lines and clean, unadorned look. You can achieve this look by painting your fireplace surround a classic white. 

Adding a gray inlay enhances the sleek, modern feel while adding a contrast to the stark white. Keep the mantle free of clutter by choosing two simple pieces to adorn each corner. A simple abstract picture in subtle shades gives a bit of color to keep the space from feeling too sterile.

This style is the ultimate way to make a powerful decorative statement without using a lot of dramatic materials, time, or labor. 

Smooth and Classic Wood

Wood is one of the most traditional materials used on fireplaces, and there’s no reason you can’t still use it for your fireplace. However, if you have a simple fireplace that needs some jazzing up, consider a smooth, wood surround. 

There are plenty of designs that you can purchase separately and various sizes to fit your unit so that you can achieve a traditional, classic fireplace design.

Browse the internet for a style that matches your tastes. Or consider using an old wood surround that you clean up and repurpose, saving you money while recycling materials and being environmentally friendly.

Simple Recessed

If you need to save floor space by not having a threshold or fireplace surround, the best choice is to go with a simple recessed corner fireplace. 

You can find recessed fireplaces in many different styles, whether you want something plain or one with an elaborate design. Most of these fireplaces will be electric or gas rather than wood-burning. 

A recessed fireplace slips right into the wall, sitting flush. This placement does reduce the chances of accidental burns to children, pets, and adults while leaving you with all your space for additional decor items.

Carved Wood

A simple but sophisticated fireplace design is to go with a carved wooden mantel. This option is great for updating an existing fireplace or adding elegance to a newly installed corner fireplace.

Adding wooden touches like tables and bowls can enhance the room’s warmth factor. This idea is fantastic for plain monochromatic room schemes that you want to feel welcoming. 

Keep the walls white and use the wood to add warm natural touches of color that break up the monotony of using a bunch of light colors. 

Conclusion

There are plenty of ways that you can use a corner fireplace to update your room’s ambiance. Whether you want to add elegance or classic old-timey touches or you need something simple and minimalistic, you’re sure to love one or more of these corner fireplace ideas. No matter the size and layout of your room, there’s a way to fit a corner fireplace into your space.

20 Best Chairs For Small Spaces

When you have a small space, chairs are the best way to furnish your room without cramping the area with excessive furniture. 

Instead of choosing bulky recliners, which, while comfy, will take up a lot of space, we’ve found 20 types of chairs for small spaces. These chairs will be stylish, comfortable and provide extra seating, so everyone has a place to sit when socializing. Designs vary, allowing you to choose a chair that fits your room’s design.

Armchair

Armchairs are comfy cushioned seats with side supports for resting your arms. These chairs come in various sizes, with some types being large enough to curl up with a good book. 

Any chair with wide supports for your arms could classify as an armchair. Therefore, there are many types of chairs that are both armchairs as well as other types. 

Armchairs are perfect for small spaces, taking up minimal space while providing a comfy spot to sit. You can even arrange two or three armchairs in a semi-circle for a quaint sitting circle.

Wingback Chair

Wingback chairs, also known as wing chairs, are easy chairs (club chairs) with wings on the back that sometimes stretch down to the armrests. 

This type of chair is perfect for framing around a fireplace to stay warm on cold evenings. The fully upholstered chair has thick cushions for comfort and exposed wood legs. 

You can choose from various patterns and fabrics, allowing you to customize your wing chairs to go with any decor. And you can also find wingback chairs in multiple sizes. 

Barrel Chair

Barrel chairs have a semicircular, high back with a space cut out of the front, resembling a half barrel. These chairs can have upholstery, tufted, or channeled fabrics with high arms.

Some types of barrel chairs swivel around, allowing for seating that can spin around for easier conversationalization among people. 

While the look of these chairs might not appeal to everyone, they go great with casual or modern themes. Two low-slung barrel back chairs with a small circular table in between make the perfect sitting area for small spaces.

Convertible Chair

Convertible chairs are another convenient yet stylish way to maximize your space. These chairs – sometimes referred to as sleeper chairs – convert from chairs into beds, allowing you to have an extra place for a guest to sleep or you to take a nap. 

There are five types of convertible chairs. Futons have metal or wooden frames that look like chairs and turn into a single-person bed when unfolded. Sleeper chairs resemble futons in function, except they have removable back support and pillows for a wider sleeping area. 

Electric chair beds allow you to convert from a chair into a bed at the push of a button. If you want a chair that doesn’t require you to remove cushions, you’ll need a drawer chair bed. The mattress rests under the chair, and you access it via a drawer below. Pulling the drawer out, the bed comes up to set on the drawer. 

And finally, a pull-out chair bed, similar to a drawer chair bed, has a bed that comes out from underneath the chair and flips open in three sections.

Lounge Chair

A lounge chair combines an armless recliner with an ottoman, making for the perfect spot to relax. Although lounges keep you in a leaned-back position, the angle is non-adjustable.

Lounge chairs are the perfect way to have a place to put your feet up and lay back when you have limited space. But if you use a lounge chair in a spot that’s too small, you may lose the room to place other furniture. 

There are multiple types of loungers, varying in design. Classic loungers have an attached ottoman for your feet to prop up but are armless. Chaise loungers – long chairs – have enough room to stretch out on one high arm and one flat side.

Side Chair

Side chairs are armless single-person seats with a solid non-upholstered frame. There may or might not be upholstery for the back and seat.

These seats are convenient for small spaces because they don’t take up much room. And they can push into tight spots for easy storage when not in use or when you need more open space.

You can find side chairs in various sizes, styles, patterns, and fabrics. Whether you want modern, traditional, or unique, side chairs make the perfect addition to any tight sitting area where you need space for people to sit.

Club Chair

Club chairs – sometimes called smoking chairs – bring to mind luxury and class due to rich leather rather than fabric upholstery. 

These chairs have a low back with armrests and a thick wide seat cushion that gives you a ton of room for sitting. 

Club chairs look great in traditional-style rooms, paired with a leather couch or a loveseat if space is minimal. Complete the look with a rich wood table. 

Slipper Chair

Slipper chairs are upholstered chairs with short legs and no arms. This chair style has been around since the 18th century, although they were primarily used in bedrooms until the 1950s. 

These chairs are often used for mid-century modern designs, with exposed geometric legs and a tight back. Current editions of slipper chairs feature box pleats to hide the chair’s legs with tight, upholstered rectangles for the seat and back. 

The versatility of these chairs allows them to go with any decor for any small space. Use a single slipper chair for an entryway place to remove your shoes. Or pair two chairs together for an intimate sitting area.

Parsons Chair

Parsons chairs are most popular for being elegant fine dining chairs that are comfortable, with a traditional style. These chairs have thick cushions, high backs, and no arms.

The design and comfort of these chairs make them diverse enough to use for dining rooms or as a reading chair. 

This chair style typically comes in a set of two, four, or more to fit any size dining space or kitchen. You can buy the chairs alone or buy them along with a matching table.

Balloon Chair

Balloon chairs are Victorian-inspired chairs used in drawing and dining rooms. These chairs have an upright back that’s waisted above the seat, with a rounded curve top rail forming a balloon design. 

These chairs had significant popularity in the 1830s, but the style lost interest by the end of the 19th century. The wood used for these chairs is mahogany or walnut, or in Australia, cedar or Huon pine.

If you enjoy the look of this style, you can find various types still available to suit multiple room designs. Some models may have a back that curls slightly over your head. 

Papasan Chair

Papasan chairs are an Asain-inspired design of a bowl-shaped chair that goes with any interior decor. In southeast Asia, where these chairs originated (no one knows precisely what culture invented the design), these chairs are called Ratan. 

Americans renamed the chair Papasan during World War II. The translation of Papasan is father or elder. These chairs are perfect for small spaces, as they don’t take up a lot of room. 

However, if you prefer a chair where you can sit straight up or recline back with your legs propped up on a stool, a Papasan might not be right. But if you want a minimalistic chair that’s big enough for you to curl up, this might be the chair of your dreams.

Butterfly Chair

Butterfly chairs are iconic yet simple chairs with Latin American (Argentinian) origins dating back to the 1930s. Other names include the BKF chair, Hardoy chair, or sling chair.

These chairs are perfect for casual sitting for small spaces. The compact size and light metal frame with sling fabric create a ground-touching seat. 

If you have a dorm or a small apartment, butterfly chairs could be just the thing. However, this style may clash with formal settings. 

Glider

Gliders are chairs that move back and forth on a fixed track. Many people use gliders in baby nurseries, but they’re also comfortable sitting in other rooms with little space for large furniture.

This moving furniture mimics the motions of a rocking chair but in a safer manner that is less dangerous for children and pets. Consisting of upholstered arms, a backrest, and a thick cushioned seat, gliders are the ultimate comfort spot.

Power gliders have an automatic motor, run by a battery pack, that you can control with a remote or buttons on the arm. These chairs do not need a power supply or for you to move them manually. 

Cane Chair

Cane furniture has been around since the 1660s, appearing in England, France, and Holland through trading with Asian merchants. 

Cane chairs consist of weaving rattan vines in a six-way honeycomb pattern around a chair frame. You can find cane chairs in a variety of styles, colors, and budgets.

Mid-Century Modern Chair

Mid-century modern chairs feature a high back on a compact frame, making them perfect for tight spaces. Elevated leg height keeps these chairs off the floor and balances the high back.

The design of these chairs with the raised armrests pairs well with tufted upholstery in neutral or funky colors. The covering is usually some attached fabric that you can clean with a vacuum or lint brush. 

Scandinavian Chair

Scandinavian chairs are the best solution for reading chairs to go in small spaces. These compact size accent chairs feature armrests, a small wood frame, and fluffy back and seat cushions for everything you need for a cozy reading place. 

Complete the design of your space with a small table to hold a cup of coffee, your favorite book, and a small lamp. 

Rattan Chair

Rattan chairs give your space a chic boho aesthetic, pairing well with bright color accents and shag area rugs. 

Traditional rattan chairs do not feature cushions. But the flexibility of these chairs makes them comfortable enough to get plenty of support from the body-shaped curves. 

The open design of this type of chair makes it perfect for giving the room an airy, open feel. Even small spaces won’t feel cramped with this type of chair.

Tufted Chairs

Tufted chairs are the perfect sophisticated beauty accent for small living rooms. A thick seat cushion provides an excellent place for sitting while the upholstered back features button accents.

Exposed wood legs with a wood border on the chair arms and the back complete this chair’s appeal. Complete the design with a metal table between two chairs.

Choose fabric colors and wood that matches your room’s decor for a look that turns heads while looking beautiful enough to wow your guests.

Rocking Chair

Rocking chairs might not be the first thing you think of when trying to figure out seating for small spaces. Multiple low-profile rocking chairs can complement a small room without dominating the space.

These chairs also don’t require much space to rock back and forth, making them ideal for small corner spaces.

Petite Chair

Petite chairs are great for small areas due to their compact size and stylish design. Placing oversized chairs in small rooms can make the space feel cramped. 

These chairs sit low to the ground, which is perfect for shorter people. The high open wood back and plush cushions provide support and comfort. 

Wood arched armrests complete this chair’s design. Choosing an arrangement with an open pattern keeps small spaces from feeling claustrophobic and blocked.

Conclusion

When you have a small space, picking the right furniture is crucial to ensure your area doesn’t feel cramped and uncomfortable. Chairs are excellent for providing individual seating. There’s guaranteed to be a chair style that will fit your small space needs.

22 Different Types of Ceiling Textures

When it comes to remodeling a room, many people consider how they want the floors and walls to look. But many people rarely think of the ceiling.

If you want to complete the look and feel of a room, you should consider your ceilings. Having a ceiling with a different texture than your walls can ruin the design of your room. We’re going to discuss 22 different types of ceiling textures so you can identify each and decide which is right for your home.

What Is Ceiling Texture?

Have you ever stared up at the ceiling in a room and noticed odd bumps or decorative swirls instead of a smooth surface?

As a young child, I thought it was a sign of a lazy finisher who didn’t smooth the ceiling once they installed it. Now that I’m older (we’re not going to say a number), I’ve learned these ceiling designs were on purpose.

Some builders and homeowners choose to have a textured ceiling – when the surface has a rough feel and look instead of smooth. A textured ceiling is also referred to as a finish. 

When a ceiling is finished, it has other materials applied over the top of the sheetrock instead of only paint. Textures often use spackle, plaster, mud, styrofoam, and other components to add depth and dimension to a flat ceiling. 

Pros and Cons of Ceiling Texture

Textured ceilings were a big success in years past, but they quickly lost popularity once it became public knowledge that many of these textures contained asbestos. Today, textured ceilings are hit or miss. Some people love them. Others don’t.

Since textured ceilings are hit or miss, let’s look at the pros and cons. You may decide that even though you’d prefer the look of a flat top, a textured ceiling makes more sense. And don’t worry – all-new textures are asbestos-free!

Pros

One of the biggest advantages of a textured ceiling is hiding blemishes. If your material has scratches, waves, or small holes, covering it with texture can conceal the imperfections. 

Another big reason why more people go for a textured ceiling over a smooth flat surface is the price. As weird as it sounds, a textured ceiling is cheaper, faster, and easier to install than a smooth surface. 

And the final benefit of a textured ceiling is that you’ll have better soundproofing. A smooth ceiling causes noise to amplify and echo. Whereas textured ceilings can help block sounds from being heard outside the room.

Cons

With so many practical benefits, it makes sense why people would want a textured ceiling. But these ceilings do have some downsides to consider.

Many people feel that a textured ceiling looks outdated. Smooth, clean lines are preferable for a lot of modern designers. 

Another downside of textured ceilings is that it’s harder to make repairs. To make a repair match, you’d have to reapply the same texture. It can take a lot of time to make it blend in.

And finally, the biggest con of textured ceilings is that the unusual textures are a magnet for dust. You’ll need to dust regularly, using care not to apply too much pressure and damage the surface.

Kinds of Textured Paint

There are four different kinds of textured paint you can use for your ceiling texture. These are:

  • Self-mixing paints
  • Smooth texture paints
  • Alternative finishes
  • Premixed textured paint

Ceiling Texture Tips and Precautions

Applying texture rarely requires using dangerous tools, so it’s pretty safe. But you do want to use appropriate eyewear, so dust doesn’t get into your eyes.

You should also wear something over your face to block breathing in any particles. Everyone should have plenty of practice working in a mask after living through 2020. 

And it’s always a good idea to do some practice before attempting any texture design. Many are simple enough for DIY, but you want to know what you’re doing before working on something permanent.

Finally, always wear protective gear or old clothing and prep your room by covering everything with plastic. 

22 Ceiling Texture Types

Now that we’ve given you all the goodies about ceiling textures, let’s look at the 22 most common ceiling texture types. We’ll describe the design, experience level and tell you how to achieve the look. 

1. Popcorn Ceiling

Out of all the different ceiling textures, popcorn is probably the most known and often the most disliked. This style was widely popular in the 1900s but rarely chosen as an option today. 

But that doesn’t mean it’s not still frequently used. Although outdated for many, it’s cheap, easy, and provides soundproofing (a parent’s dream). 

Popcorn is a combination of mud and small Styrofoam balls, applied to the ceiling using a spray gun and hopper. The final look is a ceiling covered with small plaster-covered balls that resemble popcorn kernels, hence the name.

2. Light Popcorn Ceiling

If you don’t like the thick blanket of balls causing your ceiling to resemble cottage cheese (another common name for popcorn ceilings), consider a light popcorn texture instead.

With this design, you still get a slightly bumpy texture. But these kernels aren’t as bulgy and gaudy as full popcorn. You won’t get horror flashbacks of the 70s with a light popcorn ceiling. 

3. Spray Sand Ceiling Texture

Spray sand is a ceiling texture made of sand mixed with a thinner (thinned out mud, primer, or water). If the name doesn’t give it away, you apply this texture to the ceilings using a spray hopper gun. 

The great thing about spray sand is that it doesn’t peel or crack, unlike orange peel texture. It’s best to get some practice on scrap material before attempting on your ceiling.

4. Knockdown Ceiling Texture

The knockdown ceiling texture has been around since the early 1900s, preceding the more popular styles like orange peel or popcorn. 

This style is a popular choice for DIYers, as it requires little tools, basic knowledge, and a simple technique. Which tools and the method you’ll use will depend on the texture you choose – mud trowel, splatter, or stomp.

The basic concept is to apply drywall mud onto the ceiling, so it forms peaks. Then use a knockdown knife to flatten these peaks, giving the ceiling dimension and a mottled look that also soundproofs. 

5. Mud and Tape Ceiling

Mud and tape ceilings are becoming a typical ceiling texture. This method uses drywall tape to cover any seams, joints, and along the sides attached to the roof. Then mud goes over the tape. 

The downsides of this texture are that it can be more expensive and it’s time-consuming. This look is best if you prefer an unfinished look. If you like an elegant, intricate design, this isn’t the one for you.

6. Skip Trowel Ceiling Texture

To create a skip trowel ceiling texture, you must know how to use a trowel – a small, flat blade with a pointed tip. 

To start, hold your trowel (coated with an all-purpose joint compound) against the ceiling at an angle. Then move the tool gently over the surface. 

You don’t have to stay in a specific pattern. As the name implies, your trowel will skip over the surface, causing a distinctive design that resembles stucco, covering less than 50% of the surface. 

7. Sheetrock Ceiling Texture

The sheetrock ceiling texture has been around since 1917, making it one of the oldest styles still used today. This texture gives your ceilings a rough, artistic look that works well with multiple design schemes. 

Besides being versatile and attractive, a sheetrock texture is easy to do with minimal tools. But it may be time-consuming. 

To achieve a sheetrock texture, use a stiff bristle paintbrush to apply the mud compound directly to the sheetrock. Do not smooth the surface out. It will dry in imperfect ridges and lines.

8. Lace Ceiling Texture

A lace ceiling texture gives your ceiling more elegance and class. When done correctly, it will look like your ceiling is covered in antique lace. Other names are French or Spanish lace.

The process for doing a lace ceiling texture is similar to the knockdown method, but it takes a lot more work and time to get the lace’s intricate patterns. 

And you have to apply two layers for a contrast of colors. After applying the first layer and letting it dry (easy), apply the textured coating on top in a different color, using hand tools and patience (challenging). 

9. Swirl Ceiling Texture

A swirled texture is one of the most attractive designs for ceilings, and it’s pretty easy to apply. Plus, it’s easily customizable to meet your particular tastes.

After applying mud to the ceiling using a sprayer or roller, use a brush to draw swirls while the mixture is still slightly wet. The size of the brush determines the circle size. There’s no correct way to choose the size and technique. It’s all a matter of individual tastes.

Due to the application’s tediousness, you may get the job done faster with a second person helping. Or leave it up to a professional as this pattern can be difficult for beginners.

10. Fish Scale Ceiling Texture

Fish scales have a repeated pattern, similar to a swirl texture, that overlaps like fish scales, which influenced this texture’s name. Other names for this design are shell or fan pattern. 

To achieve a fish scale texture, brush layers of circular arches in an intricate layout overlapping each previous turn. 

While you get a unique and attractive finish, the fish scale texture is one of the most difficult for beginners. In most cases, it’s best to leave this job for a professional to handle.

11. Slap Brush Ceiling Texture

Slap brush is a standard DIY ceiling texture that’s a lot of fun to apply. But it can be a long and tedious process that requires lots of practice. 

This texture gives your ceilings an artistic dried paint feel with rough ridges and lines laid out randomly. To create a slap brush texture, start by applying mud to the roof using a roller.

Then slap the ceiling with a stipple brush or other hard-bristled tool. While it can be fun to hit the surface, use care as any mistakes will show up once it’s dry, leaving behind a mess rather than art.

12. Stipple Brush Ceiling Texture

A stipple brush texture is similar to stomp and slap in that you use a stipple brush to create patterns. However, this texture is more challenging because the material’s thickness needs to hold a good design.

Stipple brush textures are great for hiding flaws like cracks, holes, or patch jobs. When done by someone with experience, it looks great. But when done by someone with inexperience, it can look sloppy and unfinished.

To achieve this texture, cover the ceiling with a layer of mud using a roller. Then use your stipple brush to form patterns. These can be random or information, using stamping, slapping, or any other technique. Rosettes and crow’s feet are also possible options.

13. Rosebud Ceiling Texture

Rosebud is another easy texture you can apply to your ceiling to get a unique pattern. You can form rosebuds using a paint roller, a stomp brush, or, if you’re creative enough, an airless paint spray gun. 

You only need a thin layer of mud to achieve a rosebud texture, so it’s not the best option if you want coverage for ceiling imperfections. Any cracks, discoloration, or holes will show through a rosebud texture.

To achieve this look:

  • Apply a thin layer of mud onto your ceiling.
  • Use a stomp brush, start in the top corner, and press down so the bristles flatten out.
  • Twist it for more dimension, or pull it away for a stiff look.

Continue the method across your whole ceiling. You can overlap the buds or place them untouching, randomly or in a pattern.

14. Crows Foot Ceiling Texture

The Crows Foot ceiling texture is a favorite for DIY’ers, although be aware you need two people to complete the job. This texture can hide minor flaws under a decorative layer of texture.

You achieve the intricate crow’s foot pattern by using a stipple brush. After coating your brush (or the wall) with drywall mud, press the brush onto the ceiling and pull away. 

For each new stamp, turn the brush a half turn and stamp adjacent to the previous mark. This design is messy so prepare your room ahead of time. 

15. Stamped Texture Ceiling

Another ceiling texture similar to the swirl pattern is the stamped texture. The difference is that you use brushes to get swirls while you need patterned rollers to form a stamped surface. 

To achieve a stamped texture, coat the ceiling with mud. Then apply your patterned roller to the surface and move it back and forth, applying hard pressure so the mud stamps. 

16. Smooth Ceiling Texture

Many people turn to a smooth ceiling texture to achieve a more modern look. You may think because there’s no design that this would be the easiest texture to get. 

You’d be wrong. To achieve a perfectly smooth texture, you need multiple mud layers, sanding each layer before applying the next. Even the slightest flaws will show up, which is why it’s so time-consuming and frustrating to achieve.

Most beginner DIYers will not be able to achieve a perfectly smooth ceiling texture. If this is the look you want, you may want to consider bringing in the professionals. 

17. Skim Coat Ceiling Texture

A skim coat texture means you are smoothing out the previous surface. This method requires some practice, but it’s a simple process that most DIYers can handle.

To get a skim coat texture, start by applying a thin layer of mud over the surface. Once dry, you can continue to apply new layers until you get the finish you desire. This texture is similar to a smooth texture.

18. Santa Fe Ceiling Texture

If you like the skip trowel texture, but you want more coverage, consider the Santa Fe texture. This pattern provides 60% more coverage than a standard skip trowel texture. 

Santa Fe is an excellent choice for hiding minor ceiling flaws, although the uneven application does not provide maximum coverage. A completed application will look like you have two layers of drywall, with plenty of space where you see the bottom layer through the top.

The application of this texture is the same as the skip trowel, except you cover more area. Apply a thin layer of mud over your ceiling without making it even.

19. Stomp Ceiling Texture

A stomped ceiling texture is similar to stamping, knockdown, and stippling. You use a textured roller and a stomp brush to create a patterned look. 

A stomp texture won’t hide imperfections, so it’s not the best texture to use for damaged ceilings. The biggest factor of this technique is having the compound mixed right. 

To stomp a design, apply your solution on the stomp brush and apply it to your wall. Repeat the process until the ceiling is covered in designs.

20. Orange Peel Ceiling Texture

Another familiar texture applied to ceilings and walls is the orange peel. This texture gets its name due to the resemblance to an orange peel. If you like a subtle, rough, slightly bumpy texture, this might be the style for you.

You apply an orange peel texture to your ceiling using a sprayer, which is a bit messier than applying a texture by hand using a trowel. But if you’ve got enough experience, a spray application is faster. 

21. Tree Bark Ceiling Texture

Tree bark ceiling texture mimics nature and gives your home a more natural feel. This texture is a knockdown style with a twist. You get long sculpted lines similar to tree bark, hence the name.

Instead of using a brush, you use unique heavy foam rollers that create a uniform pattern. Coat the roller in your mixture and roll it over your ceiling. 

22. Hawk and Trowel

Hawk and trowel is a texture that was widely popular in the 1970s. The name comes from the specific tools needed to create this design – a trowel and a hawk.

This technique is easy enough for users of all skill levels, so it’s an excellent beginner project. The final result will vary by applier, but you end up with plaster layers that have a ripple effect, similar to water. 

Ceiling Texture Types FAQ

Now that we’ve looked at the 22 most common ceiling textures let’s go over a few frequently asked questions people have about the topic.

What are the 4 types of texture?

Textures can come in spray, drywall, patterns and designs, and brush strokes. 

What is the best texture for ceilings?

The most common texture for ceilings in higher-end homes is the knockdown. Apartments and older homes may have popcorn or orange peel ceilings, which are common but less preferred styles.

What is a textured ceiling called?

Ceilings that have a texture are referred to as finished ceilings. A finished ceiling refers to the addition of other materials besides paint to give a unique look. 

Conclusion

We hope you enjoyed this extensive guide to all things related to ceiling textures. Skip the boring (and expensive) choice of a smooth ceiling. Choose one of these twenty-two ceiling textures to give your home character, depth, and extra appeal.

Standard Garage Sizes for 1, 2, 3, or 4 Cars (Custom Graphics)

Building a garage seems like an easy task. But think again! Garages require a host of considerations before you commit to construction. Think about the height, the width, how you want to use it, and the placement of wall furniture.

Let’s take a look at garage sizes in more detail.

1-Car Garage Dimensions

1 car garage size1 car garage size

When working out the space, allow 288 square feet for each car. If you do that, when you scale up the sizes, all you need to do is multiply the square footage.

Typically, the average 1-car garage is about 20 ft x 12 ft wide to allow the car doors to open. The average height is 7 ft, which takes into account the overhead garage door mechanism.

Increasing those measurements by a few feet allows for extra storage. Try 24 ft x 16 ft x 8 ft as another example. This gives you the space to move around the car.

It is also a much better size if you drive a crossover SUV, given the extra length, width, and height. You will need a garage door width of about 7 ft x 8 ft to allow for wing mirror clearance.

For a truck or SUV, increase the measurements again to between 28 ft in length by 16 ft in width and 8 ft in height. The garage door would also need to be wider, at about 9 ft x 8 ft.

2-Car Garage Dimensions

2 car garage size2 car garage size

Families often use 2-car garages in two ways: one for storing the car safely, and the other for storage or as a workshop. Typically, 2-car garages are a minimum of 22 ft wide and 20 ft deep.

They also have twin garage doors measuring between 9 and 10 ft, although it isn’t uncommon to have an extra-wide 16 ft door.

When making your calculations, ensure there is a minimum of 7.5 ft for car door clearance.  Most 2-car garages range in width from 22 ft to 26 ft to give greater clearance around the car.

If you are parking mid-size cars, these dimensions would be ample, but if you want to house 2 trucks, you might want to go for the maximum length of 24 ft to compensate for the increased size.

2-car garages generally range in size from 400 to 600 square feet, depending on the vehicle.

3-Car Garage Dimensions

3 car garage size3 car garage size

Things can become more complicated when you are dealing with multiple-car garages. You need to allocate enough clearance for each car door to open.

The average size of a 3-car garage is about 32 ft x 22 ft. The height doesn’t really change between the garage sizes unless you are catering for a specific vehicle.

These measurements are based on the average size family car, but you might want to increase the length and width if you have a larger vehicle. If you have multiple SUVs, you will need more space than mid-size cars.  

Typically, 3-car garages have either triple doors measuring 7 or 8 ft wide or a combination of a 16 ft wide door and a single door.

Unless you want to use your garage as a workshop, there is only enough breathing room between the vehicles to allow passage because space is limited.

The average square footage of a 3-car garage is between 576 and 864 square feet.

4-Car Garage Dimensions

4 car garage size4 car garage size

On average, a 4-car garage measures between 34 to 36 ft in width and typically have twin 16-ft doors.

As with the 1 and 2-car options, they are pretty standard unless you are looking for a specific height. 4-car garages have a length spanning 20 to 24 ft, but this can change depending on the vehicle size.

Like the 3-car option, there isn’t much space between vehicles, with just enough access to get in and out.

If you design something bespoke, the sizes can be anything you want, depending on how you want to use the space and the land you have available.

The average size range for a 4-car garage is between 1150 and 1300 square feet. This gives you enough room to open the doors of each car individually without fear of damage.

Considerations For Garage Sizes

There are so many variables when designing and building a garage, but it is important to focus on some basics first.

Let’s Talk About Size

A garage may seem like a simple space, but it needs to have clearance for your car and garage door mechanisms, plus wall storage and room to work. When it comes to garages, size really does matter.

Height

Don’t underestimate the importance of height, vehicle clearance, overhead storage, lighting, and garage door openers. Even your vehicle’s antenna is a consideration as it is the tallest part of the car.

Width

Whether you are using a parking sensor or not, you will still need a decent amount of clearance within the garage.

Trying to squeeze out the doors is not fun, especially if you are less able than others, and if you want your paintwork scratch-free.

Plus, the right amount of clearance makes it easier to perform maintenance tasks on your car. Also, garages contain equipment, so think about your storage options when choosing the width.

On average, each separate garage door needs a minimum of 1.4 feet of wall to separate them. If you have more than one door, you need to factor this into your measurements.  

Depth

You should be able to walk around your car while it is parked. Depth is a common miscalculation when designing a garage. Also, most tools are located on the end wall in front of your vehicle.

How You Use It

Garages aren’t just for cars. Many owners use their garage space for practical things like woodworking, metalwork, and hobby pursuits. You can create a mess without worrying about the disturbance.

Plan For the Future

You might not always drive the same car, so if you build your garage around your existing vehicle, it will cause issues later when you swap it for a larger model.

Try and build in all eventualities into the design. It helps you future-proof your garage.

What Are the Costs?

The costs vary depending on how many cars you have and what you want to do with the space. The average dollar per square foot stands at $35 to $60. Here are the average figures:

Garage Type

Average Dimensions Ft

Average Square Footage

Average Costs

1-car

20 x 12

264 to 288

$7,500 to $14,200

2-car

20 x 22

400 to 600

$19,600 to $28,200

3-car

32 x 22

576 to 864

$28,200 to $42,700

4-car

36 x 24

1150 to 1300

$42,700 +

Top Tip: Always allow an extra 5 or 6 feet clearance on the sides for the car’s doors to open. If you go too narrow, it will damage your vehicle.

Average Vehicle Sizes

To decide on garage sizes, you must first have an understanding of typical vehicle dimensions. Cars come in all shapes and sizes, so the best way to do this is to categorize them into groups.

Small Cars

Typical models: Kia Rio, Chevy Cruze, Mazda 3, Mini, Ford Focus, Toyota Corolla.

  • Average length: 15 ft
  • Average width: 6 ft
  • Average height: 5 ft

Medium-Size Cars

Typical models: Toyota Camry, Audi A4, BMW 3 Series, Honda Accord.

  • Average length: 16 ft
  • Average width: 6 ft
  • Average height: 5 ft

Full-Size Cars

Typical models: Dodge Charger, Chevy Impala, Chrysler 300, Toyota Avalon.

  • Average length: 17 ft
  • Average width: 6.5 ft
  • Average height: 5 ft

Medium-Size Trucks

Typical models: Ford Ranger, GMC Canyon, Chevy Colorado, Nissan Frontier.

  • Average length: 18 ft
  • Average width: 6.5 ft
  • Average height: 6 ft

Large Trucks

Typical models: Ford F-150, GMC Sierra 1500, Dodge Ram 1500, Chevy Silverado

  • Average length: 19.5 ft
  • Average width: 7 ft
  • Average height: 6.5 ft

Crossover SUVs

Typical models: Honda CR-V, Toyota RAV-4, Hyundai Santa Fe, Mazda CX-5.

  • Average length: 15.5 ft
  • Average width: 6 ft
  • Average height: 6 ft

Medium-Size SUVs

Typical models: Ford Explorer, Dodge Durango, Honda Pilot, Kia Sorento.

  • Average length: 16.5 ft
  • Average width: 6.5 ft
  • Average height: 6 ft

Large SUVs

Typical models: Cadillac Escalade, Ford Expedition, Chevy Suburban, GMC Yukon.

  • Average length: 17.5 ft
  • Average width: 7 ft
  • Average height: 6.5 ft

Attached Vs. Detached

Which is better and which is cheaper to build?

Attached

Attached garages are less expensive to build because you only have to construct 3 walls instead of 4.  It’s also cheaper to install mains electricity, lighting, and water because the services are already in your home.

They are also more convenient because of their proximity to your house. In bad weather, you can get access with the minimum of fuss. Some even have connecting doors to the main property.

Attached garages increase property values, with most investments seeing 80 percent returns on property values. They are also cheaper to build, costing on average $27,000.

There are some downsides to attached garages. They are a greater fire and security risk. They don’t fit with every plot, restricting what you can build, and they may incur more expensive building permits.

Detached

Detached garages are located away from the main home, so if you undertake any noisy work, such as using a compressor, then you are less likely to disturb anyone’s peace.

They also have greater scope to expand because you can locate them anywhere in the yard. This gives you room for more cars.

Like attached garages, detached ones also increase your home’s curb appeal and add to the overall value. Plus, they fit the plot better because you choose where to locate it rather than work within your existing home’s constraints.

There are negatives with detached garages. They are less convenient to get to and use, especially in bad weather. Running amenities like gas, electricity, and water is also more of a challenge.

They take up valuable yard space, which could have better uses. Also, some homeowner associations may not allow it.

Is a Carport a Better Option?

Carports are easier to build and cost less. They also take less time to construct. They offer adequate protection levels for your vehicle from the rain, snow, and sun, but your car is not as secure.

Garages conceal your vehicle and lock it away. Thefts from garages are rarer than from carports.

The other consideration is the aesthetics of your property. Typically, a carport is a metal structure that sits on your plot, detached from the house. They are not as attractive as garages.

Then there’s the increase in the value of your home to consider. A carport adds a small amount but nowhere near the levels of a garage.

Finally, some cities may require you to have a permit to erect a carport, although unlikely. In contrast, a garage permit is required in most places because the construction material needs to be fire-retardant and the electrics certified.

Do I Need a Permit For a Garage?

Each city or region sets its own rules, but they are pretty straightforward when it comes to building a garage. The garage might need to be constructed from fireproof materials, or the electrics and plumbing might require a permit.

In some areas, it depends on the size of the garage. In some local zoning departments, single-car garages don’t need a permit, but double-garages do.

Your structure needs to be single-story, less than 750 square feet, minus a roof deck, and with beams spanning 14 ft or less to qualify for a subject-to-field-inspection permit.

If the garage meets all these requirements your garage complies with the planning laws.

Keep Your Car Secure Behind a Garage Door

Knowing what size to build your garage is crucial. If you are a multi-car family, keeping everyone’s car secure is a priority. Also, having that extra space for other tasks is a real bonus.

A garage is not just a place where your car sleeps; it could be a gym, a workshop, a storeroom, and even a laundry room.