What Is A Parapet Roof?

Parapet roofs are often thought of as a decorative element, but they have many practical purposes. 

Many homeowners don’t realize that the extended walls created by parapet roof designs will still take the force of wind, rain, hail, and snow. This means that these roofs do more than looking good on your home; they also help protect it from damage caused by weather conditions. 

If you’re looking for an attractive way to add some protection to your home without adding too much bulk or taking up too much space, a parapet roof is probably right for you. The design does not only improve the look of your house but also its functionality and safety in adverse weather conditions. These roofs can be built on top of existing structures or installed as part of new construction projects with ease and flexibility so there’s no reason why you shouldn’t consider this type of roofing system if one fits into your budget.

What Is a Parapet?

A parapet is simply a solid structure that is placed along the edge of any roof to protect it from damage. It’s usually made of stone or concrete and installed within an inch or two of the wall surface below for protection. Parapets are also used as guard rails during construction projects, but they can be very attractive to look at once completed. 

A parapet is a simple but effective improvement to any exterior design. It protects the roofing system from damage and prevents water, snow, and ice from accumulating on top of it. Most importantly, parapets help keep people off your roof during times when you know there will be bad weather conditions like heavy rain or extreme cold. 

Parapets are built with lightweight materials that won’t cause too much weight on top of the roof but still add strength and stability to the structure as well as protection against outside elements like hail, wind, water leakage, etc. This means they can easily be removed whenever necessary without damaging your home’s foundation or interior walls in any way.

How Do Parapet Roofs Work?

A parapet roof is designed to help protect any home you place it on, so the first thing to consider is how your own structure will be affected. Your roofing system won’t get damaged by the rain and wind as long as your parapet roof design protects it but that doesn’t mean there won’t still be some changes inside or under the surface of the house itself.

Parapets are usually placed at least a few inches from your home’s exterior walls. Because of this, you’ll have to make sure there is enough space between the two and carefully plan for expansion joints that can accommodate movement if need be. If you don’t leave enough room for expansion then water could leak in through cracks when rain runs down, which would damage your walls over time and cause expensive damage to your roof.

Parapets can be built on top of an existing roof, but they often need extra support from walls and columns inside if you’re building a new home or adding a new room. This means that any interior changes will probably come with added upkeep when it comes to ensuring these structures are taken care of properly. 

If you have a question about parapet roofs in your home then it’s best to speak with someone who knows more than the average professional. Contractors who specialize in home structure and design should be able to provide accurate information so you know exactly what else is needed when deciding whether or not this type of roofing system would look good on your house without negatively affecting its overall quality.

Why Choose a Parapet Roof?

There are many reasons to choose a parapet roof design for your home. Whether you’re adding one for the first time or repairing an existing structure, there are tons of benefits to having these roofs in place.

Parapets make sense both aesthetically and practically. They can be designed so they blend into the architecture of any building but still protect it from bad weather and more severe damage caused by storms, wind, hail, etc. The added walls allow for extra space as well which makes them great at hiding clutter from view once installed. 

The most attractive aspect about parapets is how easy they are to install. Any homeowner can add them on top of their existing roofing system or as part of new construction projects with ease if they’re willing to make sure they have enough room to install them.

Building a Parapet Roof

Parapet roofs can be built quickly and conveniently even by novice homeowners who aren’t experienced in building construction. The easiest way to build one is to find a contractor who specializes in parapets so they can help you design the roofing system that’s right for your home.

The materials needed will depend on what kind of parapet you want, but most require using lightweight yet sturdy materials like aluminum or stone that won’t cause too much weight on top of your ceiling without still providing added stability and protection from weather elements. There are many designs available for different kinds of homes, but this simple overview should help anyone understand how these structures work no matter what kind of house it’s being placed on.

Adding a Parapet Roof

You may want to build a parapet roof because you love the way they look or because it’s an improvement that makes sense for your home, but it can also be something done out of necessity. If you have extended wall sections leading from the top of your roof then water could leak in through cracks when rain runs down, so having these walls built will protect your interior as well as the exterior.

Parapets are usually placed at least a few inches from your home’s exterior walls. Because of this, you’ll have to make sure there is enough space between the two and carefully plan for expansion joints that can accommodate movement if need be. If you don’t leave enough room for expansion then water could leak in through cracks when rain runs down, or your roofing system could be damaged over time.

Parapets can also be added as a way to obtain extra square footage in any room of the house where you most need it. Adding these walls will often take up less space than adding columns and beams for support which makes them perfect for rooms like attics and basements where supporting structure would dominate the rest of the area if not properly planned out ahead of time. If you have enough space between your roof and ceiling then building an entirely new room on top is possible, but this should only be done by professionals to make sure everything is built correctly so cracks don’t appear in existing areas due to improper support.

Running a parapet roof along the side of any home’s exterior can make it look more impressive while also defending the entire thing from hail and other severe weather. The added support will protect your home even if it’s not in danger of being attacked by medieval invaders.

The extended walls created by parapet roof designs will still take the force of wind, rain, hail, and snow so they should always be installed to withstand these elements without caving in or suffering too much damage. Parapets are definitely a useful tool that every homeowner should consider adding no matter what kind of house they’re building on top of. It might seem like a lot at first but once you get the hang of them they won’t seem any different from other roofs and they’ll provide many benefits to enjoy for years to come.

Parapet Roof Maintenance Tips

If you want your parapets to last over time then it’s important that you take time to maintain and repair them whenever necessary. It is not too difficult of a job, especially if there isn’t any damage but keeping up with routine maintenance can save you lots of money on expensive repairs in the future. 

You won’t be able to do anything about hail, wind, or snow damage but inclement weather will still cause small cracks over time even without these serious conditions. A simple crack in your structure can extend into something larger so make sure you check for any signs of damage before moisture has a chance to build up inside because water trapped in walls can cause mold and mildew to grow quickly.   

When you get any cracks patched make sure you use a waterproof adhesive or sealant that will prevent water from seeping through the cracks later on if they open up again. If you’re looking for more information then it’s best to speak with someone who specializes in roofing repairs as it is an area of expertise.

If your parapet roof needs repair over time then seek out professional help so that your home won’t have problems with leaks when it rains or snow melts away in warmer months, which could lead to bigger issues down the road. There are plenty of options available for practically any homeowner even though they will need some maintenance friendliness just like every other type of roofing system.

What Are Parapet Roof Materials & Colors?

Although parapets can be made from a variety of materials, most designers pick an attractive brick or stone to use for this area of the structure because it matches the building’s wall and is guaranteed to last over time. It also has the added benefit of hiding damaged areas well if they cannot be patched properly. If you want a more modern style then metal works really well but since these are much less durable than stonework or bricks you will probably need to have them replaced sooner rather than later. Regardless of what material was used to build your walls and roofing systems, there should still be some type of waterproof sealant between layers so that moisture doesn’t make its way inside the walls and cause damage.

After the materials are installed then you can have them painted to match your house’s color scheme. There are many designs to choose from, including bold patterns like paisley or striped that are meant for exterior use only because these will quickly become ragged or faded if they are used indoors. Paisley is great for warmer climates since it has large but open spaces between colors while a solid uniform pattern works best in colder areas of the country so that moisture doesn’t pool on surfaces too easily even when temperatures drop below freezing levels

What About Pricing?

The price of a parapet or brick roof system depends on where you live, how big the structure is overall, and what type of materials were used during construction. You should consult with a developer or local roofer for more information about how much it will cost to install parapets on your home, as each project is unique and pricing will vary wildly.

Keep in mind that the larger the structure you’re planning to add them onto then the more expensive they usually are because labor costs go up when there’s lots of material involved. The best way to reduce these costs is by using classic materials like brick, stone , or metal so that you won’t have to make any major repairs over time even if you don’t get the job done right away.

Conclusion

The parapet roof is an attractive and functional way to extend the life of your home. Taking care of these roofs will require some maintenance, but they are worth it when you think about their potential benefits for a house’s longevity. Parapets give walls extra strength against wind, rain, hail and snow so that water doesn’t pool in cracks long term or cause mold inside the structure. If you’re looking for ways to save money on this project then consider using simple materials like brick or stone with waterproof sealant between layers before painting them to match your exterior color scheme because paisley patterns work better in warmer climates while solid colors are best if you live somewhere cold where there won’t be much melting during winter months.

10 Great Mattress Alternatives

Are you thinking of sleeping on a different surface other than your traditional mattress? There are many reasons for this, including back pain and the desire to eat in bed.

Traditional mattresses can be very uncomfortable if you have an allergy or sensitivity, especially when it comes to dust mites and chemicals like formaldehyde that is commonly found in most mattresses.

For those looking for a comfortable alternative to sleeping on your mattress, we recommend air beds instead of foam ones. Air beds provide more cushioning than foam alternatives while also being easier on your allergies and chemical sensitivities. They’re also easy to inflate and deflate as needed

1. Hammock

Hammocks are great for people who suffer from chronic back pain because they can help alleviate some of the discomfort associated with waking up. They’re also a lot less expensive than mattresses, and much lighter to carry around so it’s easier when you need to bring your bedding on camping trips or go visit relatives in other cities

Pros

  • Hammocks are one of the cheapest options that you can find, which means they’re perfect for those who want to sleep on a more comfortable surface but don’t have a lot of money to spend on it.
  • Hammocks are also much lighter than typical mattresses, so it’s easy to bring them with you when you go camping or visiting relatives in other cities
  • Hammocks can be very comfortable for those who suffer from chronic back pain because they provide gentle support without putting pressure on your spine and joints. You’ll wake up feeling refreshed

Cons

  • Hammocks can be uncomfortable for people who don’t have chronic back problems because they are bouncy and tend to move when you’re trying to sleep on them
  • It is difficult to find a hammock that fits two people if one of them is significantly larger than the other.
  • Hammocks can’t take the place of mattresses for people with allergies

2. Air beds

Much like traditional mattresses, air beds provide you with a lot of comfort while you sleep. It is recommended, however, that you buy a thicker mat if you are looking more for cushioning than just something thin and comfortable to lay on. They are also very easy to inflate and deflate as needed

Pros

  • Air beds are much cheaper than traditional mattresses for those who don’t want to spend a lot of money on something they will use every night.
  • You can roll off of one of these mats, which is great for people who have mobility issues or those with children who tend to move around at night when they sleep
  • Air beds come in many different sizes, from twin all the way up to queen, so you can easily find the right fit for your home and sleeping needs.
  • If you get a thicker mat, it provides some additional cushioning that helps you relax more

Cons

  • You do need an air pump if you’re going to use this type of bed. They aren’t too expensive but can add up over time if you’re constantly inflating and deflating your bed.
  • Air beds are not comfortable for those who suffer from back pain or other ailments because they don’t provide a lot of support.
  • They can be a little bit cold, especially if you sleep without sheets

3. Water Beds

Water beds have been around for a long time and they aren’t going away any time soon They provide some serious cushioning that is hard to find in other air mattress models, which makes them more comfortable than the standard thin option. This is perfect for those who like their mattresses soft You also won’t need to worry about rolling off of this type of bed during the night For people with arthritis or other joint issues, water beds are a great option that relieves some of the pain associated with losing sleep.

Pros

  • Water beds are much more comfortable than most other mattress types because they provide you with so much cushioning. Those who like softer mattresses are going to love this alternative.
  • They also don’t deflate while you sleep which prevents your bed from getting flat during the night when it is under pressure. If you wake up in the morning and feel rested, then you know this bed keeps its shape 
  • It’s also easier on people who stay out of their beds at night because their joints aren’t being put under as much stress as they would be if sleeping on a traditional mattress.

Cons 

  • Water beds can leak or spring a leak, which isn’t fun. Make sure you ensure the water bed you buy is well made and doesn’t have problems with leaking
  • You won’t be able to sleep on your back in a water bed as they are. uncomfortable for people who like to sleep in that position. Some people also experience back pain when they try to sleep on one of these beds.

4. Visco Foam Mattresses

Visco foam mattresses are another option for those who want something soft but don’t expect it to behave like a traditional mattress. Typically, these types of foam only come in queen size, so if you have multiple children or other individuals sleeping in your home, it’s better for just one person to use these beds. They are also hard to move around the house if needed, but they do provide you with a lot of support and comfort These mattresses are designed for people who want to sleep in different positions throughout the night without experiencing back pain or discomfort.

Pros

  • Visco foam mattresses provide you with a great deal of comfort throughout the night. This type of mattress is perfect for those who like soft surfaces that envelop them as they lay down. 
  • You’ll have less pressure on your joints while sleeping in this bed, which can help relieve back and joint pain 
  • You will also be able to change positions throughout the night without feeling uncomfortable because Visco foam is made out of material that helps absorb shock and movement while you sleep.
  • The great thing about Visco foam is that it provides you with good support both while lying down and sitting up, so if you suffer from back pain, this mattress can really help
  • Visco foam mattresses are usually quite firm, but they do provide a little bit of giving when sleeping on them. You’ll be able to feel the material beneath your body without feeling too much pressure from the bed itself.

Cons 

  • If you’re not careful, these beds can become hot in warm rooms because they don’t breathe easily. It’s important to keep them in well-ventilated areas.
  • You need to make sure you use these mattresses correctly or else they won’t be as comfortable as possible for you. You shouldn’t sleep on them for more than eight hours per night or else you will probably find that your joints start hurting because your body isn’t getting the rest it needs.

5. Futon Beds

Futon beds act like traditional mattresses but they can also be folded out into a couch for lounging on.

A lot of people like to use these mattresses when they have guests who want to spend the night, and they can then fold them back up and store them away after their guests leave Futon beds are designed so that they don’t get compressed easily, which means your mattress will stay at the same height as it was when you bought it even after years of being used. You’ll feel just as comfortable sleeping on this bed now as you did twenty years ago.

Pros 

  • If you’re short on space, futon beds are one of the best options out there. You can either store them away when not in use or you can keep them open as a couch for extra seating in your living room.
  • Futon beds are designed to hold up to the wear and tear that they’ll go through over several years, so you won’t ever have to worry about replacing them. 
  • Many people who buy futons also buy memory foam mattresses to go with them because they want something soft but also supportive. 
  • These types of mattresses usually cost less than $100,  and you should be able to find one that fits your sleeping needs without too much hassle.

Cons 

  • Futon frames aren’t known for being very comfortable, so if you want a bed like this to sleep on every night, it may not be the best option for you. 
  • You can purchase futon mattresses without frames, which will make your bed more comfortable but take up a lot of space.

6. Camping Mat

If you’re out enjoying nature, one of the best options for a comfortable night’s sleep is a camping mat These mats are designed to be used outdoors as they help protect your sleeping bags from becoming dirty. They also provide you with some cushioning that your sleeping bag isn’t going to give you naturally.

Pros 

  • Camping mats are very inexpensive, and since most of them fold up easily, you can store them when not in use without taking up too much space in your house. 
  • You can typically bring these along on vacation with ease, so if you plan on doing a lot of camping this year, it’s definitely something to look into.
  • Camping mats provide great support while lying down, and many of them have extra pockets where you can store your important things. 
  • You don’t have to worry about rolling off of your mat while you sleep either because it’s usually stitched into the ground so that doesn’t happen

Cons 

  • Not all camping mats are going to be comfortable. If you find one that is, great However, most of these mattresses are known for being thin and they may make you feel a little bit like you’re sleeping on the ground even if that isn’t exactly true. 
  • You also need to be careful when using them in areas where there may not be enough grass or dirt beneath them.

7. Water Beds

Water beds aren’t actually made out of the water as many people believe, but they do provide some level of cushioning that you won’t get with a regular mattress. Waterbeds can also be very comfortable if you know how to use them correctly

Pros

  • A lot of people find water beds to be very relaxing, and they’re great for people who are looking for something that’s more like a bed than a traditional air mattress would be.
  • People who experience pain in their spine while they sleep will benefit from the support that this type of mattress provides, too.
  • Some water beds have built-in massage systems so that you can feel even better when you go to sleep each night. They usually operate on timers so that they’ll turn off automatically after an hour or two, but some models allow users to control them manually as well. This is nice if you have a particularly sore area that needs some extra support

Cons

  • Since water beds are known for being thick, they can be difficult to store if you don’t have a place where they can be set up all the time.
  • If you want to get rid of your water bed, it’s also going to take more effort than simply throwing away a regular mattress. However, this effort could potentially pay off in the comfort that you feel while sleeping on your new bed

8. Air Mattress

Air mattresses are great options for camping or for people who need to bring their mattresses with them when they’re moving into a new place. They’re not going to be as comfortable as some of the other types of beds that we’ve mentioned, but they will get the job done when it comes to providing you with a supportive surface while you sleep

Pros

  • Normal mattresses can take up a lot of space, but you won’t have to worry about that with an inflatable one.
  • Some models even come with their own pump so that you don’t have to carry around an extra one in your car or bring along something that will plug into the wall
  • If you need a new mattress quickly, purchasing an air mattress is much faster than ordering and waiting for a more traditional one to show up at your house.
  • It’s also going to be much easier to find a place where this type of bed has been stored since it doesn’t take up very much space. This makes them wonderful options if you move a lot.

Cons

  • Air mattresses are not very comfortable, especially when compared to memory foam mattresses that have been designed to deliver the best sleep possible. If you’re used to sleeping on a regular mattress and you want something similar, it’s going to be tough for an air bed to match up.
  • You also need a pump in order for these beds to work properly, and sometimes they can run out of air even though there is still space available inside of them.
  • It might take some time before you get used to sleeping with less support than usual

9. Sleeping Bag

Sleeping bags are going to be more comfortable than sleeping in the great outdoors, and you don’t necessarily need to have a traditional bed if you’re camping for several nights. However, your bag is not going to provide quite as much support as other options that we’ve mentioned so far. If you want something that’s easy to store, this might be the right way to go

Pros

  • Some models allow you to adjust the level of firmness based on where it is that you’re sleeping. For example, if you’re camping in a place with the soft ground beneath you, it will feel like your mattress is much softer so that you can sleep better
  • You won’t really need an extra pump for these mattresses, either. They’ll be easy to store if you don’t have the space for something bulkier, and they won’t take up much room in your vehicle if you want to travel with them

Cons

  • Some models are better than others, but sleeping bags aren’t known for being especially comfortable.
  • This is not an option that we would recommend if you’re struggling with back pain or if you need a lot of support while you sleep.

10. Japanese Futon or Shikibuton

Japanese futons and shikibutons are thinner than some of the other mattresses that we’ve mentioned, but if you have a bad back or shoulder pain they can be quite comfortable. These beds may also work well for people who want to save money

Pros

  • If you shop carefully, you’ll find some of these models for as low as $100. It’s hard to find comforters for that price
  • You’ll have another option if your partner snores and you’re tired of hearing it at night. Since this is a thin mattress, you don’t have to worry about them rolling off of it

Cons

  • Some people don’t like thinner mattresses because they feel like the bed isn’t providing them with enough support while they sleep. If you’re used to sleeping on a traditional mattress, it might be tough to adjust
  • You’ll need to put some effort into cleaning and maintaining these beds since they don’t come with covers or sheets. That can make it more difficult for you to keep your bed clean

Don’t Forget About Mattress Protectors

Once you’ve selected one that is going to work well in your home, we suggest purchasing a mattress protector before creating too much of an investment in this type of bed They will help protect against stains and spills, and they make it easier to keep your bed clean.

We like the SleepZilla mattress protector because it’s waterproof, so oils from foods or drinks won’t work their way through. It also comes with an invisible zipper, ensuring that you don’t have to worry about dealing with a big hole when making an accidental tear in the cover. The memory foam inside of this one is hypoallergenic, too, so you shouldn’t have any trouble sleeping on it if you need extra support for your back or shoulder areas.

We hope that our reviews have helped you learn a little bit more about the different options that are available for those who want something other than a memory foam mattress.

19 Reliable Alternatives to Sandbags for Flooding

Sandbags are heavy, expensive, and don’t always work. 

You need to protect your home from flooding but you’re worried about the cost of sandbags. 

There are many other alternatives to sandbags that can help you save money and time, while also providing a better solution for protecting your home or business from floods. Here’s a list of some reliable flood protection options you might want to consider before buying sandbags.

1. Transportable Flood Fence Barriers

One of the most effective ways to prevent flooding is by purchasing transportable flood barrier fences. These are only as large as businesses or homes need them to be, so you don’t have to worry about them taking up too much room. You can also install these barriers faster than sandbags and save some money on the installation fees.

2. Floor Protection Panels

Floor protection panels are mesh sheets that cover the floors of homes and other buildings. They help keep floodwater out while also protecting your flooring from damage. You can use these to make sure that whether there is heavy rain or a storm, your home doesn’t suffer any water damage.

3. Silt Fence Water Bags

Silt fence water bags attach to silt fence fabric, but they have an inflatable bladder instead of sand inside them. This helps to ensure there’s less weight available for the floodwater to push around than there would be if you were using regular sandbags. 

4. Floodwall Panels

Floodwall panels are similar to transportable flood fences in that you’ll only need as many as you need, so it’s easier to save money on these than it is with sandbags. These panels are ideal for keeping the floodwater away from your home or business for years while also providing more protection against different types of water damage.

5. Retractable Flood Wall Bollards

Retractable flood wall bollards are one of the most stylish solutions to flooding concerns that people have because they come in many different colors and styles that allow them to fit in with any type of property or decor. They’re also quite easy to install, ensuring you can keep your home protected even when there’s a lot going on around you. You’ll want to make sure you have enough retraction capability available if you have much distance between your home and the floodwater.

6. Flood-Resistant Landscaping

Even if you take every precaution you can to prevent flooding, it’s possible you’ll experience some water damage at some point in your life. If this happens, then it’s essential that you have landscaping that is resistant to flooding in place around your home or business. Plants with deep roots are far more effective than higher growing plants when there are high winds and torrential rains. You can also use new plant types on your landscape so that they’re less likely to suffer from damage related to wetness while still looking good no matter what type of weather you’re dealing with. You may even want to replace old trees on your property with new ones instead of trying to save them.

7. Flood Doors

Flood doors are an essential part of any flood protection system; however, it’s hard to find the right kind for your property because they come in so many different styles and types. Some protect the main entry point into your home while others have the ability to cover multiple doorways within the space or building you’re trying to protect. If you’re not sure which type will work best with your property, then consult a specialist that can tell you what will help you keep flooding away from your home.

8. Infrared Grade Sensors

These sensors detect when water levels get too high and automatically activate pumps and other systems that start moving water out of your basement or first floor before it has a chance to cause you any damage. If flooding is an ongoing problem, then these devices might save you a lot of money on repairs down the road. You can even use them as part of your overall flood prevention system to ensure that when something happens, it doesn’t get out of hand before you have a chance to solve the problem yourself or contact emergency services for help.

9. Plastic Poly Tube Flood Barrier

You can use a plastic poly tube flood barrier as a secondary line of defense when you’re keeping floodwater away from your home. This is one of the most cost-effective alternatives to sandbags because it doesn’t require any filling with heavy materials that could cause damage if they fall out of place during an earthquake, hurricane, or another type of disaster.

10. Mesh Barrier Bag Gravity Water Prevention System

If you have multiple homes or properties worth protecting on your property, then these gravity water prevention systems might be ideal for your needs. They attach to existing eavestroughs and are designed so that even if water flows over the top of them, it still gets directed into the sump where it’s pumped out rather than becoming trapped where you can’t move it.

11. Inflatable Dam

Inflatable dams work like a secondary floodwall that forms around the exterior of your home or business and directs water away from it instead of inward. They’re often used by farmers to direct excess water into their fields and away from homes so both properties stay protected. You can also use these options to divert additional water in case your other defenses aren’t able to hold up any longer.

12. Garbage Bags Filled with Dirt

If you’re dealing with a lot of floodwater and sandbags aren’t an option, then garbage bags filled with dirt might be the next best thing. It’s still not as good as having real flood protection in place, but it could help if you need to keep water out while waiting for better defenses to arrive.

13. Stormbags

Stormbags are a good alternative to sandbags for people who don’t want to keep using the same defense over and over again. They work without filling them with sand or water, which means they’re far easier to place in position and move around when necessary as they’re not so heavy. This also makes them a lot less likely to cause damage if something happens that knocks them out of place on your property during an earthquake or other type of disaster.

14. Absorbeez

Absorbeez are another good alternative to sandbags that comes with a lot of benefits. They’re lightweight, inexpensive, reusable, and easier to use than sandbags on any level. If you want an affordable solution that still works like it’s supposed to when you need it most, then this is probably the best option for your needs.

15. Sorbarix

The reason this flood barrier works so well is that it absorbs the shock of water hitting your home or business and directs it into a sump where you can get rid of it before it becomes trapped in an area you can’t do anything to help. This means that no matter how powerful a hurricane or other type of storm is when it hits, you shouldn’t have to worry about damage if you’re keeping floodwater away with these barriers.

16. Nylon Mesh Waterproofing

When you use nylon mesh waterproofing on your property, then water should be able to pass through without causing any problems down the road. It also serves as a secondary defense against flooding because even if some water manages to get past your first line of protection, then it should still stay within the property and not become trapped.

17. Hydrabarrier

These inflatable barriers work as a secondary line of defense to keep water away from your home when you can’t use sandbags. They’re highly effective against a wide array of disasters, including tsunamis and hurricanes as well as flooding triggered by earthquakes, sewer backups, or other issues that cause extensive shoreline erosion.

18. SpeedBlock

SpeedBlocks are another good option for keeping water away from your home during extreme flooding conditions because they’re lightweight and easy to move into position. This makes them ideal if it’s hard to install flood control systems in the concrete before foundations are poured on any level.

19. NoFloods Barriers

NoFloods barriers work like the secondary defense line of a moat to keep floodwater away from your structure so it can’t get trapped where you can’t do anything about it. When water flows over the top, then it gets directed into a sump pump area where you can siphon off as much of it as necessary before using the rest for irrigation purposes when possible.

Can You Paint Granite? – The Home Simple

Yes, it is possible to paint granite countertops.

When painting the granite in your home you will need a smooth surface, so make sure you rough up the area before moving onto the next step.

You will also want to use a primer and sealant in order to remove even any microscopic flaws from the surface of your counters or fireplace surround. You can find more information on primers and sealants here.

The Prep

To prep your countertops or fireplace surround to paint, you will need to sand the area, make sure you are using a high-quality builder’s sandpaper.

The type of sandpaper that you use is important because it will determine how well your countertop or surround granite paint job holds up and also what color scheme you can choose for your new countertops or surround.

For an exterior application, you can use a lower grade of sandpaper, but for an interior application, it is important to make sure you are using the right quality.

Priming

You will want to apply a primer to the countertop or surround before you paint.

The reason that you will want to install a primer is that it helps fill in the holes and cracks in your granite and also creates a smooth surface which will hopefully prevent the paint from chipping off or peeling.

You can find a lot of different kinds of primers, but what you choose is up to you as long as it does not have silicone or acrylic in it.

Regardless of which primer you use make sure that the area is completely dry before applying your protective finish. You may want to apply a second coat of primer after the first one has dried.

You need to allow 24 hours for your primer to dry completely before moving onto the next step.

The Sandpaper

For your project, you want to use 220-240 grit sandpaper because it will give you good results that will last over time. Also do not forget to clean your granite before painting it, you need to remove any dust and dirt from your granite.

If you are painting the surround of your fireplace, you want to try to get into all the crevices because it will still be visible even after the paint job is done.

The Sealer

Once your granite has been prepped, you will want to seal it to protect it.

The granite will be able to take paint, but if you do not seal the granite first you could run into problems down the road with mold and mildew because moisture is drawn into the cracks of your granite from humidity in the air.

The sealer that you use for this job needs to have a good drying time because this will make sure the paint job lasts longer.

You can use any of the products you would use for a countertop and they will work well. But, if you are looking to save time and money, then using a granite sealer is your answer.

Painting

Once your granite is prepped and sealed, you want to start painting it. For the paint that you use, you want to select an oil-based primer with a satin finish and then use semi-gloss paint over the primer.

If your painted granite is going to be used for an interior application, make sure the paint you chose has good adhesion characteristics.

The clean-up of the paint job is easy because the primer and paint are all oil-based.

Once you have finished painting your granite, make sure you let it dry for at least 24 hours before using it or putting items back onto your counters.

Before placing items onto your countertops, make sure to check for any loose paint that may have fallen onto your counters when you were painting.

Make sure to seal your granite before using it and make sure you are not placing any items that may scratch the surface of the granite.

Take Your Time

You will definitely want to take your time when painting the granite in your home or business.  The countertops or surrounds in your house are most likely a focal point and will be one of the first things that people notice when they walk into your home, so you want to make sure it looks good.

If you take your time with the preparation work, painting process, and clean up then the granite will look great for years and will hold up well when you are done.

Making sure that you are doing all of the work yourself will save you money because then there is no need for hiring a professional to do it for you.  You can find everything you need at the local hardware store and they have a wide selection available.

What kind of paint can you use on granite?

There are many kinds of paints that can be used on granite. You can find most of them at your local hardware store and if you want to use something different than what they have then you can also find it online or at a specialty paint store.

You want to make sure the finish is right before putting any type of paint on your granite. Many types of paints can scratch easily, so if you are planning on placing anything on your counters then the paint may need a low gloss finish.

If you are planning to have granite in your kitchen then there is nothing better than using an oil-based primer and paint because it will give you what you want right out of the gate. To seal it, you will want to put on two coats of satin sealer.

This type of paint and primer combination is made for granite and will give you superior results for years. This is the best way to go if you are looking to go the extra mile for your home or business.

If this is not an option then you can always use a latex paint which is a much cheaper option. But, you want to make sure that you get the right kind of latex paint for your granite countertop so it will look good and last.

Using latex paint on your granite counters is fine if you are planning to keep things simple with what you place on the countertops.  You will want to make sure that you use a low gloss paint and primer combination and then put on 2 coats of semi-gloss over the primer.

Once it is all done, you will have great-looking granite countertops for years to come.

If you are planning on using your granite counters in the kitchen then go with an oil-based paint and primer combination. This is the best way to go if you are planning on using granite as your main countertops.

Conclusion

In this article, we’ve shared some of the best tips and tricks for painting your own granite countertops. Painting a surface like granite can be daunting because it’s so slippery with all that water-based sealer on it!  But we hope the information here has made your project a little easier.

18 Different Types of Scissors

When it comes to cutting, scissors are one of the most important tools in your arsenal.

But with so many different types available, how do you know which type is best for what you need?

The different types of scissors may be used in a number of different fields, but they are all designed for specific use and purpose. If you want to start using these tools, then it is essential that you understand each type’s characteristics so that you can pick the right one for your needs at any given time.

Sewing Scissors

Sewing scissors, also referred to as ‘dressmaker’s shears’ are specifically designed for cutting fabric.

They will have the sharpest of blades and light but sturdy handles that allow you to maneuver between the tight and carefully placed stitches in your fabrics. Most sewing scissors will feature pointed tips so that you can easily cut out patterns and shapes from paper. They are also specially made to have a notch at the end of the blade to help you turn corners, which is essential for cutting fabric but not so necessary when dealing with cardboard or paper.

These snipping tools are distinguished by their distinct, sharp, and long blade, which makes them the perfect tool for cutting fabric.

They also feature a heavy, sturdy handle that is designed to provide the user with maximum grip and control when cutting, which makes them more comfortable than other types of scissors.

1. Dressmaker’s Shears
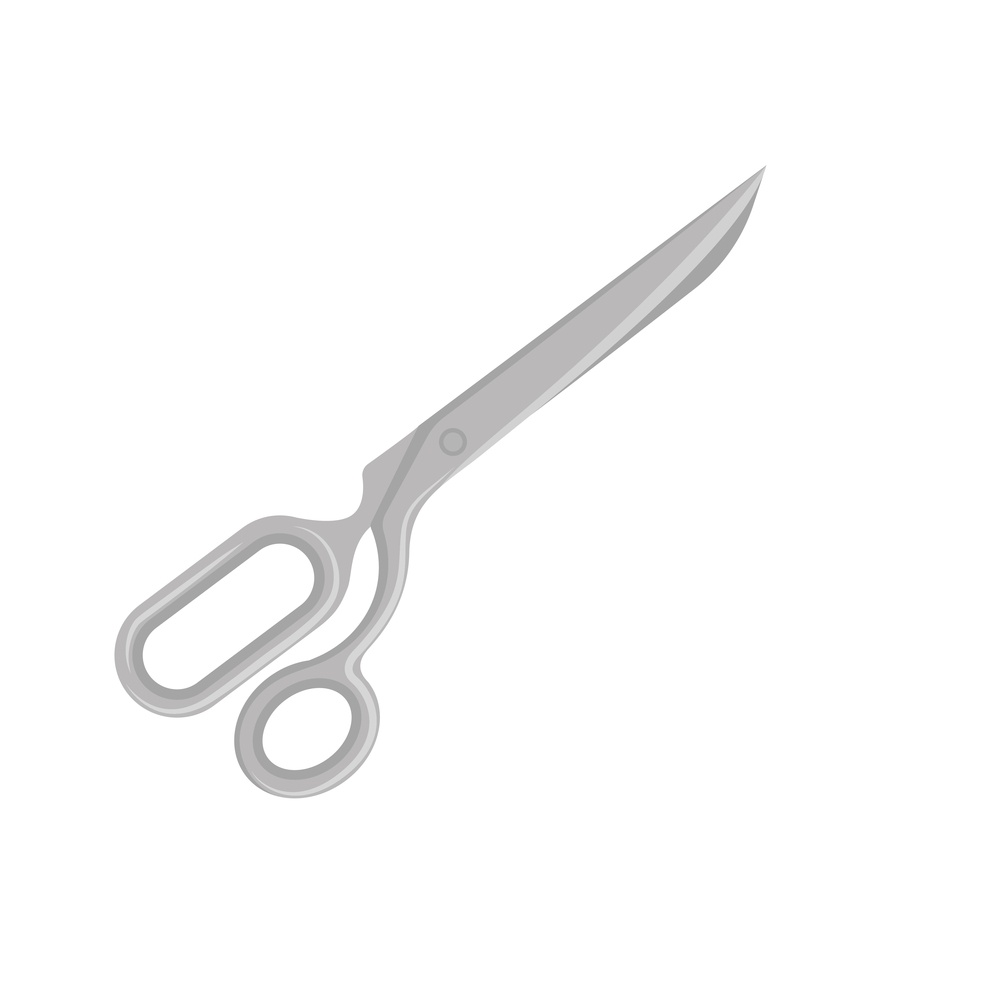
Dressmaker’s shears are made for sewing or fabric-related tasks such as cutting out patterns from paper and snipping loose threads on your clothes. They are made to be comfortable and easy to use. They are great for beginners because they are easier to maneuver than other kinds of scissors.

2. Tailor’s Scissors

Tailor’s shears have blades that feature a sharp edge but this does not mean that you may use them on paper or cardboard.

They are made specifically for use on fabrics and will come with a sharp, narrow blade that allows you to easily cut through even the finest threads. You should avoid using these scissors on hard materials such as paper or cardboard because it can damage the blades.

If you want to make clothes for yourself or your kids, then tailor’s shears are perfect for you.

These scissors have long handles that allow you to push down on the fabric steadily and cut through it with ease. They will also have sharp blades for cutting threads, which is important if you want your sewing ends to be free from fraying or tangled lumps. These snips feature pointed tips so that they can be used to cut out shapes and patterns easily.

3. Pinking Shears
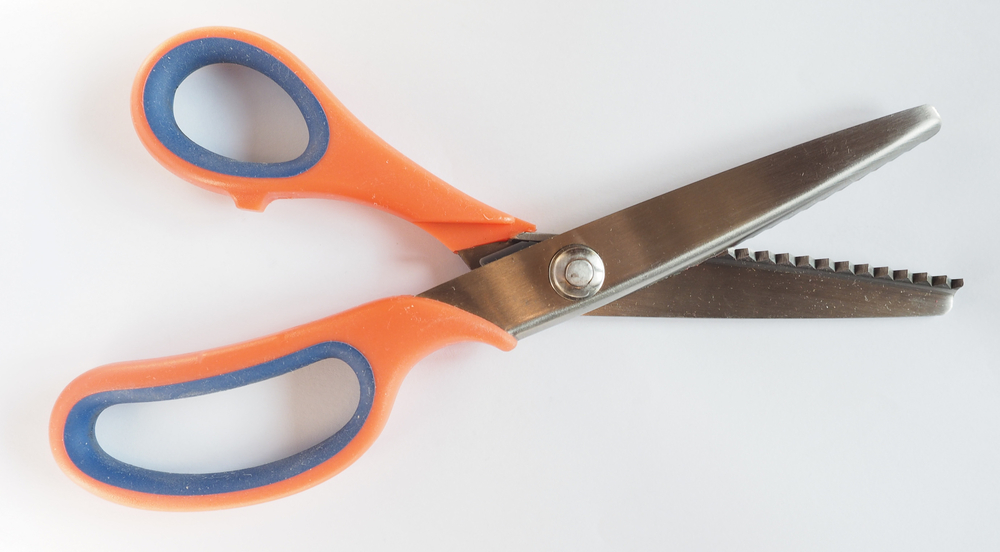
Pinking shears are the main tools used by tailors and stylists to cut fabric.

They come with an extremely sharp blade that features a zig-zag cutting edge that allows you to make a style called pinked or pinking without fraying in the material. The zig-zag pattern will keep the edges of your fabric from unraveling or fraying as quickly and easily.

These shears are also easy to clean because they do not feature any moving parts, which makes them safer when dealing with fabrics that may contain small particles. Pinking shears can be used to trim materials such as cotton, satin, or silk.

4. Buttonhole Scissors

Buttonhole scissors are used to cut straight lines in clothes or materials, particularly those that will become buttonholes.

They may come with a blade on one side of the scissors and a hole-punching device on the other. The blades can be adjusted to make long cuts, which is perfect for creating anything from buttonholes to large cuts in fabrics.

The blades of these snips are either straight or curved, as buttonholes can be long and short depending on their use. They will come with sharp edges that allow you to cut easily through your chosen materials and a hole-punch device for punching holes in the middle of the buttonhole cutouts. These scissors can be used to cut both hard and soft materials that will not be damaged by the hole punch or blades.

5. Appliqué Scissors
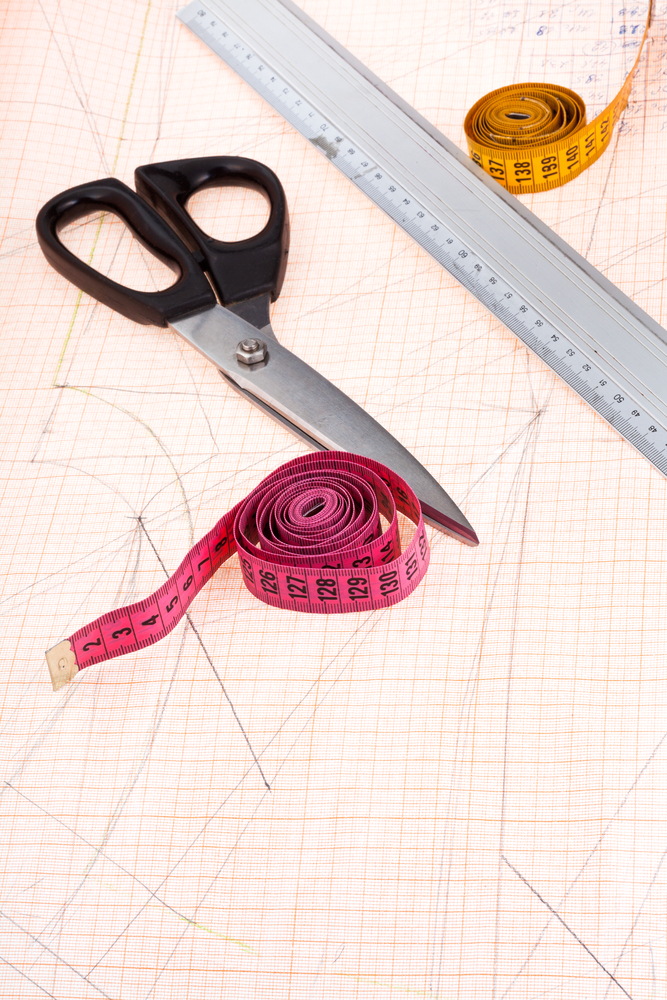
Appliqué scissors are used to finish and decorate your materials through the stitching.

They are similar to tailoring shears but they come with an extended blade that can be used for a variety of tasks, such as cutting out pieces or manipulating fabrics more than regular scissors can handle. They will have long blades with sharp edges that make cutting through your materials easier. They may feature a hole-punching device that can be used to cut out pieces for decorative stitching using embroidery floss or thread.

These scissors are specially designed for sewing but they can also be used as regular scissors if you don’t sew regularly and need something more versatile than fabric shears.

6. Embroidery scissors

Embroidery scissors are smaller than regular fabric shears and feature extremely sharp blades. They may come with a small hole-punch tool at one end of the handle. These snips can be used to cut out stitches on your material as well as decorative stitches that you want to add to your clothes or other items.

They are great for beginners and people who need to do a lot of fine work with their hands.

7. Crafting Scissors
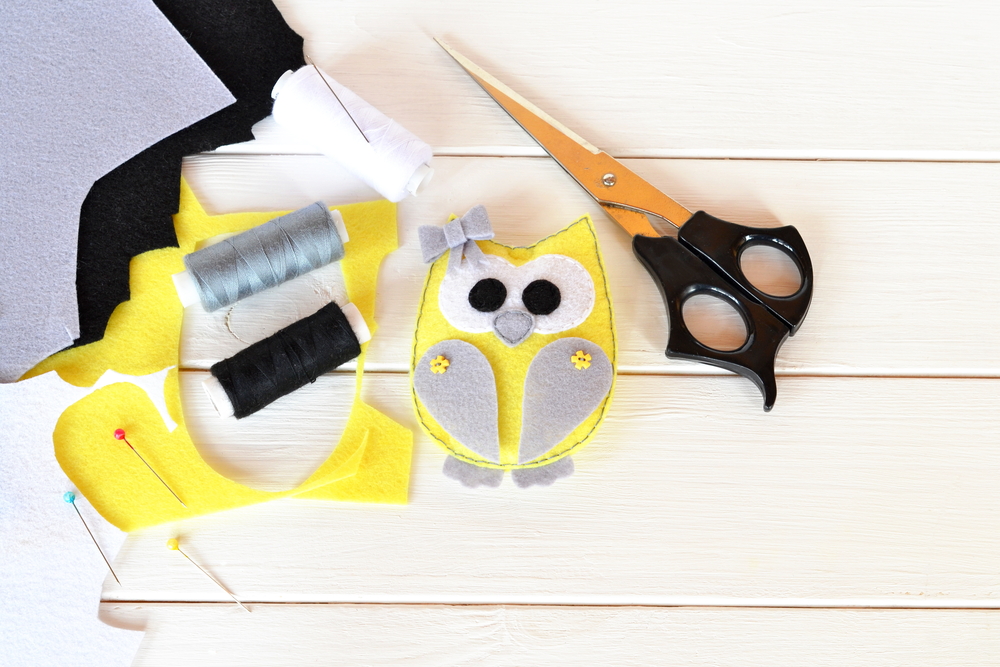
Craft scissors can easily cut through materials and features blades that are as sharp as regular sewing snips.

They may come with a variety of components in one set, such as cutting, sanding, carving, or embroidery options for your projects. They can be used to cut both paper and cardboard so they are perfect for crafters or anyone who may need to open boxes or packages during a home project.

They can also be used for cutting through the foam, wood, and plastic materials so they are an essential part of your at-home projects.

8. Right and Left-Handed Scissors

When it comes to scissors, you will find that there are those designed for right-handed people and those made for lefties. Whatever you choose should depend on your personal preferences.

Left-handed people will have a harder time cutting or handling the materials with regular snips so it may be easier for them to use specialized ones in order to easily cut through their materials. Many left-handed people recommend using tailor’s shears, which are designed to be used with your non-dominant hand.

9. Ambidextrous scissors

Alternatively, you may also want to try ambidextrous scissors that can be used with both hands.

These snips are designed for people who have trouble handling regular scissors and wish to make their cutting more efficient and easier. They may come with a variety of components, such as sanding pads or carving tools for your own convenience when creating your own projects.

Some scissors can even be used with both hands and come with combs on top of the handles that allow you to control your materials while cutting them open. They will have durable blades as well as other components made for both right-handed and left-handed people, so they are versatile enough to handle a wide range of household tasks.

Gardening scissors

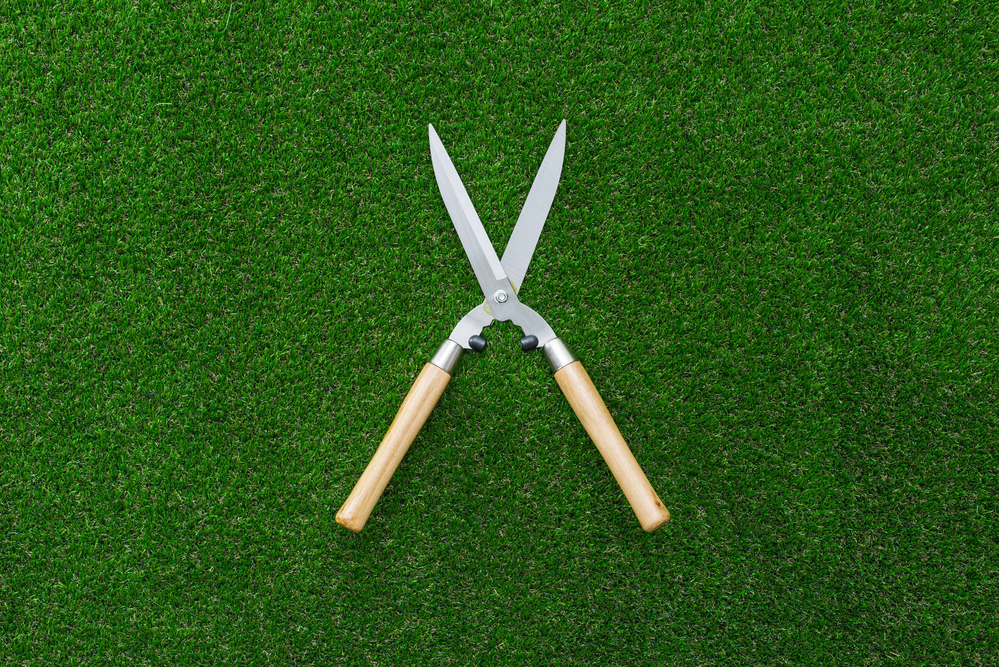
10. Hedge Trimmers

Hedge trimmers are specially designed to trim hedges and help you keep plants neat and well-trimmed.

Some models come with a dual-action cutting system that allows you to make quick and clean cuts through your materials. The blades feature sharp edges that allow you to cut through thick stems without much effort. They can also be used to shape shrubs and trim bushes in your yard.

These snips are not meant for cutting through thick logs or other heavy materials so they should only be used on plants that need to be trimmed. You can find them with serrated blades or circular ones depending on your needs when trimming plants at home.

They may also feature multiple or halved heads to help you get the job done faster and with more precision.

The size of the blades can also vary according to your preferences when using these snips, so make sure that you choose a pair that suits your needs. They are great for people who have plenty of plants at home or someone who needs to take care of small shrubs, bushes, and hedges in their yard.

11. Pruning Shears
Pruning shears are designed to cut through thick stems without much effort. They feature large handles that can be used by left or right-handed people to help you control the direction of your cuts with greater ease. You will find these snips in a variety of sizes and with different blade models, depending on your needs when working on various projects. Some of them can be used to cut through small branches or thick stems while others are designed for both cuts.

These snips feature blades that have sharp edges so you can easily make clean and precise cuts through lots of material at home. They may come with rubber-coated handles that help you better control the movements when cutting.

The blades are also highly durable so they can withstand regular use and abuse during your projects at home. Make sure to choose snips that feature blades made for heavy-duty purposes so you can easily cut through branches or thick stems without any issues. These snips are great for people who have lots of plants or need to take care of their yard at home.

12. Grass Shears

Grass shears are similar to pruning shears but they can be used on plants with longer stems.

They have shorter blades than other types of scissors so you can easily cut through the grass without any trouble. However, the blades may not be sharp enough to trim thicker or tougher materials like branches and stalks found in shrubs.

They are a great option for people who have house plants that need to be trimmed or someone who maintains their yard on a regular basis. They may come with sharp blades or serrated edges to help you make clean cuts through your materials, helping you keep them in good shape. They also feature large handles so they can be used by both right and left-handed people.

Grass shears are easy to use for anyone regardless of their experience level with cutting tools. They have short handles and lightweight blades that make them a great accessory for pruning plants on your windowsill or working in your yard on the weekends.

Grooming scissors

13. Hair Cutting Shears

Hair-cutting shears are available in both straight and curved models. They are specially designed to give you a smooth clipping and can be easily used on long hair without pulling or damaging your locks since the blades have rounded tips.

You will also find these snips grooved on the inside so they can catch more hair, allowing you to cut it off in one go.

Haircutting shears are designed for home use and can be used by both kids and adults. However, you should always find a professional to cut your hair if you have not done it before or do not feel comfortable using these tools.

They usually come with thin blades that make them lightweight so they will not weigh down your hands when using them. However, their thin blades can also be a downside since they may not provide you with the control you need to cut through large amounts of hair in one go.

Haircutting shears are easy to use but it’s best if you practice first on some thick clippings before using them on your long locks. Make sure to choose a pair that includes adjustable blades so you can easily trim your hair at regular intervals without damaging it in the process.

14. Hair Clippers
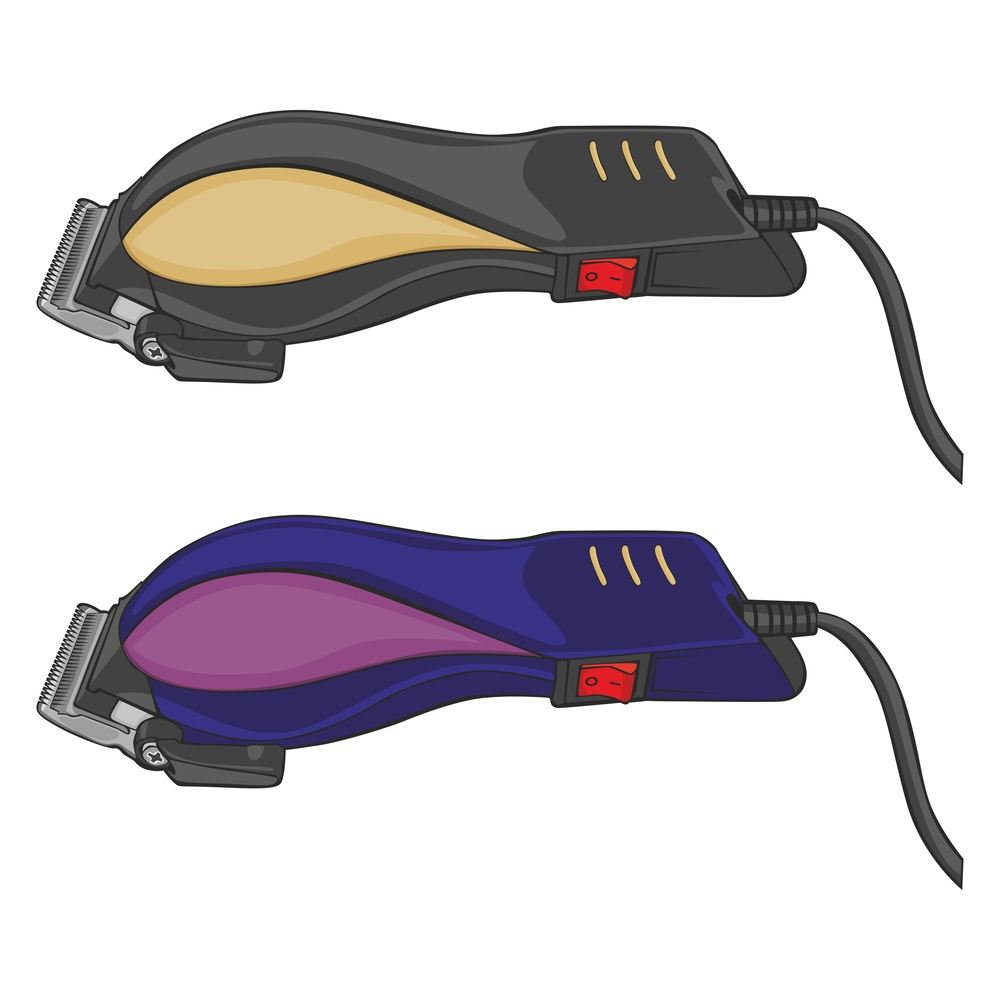
Hair clippers are used to give you a perfectly even haircut every time. You will find them in various blade sizes and with different attachments that make them versatile tools for hair cutting.

You can use most of these clippers at home without having to worry about learning how to use them. They usually have adjustable blades that allow you to choose the length of your hair. Some models feature blades that can be pulled or pushed back to help you achieve the desired length with just a few passes.

It’s easy to use these clippers because all you need to do is place them at the base of your head and go through combing motions and then push down on the clipper to get the desired length. They are ideal for people who want to achieve a short hairstyle without spending hours at the barbershop.

However, you should try these clippers first before using them so you can get an idea of how they work and what kind of results they will give you. You may also need someone to help guide it through your head so you avoid cutting off too much hair if this is your first time using it.

You should also learn how to clean them properly once you are through using them, especially if the clippers come with adjustable parts like combs or blades. It is best if they can be cleaned in warm water and then wiped dry with a towel afterward, but you should check the manufacturer’s manual for specific instructions.

Medical Scissors

15. Bandage Scissors

Bandage scissors are specially designed to help you cut off bandages on injured areas. They usually come with thin blades that can easily go between the material and your skin without causing any harm or pain in the process.

These scissors have short handles so they will not get in the way while you are trying to remove a bandage from an injury. You can easily hold these scissors with one hand or if you prefer two so you can get a better grip and cut through thicker bandages.

Bandage scissors are easy to use, but they should only be used for accident-related tasks otherwise they can do more harm than good. Make sure to check the instructions that come with your set of scissors to ensure they are made for the type of use you want it for.

16. Trauma Shears

Trauma shears are used to cut through clothing and material that is stuck on a victim’s skin. They have short and wide blades that allow you to completely remove the item without causing any harm or trauma to the area in question.

They usually come with blunt tips so they will not cause more damage as you try to pry something off the skin. Trauma shears can easily cut through clothing but you should practice on some fabric and scraps first before using them on a victim to avoid harming them in the process.

Trauma shears are not that difficult to use, especially if you know how to handle regular scissors in the past. However, it’s best if your hands are steady when you are using them so you can learn how they work before going to use it on an accident victim.

17. Suturing Scissors

Suturing scissors have a long handle that gives you enough leverage and control for delicate surgical procedures. They come with very sharp tips that allow you to easily make precise cuts without damaging the tissue or causing any harm.

If you are planning to use these scissors in a surgical procedure, make sure they are high quality because the wrong material could easily break during one of your procedures and cause more damage rather than help the victims.

These scissors come with a thin blade that is very sharp so you need to be careful while handling them and even more so if you plan to use them on accident victims or patients. All in all, suturing scissors are excellent tools that should not be taken lightly and only used by professionals who are trained in using these types of scissors.

18. Ophthalmic Scissors

Ophthalmic scissors are the type that has a very fine tip that is used for delicate eye procedures. Just like suturing scissors, these scissors come with sharp points and blades so you need to be careful how you handle them, especially if the blade is exposed.

Ophthalmic scissors are generally designed with long handles so you can easily reach difficult places without risking cutting yourself or the patient. These scissors are also used for laying fine layers of tissue or fabric.

Conclusion

Scissors are such an important household tool, and the first thing you should keep in mind when choosing them is to consider your personal needs. Are you looking for a pair of durable kitchen scissors that can cut through meat with ease? Or do you want a pair of professional cutting scissors that can cut through fabric with ease?

The type of scissors you choose will depend on what your needs are, and once you have identified them, it becomes much easier to choose the right pair in terms of size, shape, quality, and material. It is also important to realize that different materials are used in the manufacturing of scissors. If you have been using a plastic scissors, it might be a good time to upgrade and try something new.

Your fingers may not appreciate it at first, but as long as your scissors are sharp enough, they should make easy work out of mundane chores like cutting meat or fabric. This is why some people choose to buy high-quality scissors for everyday use and keep some different scissors for special occasions.

Hopefully, you now have a better understanding of the various types of scissors that are available on the market today. Each type has proven useful in one way or another, and if you do not need all the types we have listed here, there is no harm in sticking with one or two types.
Different Porch Light Colors (And What They Mean)

Ever wonder what color your porch light means? Whether we’re welcoming guests into our home or signaling safety in an area, colors are a powerful vocabulary for expression. In addition to affecting our mood in everyday situations, this is why choosing the right porch light color is so important.

In this article, you’ll learn about different meanings and symbols that come from porch light colors.

Porch Color Light Meaning 

Blue Porch Light Meaning

Choosing a blue porch light can mean many things depending on the situation and what you want to express. It can mean peace, freedom or autism awareness but each color holds a different feeling that we often associate with them in our everyday lives:

Blue is the most common porch light color meaning safety and calmness . Blue signifies security as well as peace. When people see an area under blue lights they automatically feel protected which explains why businesses use them for their storefronts or police departments use them to denote areas of protection.

It’s equally important to note that blue isn’t just used by law enforcement officers; it is also used heavily in hospitals where people go to recover from illnesses, injuries or accidents. Because of this, blue is considered a comforting color that symbolizes a state of well-being.

Blue lights are commonly used at sporting events because they are associated with positive feelings and a strong competitive spirit which can help boost a team’s energy levels during their games.

Blue lights aren’t just for sports; if you want to use this color symbol in your backyard for parties or at home, simply place outdoor string lights on trees or under eaves where it will shine down upon your property like a cover from above.

The good thing about blue porch light meaning is that it doesn’t have to be hidden behind closed doors; if you want to show your support for awareness of autism or any other condition, simply keep a blue light on at night.

The bad thing about blue porch light meaning is that it isn’t visible in the day; if you want people passing by to understand the awareness message behind this hue, make sure to stock up on green and white lights as well.

Green Porch Light Meaning

While blue symbolizes protection and calmness, green is often used to signify life , peace, harmony and good health . Green also signifies fertility as well as renewal which explains why businesses and companies use this color for their logo. In fact, Apple Computers made its brand easily recognizable with its green apple logo.

In religion, like Buddhism, green is used to signify that the practitioner is moving towards perfection .

Doctors often use green lights to denote areas of protection in hospitals and similarly, businesses often use these lights to denote a secure environment for their customers. This explains why you’ll see many banks using this color. Whether you own a business or want to keep your home safe, using green porch light meaning can be beneficial for both.

As we mentioned earlier, blue and green are complementary colors which means that they look good together so if you choose one and want some variety indoors, simply mix in white lights as well. Green woodsy outdoor lanterns will also give off a soothing atmosphere at night while adding additional light into your yard or garden during the day.

Determining your porch light color meaning may be tricky but it is possible if you take the time to think about why you’re using it and the features that this particular hue provides.

Red Porch Light Meaning

The most common use of red lights in our everyday lives is as a symbol of power or danger . You’ll see red lights used by construction crews to mark out areas where work is still in progress. Similarly, police officers often use red lights to denote when an area needs extra protecting.

If you want to choose red lights for safety reasons, ensure that your property has adequate fencing, surveillance equipment and also strong locks; since these hues are symbols of danger people will not just wander onto your property without first knowing what lies ahead.

You can use red lights however you want in your home; these lights are perfect for a night club or bar which is why many restaurants will choose this color to signify that it’s time to party!

If you want an even more exciting atmosphere at home, make sure to include red string outdoor lights during parties and other family get-togethers. Red can be seen as the “wild card” of colors so you never know what kind of fun awaits when you mix in some excitement with your second favorite hue.

Red is also used to symbolize strength , power and ambition . You may have noticed that most sports teams use this color for their jerseys and they’re not just trying to make themselves look good; studies have shown that people are more likely to win when wearing red clothing.

People who want to use their homes for business can also benefit from this color by adding a few red porch lights meaning if you’re using your home as a retail space or meeting room for seminars and workshops. Red is known as the color of love and it is no secret that we all love to get our hands on deals so use this hue for any festive sale in your house.

You can also find Christmas lights in red which symbolize both Santa Claus and the color of gifts under the tree . In addition, these hues are often used during weddings because they are associated with fire which signifies passion and romance . However, experts suggest that couples should avoid using red as the main color of their home since it can make them feel quite restless and even angry.

Red is also associated with blood which is why you’ll see hospitals often using these lights to show that there are medical staff present inside . Similarly, food establishments will use this color to signify that they have running water and sanitary conditions for customers. If you want to grab people’s attention with a memorable experience, adding some red porch light meaning in your house could really work for you.

Orange Porch Light Meaning

The first thing most people think about when they hear orange is Halloween but we tend to overlook the fact that not all pumpkins are bright orange . In fact, this hue is actually very versatile and there are no limitations on how you can use this color in your house.

If you’re looking for a friendly, happy addition to your home then orange is the way to go. Just be warned because while it may make kids feel optimistic and cheerful , adults could find that the hue makes them anxious . You should also avoid using orange outdoors since this color attracts termites which you definitely won’t want in your yard.

One of the more interesting uses of these lights is by people who are transitioning their homes from one climate to another; it has been proven that adding warm colors like red and orange during winter months helps with depression and feelings of coldness during this transitional period.

Yellow Porch Light Meaning

Yellow is another favorite outdoor light color but this shade is best used to enliven an outer wall or a centerpiece on your patio . You can also use it indoors for kitchens and family rooms if you want something cheerful that is still subtle.

However, many people believe that yellow is the happiest color in the world and given its playful quality; using it outdoors would be perfect during children’s activities like birthday parties or play dates. The interesting thing about these lights are that they don’t have to actually be yellow to signify joy since even shades of green will do just fine!

Yellow porch lights mean security ; not only for your house but also for our wallets since these hues create a sense of calmness which encourages us to stay longer at stores with products in this color. Stores have actually been exploiting the power of these lights for years by putting yellow signs outside to advise customers that there are discounts inside. If you want to add some brightness and energy to your home, then consider using yellow porch light meaning for a lively addition.

Purple Porch Light Meaning

Purple porch lighting can mean love or mystery . Based on its rich history, this color is usually used for weddings or quinceaneras because it symbolizes royalty and honor. You can also find these lights in spiritual places like churches that believe purple only comes from the heavens above.

Similar to orange, avoid using purple outdoors since most insects are known to be drawn towards this hue . Outside of homes, you’ll see these porch lights used in businesses but if you want to add some romance to your place then we recommend adding them indoors instead.

Blue and Green Porch Light Meaning (Combined)

When you combine blue and green porch light, you get turquoise which is one of the most powerful colors on earth. More than just an eye-catching hues, these lights actually affect our mental health . It has a calming effect and can even suppress feelings of depression and anxiety which is why you’ll see many hospitals using them for their waiting rooms .

Blue and green also have connotations to nature; think about water or plants which are vibrant shades of similar colors. As porch light meanings go, you really can’t do much better than this combination especially if you want people to feel secure in your place.

The Subconscious Effect of Colored Porch Lighting

Color is an important part of lighting to create a vibrant feel in any environment. However, we don’t only use it for aesthetic purposes because our brains have a subconscious reaction to these hues. Below, We have outlined the different colors of light and the mood they produce so you can choose appropriate lighting for your porch.

White

White is the color of purity, and you can see it in the variety of shades used by doctors and nurses for their scrubs. Since white is considered a clean color, some people also use it as home lighting to inspire a sense of hygiene. If you want your porch lights to reflect peace and harmony , then we recommend using darker versions like ivory or cream to create this effect.

Blue

Blue is also one of the hot porch light meanings due to its connection with nature. While bright blues are usually used in homes for accents, they also reflect a sense of hope or trust . If you want your guests to feel comfortable in your place, then this color can do just that because it symbolizes peace as well as tranquility and calmness.

Green

If you’re looking for an outdoor light meaning that promotes calmness , then green should be at the top of your list. Green is the most cheerful color on earth; psychologists have actually concluded that even people who don’t consider themselves as ‘green types” will still feel relaxed when they see this hue . This makes it great for waiting rooms since it gives the feeling that all will be well in the end.

Yellow

You’ll see a lot of yellow porch lights in stores because this is one of their main colors. It not only reflects warmness and happiness but also creates an eye-catching appeal for passersby to come inside such as using it on signs . If you want your guests to feel welcome , then consider adding a bit of yellow light to your entranceway or windows so people can see them from afar.

Pink

Pink is also one of the hot porch light meanings and you can see why by its connection with romance and femininity . This shade creates a warm, fuzzy feeling inside so if you want guests to have positive feelings about your place then we recommend using pink since it’s linked to amorous feelings.

Orange

If you still think that orange is just for Halloween then think again because this color means many wonderful things . From a communication standpoint, it reflects positivity as well as determination which makes the perfect choice if you want people to feel inspired or confident whenever they visit your place. If you still don’t like using this hue outside since insects are drawn towards it like bees, then choose deeper versions like pumpkin or burnt sienna for your porch lights.

Purple

Purple is a color that’s high in spirituality , and you can see why since this hue is often used for altars or religious purposes. It also reflects independence and has the power to stimulate thought so if you want your guests to be absorbed in their own thoughts, then adding purple porch lights will achieve this effect.

Direction of Light

Make sure you pay attention to the direction of your porch light, because it’s just as important as what color you choose. For instance, if you want to create an outdoor light meaning of welcoming then shining them downward will achieve this objective since it projects a sense of openness. However, when projecting the color green or yellow, having your lights pointed downwards won’t produce the best effect so make sure you point them towards the horizon instead .

Seasonality

When choosing what color means for porch lighting , then one thing to consider is seasonality. For instance, using orange in winter might be too eye-catching while pink is more appropriate during the spring and summertime. The same case goes with white and blue – if you use white in fall or winter it can also feel cold and unwelcoming but during spring time on a moonlight night, it can give a fresh, inviting feel.

Blue Whether in the human body or in nature, blues bring peacefulness with them so if you want your guests to feel at ease upon visiting your place then choose this color. It’s a great choice for anyone who wants a cozy atmosphere without feeling too hot because it creates an illusion of coolness and can be used for entranceways, doorsteps, or anywhere else that requires attention . If you want people to think positively about your home , then consider adding blue since it has been proven to make people relax their shoulders and face more towards the sky which is linked to understanding , imagination , and inspiration . It will also create greater amounts of happiness .

Quick Tips on Choosing the Right Porch Light 

Here are some tips for choosing the right porch light for your home.

  • Think about the seasonality of your porch light, like for example, in summer you may prefer orange while in winter, white and blue.
  • Consider the angle of light and if you want to create an inviting and welcoming feeling to your home or any space, then make sure your porch light is pointing downwards. This is best when projecting green or yellow lights.
  • Consider what color means to you and whether it has a spiritual meaning or not. Purple for example can be used outside as there are no bugs that like purple hues while other colors have different meanings.

Conclusion

Changing the color of your porch light is a simple choice that can have some deep psychological effects. It all depends on what mood you’re trying to create and how deeply you want it to affect you.

What Size Wire For 200 Amp Service Underground?

Installing a 200 amp service water ensures your home has enough amperage and voltage to power all of your home’s devices. 

But many places require you to get a permit before installing a service wire. And because of the risks of electrical shocks and fires, many people have to use a professional electrician to install your 200 amp service wire. It’s crucial to use the proper size of wire for your service wire. 

Keep reading to learn more about the proper size wire for your 200 amp service. We’ll also explain amperage and what amp you’ll need for your home.

What Is Amperage?

There are two types of measurements to define the strength of an electrical current-voltage and amperage. It’s important to understand these two measurements if you’re working with electricity. Mishandling electricity can lead to dangers such as electrical shock. 

Amperage is the measurement of the volume of electrons in an electrical current flow. Amps (short for amperage) are more dangerous than voltage, which measures the pressure that makes the electrons flow.

If this sounds confusing, think of it like this. If you have a flowing river, amperage will define how much water is in the river. And voltage would describe the river’s steepness – pitch. 

When a river has a low amperage and a high voltage, it would be small and flowing almost vertically, like a waterfall with a slight trickle. If a person comes into contact with this type of electrical current, it will give you a jolt, but it wouldn’t be harmful.

Now picture a very deep river with a lot of water. Although the current is moving slowly, you can still get pulled underwater and drown. So, if you come into contact with an electrical current with very high amps but very low voltage, you can be at risk of serious injury due to electrical shock. 

The chart shows the dangers of different amps by electrical shock.

  • 1 to 5 mA: Slight feeling of electrical shock that’s not painful
  • 6 to 30 mA: strong shock that’s painful and causes loss of muscle control
  • 50 to 150 mA: severe painful shock that can cause severe muscle reactions that can lead to respiratory arrest and potential death
  • 1,000 mA to 4,300 mA: stops the heart, causes nerve damage and high risk of death
  • 10,000 mA (10 amps): severe burns, cardiac arrest, and death

As you can see, placing a 200 amp service underground must be done with extreme caution to prevent the risk of serious injuries or death. 

Average Amp Range For Residences

The circuits in your household outlets supply 15 to 20 amps (15,000 to 20,000 mA). The more amps you have, the more power you have to use multiple devices simultaneously.

Standard homes have 100 amps. But for larger homes or homes with central electrical heating or air conditioning, you’ll need 150 to 200 amps.

Older homes may have the capacity of 80 amps, which is rarely enough to power a bunch of devices and a central heating and air conditioning system. 

What Size Wire For 200 Amp Service

Installing a 200 amp service requires the use of the correct wire gauge. And if you’re doing the installation yourself, you will have to get a permit first. Some locations may require you to hire a professional electrician to obtain the permit for you. Again, it’s best to check with your local building department for information.

For a 200 amp electrical service, the gauge you’ll need will depend on the type of wire used, the length of wiring, and the voltage drop. 

Copper wires use a #2/0 AWG (American Wire Gauge) copper wire. In contrast, 3″ conduit covering copper-clad or aluminum wires require #4/0 AWG. This chart shows standard wire sizes by amp and wire type.

Service (Amps) Copper (AWG) Aluminum/Copper-Clad Aluminum
100 4 2
110 3 1
125 2 1/0
150 1 2/0
175 1/0 3/0
200 2/0 4/0
225 3/0 250
250 4/0 300
300 250 350
350 350 500
400 400 600

When to Use Copper Wiring

Copper wiring is more popular because the material is more resistant to heat, and it doesn’t rust or oxidize if it gets wet. Although copper wires can be thinner, it’s also more expensive.

The number of feet of wire you’ll be running can also affect whether you’ll want to use copper, aluminum, or copper-clad aluminum. Copper is the better choice for long lengths due to better conductivity and lesser contraction.

When to Use Aluminum

Aluminum is another popular choice because of its affordability, flexibility, and it’s more lightweight. However, this material has a lower heat resistance and can rust when it’s wet, so it needs an antioxidant coating on the connection terminals.

Aluminum wires require a larger size gauge since it’s less conductive than copper. In addition, aluminum-clad in copper does not need the same antioxidant coating on the terminal ends.

Beware the Voltage Drop

And when you have to run the cable underground over long distances, you can experience voltage drop – when the circuit experiences a voltage loss. 

Voltage drop – impedance – listed as a % of the voltage total on the power source can cause your appliances and the other things powered by circuits to have minimal power. The standard reading for circuits in the breaker box should be 120. 

If a circuit reads less than 120, that breaker is experiencing a voltage drop. When you put too much load on a circuit, and it exceeds 80% voltage, you can experience a superfluous voltage drop. The NEC (National Electrical Code) recommends a maximum drop of 3% and keeping the total load to less than 80%.

Costs for 200 Amp Service

Pricing for installing a 200 amp service placed underground will vary by factors like location, material costs, and permits. How much work is necessary will also play a role in the prices.  

Most installations of 200 amp service require running the service wire, a meter base, conduit, and the electric panel to control the 200 amp service.

You can expect to pay between $1,600 and $6,100 for the total costs of installing the entire 200 amp system. The average median is around $3,700, based on the following:

  • Amp panel – $500 to $4,000 ($2,000 median)
  • Amp meter base – $100 to $650 ($450 median)
  • Service wire – $1,000 to $1,500 ($1,250 median)

How To Determine Your Electrical Amp Needs

To determine your needs regarding how much amperage your system will need, follow these steps. You may want to write these numbers down to manage your calculations. 

  1. Multiply the square footage of your house by 3 watts (how much power your lights and receptacles use)
  2. Add an additional 1,500 watts per small kitchen appliance or laundry room circuit.
  3. Add wattages for additional appliances using individual circuits (dryers, water heaters, range, window air conditioners).
  4. Combine all three totals from steps 1 through 3 with the first 10,000 watts at 100% and 40% for all remaining watts.
  5. Add in the wattage of the central A/C or the heating unit (whichever is higher).
  6. Divide the total by 230 to get your home’s amperage needs.

To demonstrate this math, let’s show a house with a square footage of 3,000 feet with a central heating and air conditioning unit.

  1. 3,000 x 3 = 9,000
  2. 4 x 1,500 (three small appliances in kitchen plus one circuit for laundry room) = 6,000
  3. Dryer – 5,500 + water heater – 5,000 + dishwasher – 1,200 = 11,700. Then add 11,700 to the first two numbers (9,000 + 6,000) = 26,700.
  4. Allot 10,000 of the 26,700 goes at 100% = 10,000. The other 16,700 goes at 40% = 6680 watts. 10,000 + 6,680 = 16,680
  5. Add 4,000 for the central air wattage = 16,680 + 4,000 = 20,680.
  6. Divide 20,680 by 230 = 89.91 amps. Therefore a 100-amp service would suffice. 

Tips for Installation of 200 Amp Service

Installing a 200 amp service should not be a DIY attempt if you have little to no experience with electrical work. Improperly installing electrical wires can lead to dangers like electrical shocks, electrical fire hazards, and short circuits. 

Here are some helpful 200 amp service installation tips. 

  • When choosing an electrician to install your service, it’s crucial to do your research to ensure the person you choose is licensed, experienced, and certified.
  • You will need an inspector to check your service installation and permits before you can begin. In some cases, your contractor may have to obtain these permits for you.
  • When using aluminum wires, it’s better to pigtail copper fixtures to the ends of the aluminum pieces. 
  • And you should never work on electricity without turning off all power using the breaker box. Be sure to check the wiring for power before beginning any work. 

Conclusion

Choosing the right size wire for an underground 200 amp service is crucial for getting the proper power to the circuits to run all of the stuff in your house without overloading the circuits. Aluminum and copper-clad aluminum should be #4/0 AWG, while copper wire should be #2/0. 

7 Plywood Alternatives

Plywood is the most commonly used material in furniture projects, but it’s not always the best choice. 

For one thing, plywood can be expensive and difficult to work with. It also tends to warp over time when exposed to moisture or humidity. There are a lot of alternatives that are more affordable and easier to use for DIY projects, and we’ll go over our favorites in this post!

1. MDF (Medium Density Fiberwood)

MDF is a great choice for those on budget and looking to buy furniture. This type of wood can be painted easily which means you won’t have to worry about how well the paint will take to it, but still offers affordable prices that are perfect if your changing taste. Use this material if you’re looking to make a coffee table or side table.

Since MDF doesn’t contract and expand with humidity or temperature changes, this means that your project will stay nice and sturdy. Plus, since many of its components are recycled wood instead of new lumber, choosing an environmentally-friendly option couldn’t be easier.

2. Particle Board

If you like the idea of plywood without the high price, then particle board might be a better option for you. This type of wood is made from waste lumber and other scraps, but it tends to be slightly more expensive than MDF because of its density.

Some particleboard densities are very heavy and can hold a lot of weight, while others aren’t quite as sturdy and tend to warp easily as well as dent much easier than MDF or true plywood. The tighter the particles in it, the better your project will look after painting with lots of details. If cost is your main deciding factor for buying furniture then go with particleboard.

3. EKOply

Eco-friendly isn’t just a trend, it’s a way of life that everyone is embracing and one company has made this concept the face of their brand – EKOply.  Their products are 100% recycled materials that go without creating any waste when manufactured. They’re also resistant to natural rot and corrosion making them as eco-friendly as they look – unlike traditional timber sheets.

There’s no need to worry about warping or cracking when exposed to moisture or humidity, but you will have to keep your eye on it if you use harsh chemicals or cleaners around it because these can leach into its pores and damage your furniture over time. You can get solid wood furniture in different finishes and colors, as well as panels in a variety of light and dark colors to match your home’s décor.

4. Solid Wood

Solid wood is the most traditional option for furniture projects because it’s easy to work with when you’re trying to get that professional look and feel. It tends to hold its value much better than other materials like MDF or particleboard if you plan on selling it later on down the line since they’re commonplace in stores now days making them much less rare than solid wood pieces.

You can use solid wood for just about anything – from tables and chairs to bar stools and dining room sets similar to what you’d see at a higher-end furniture shop. Before you start any project, make sure that you have the proper tools on hand otherwise it will take twice as long to finish. Make sure you have the right blades for your saws because cutting large pieces of wood can dull them quickly and increase the chance of an accident.

Safety is key when using a table saw, so make sure not to overload this machine or use a blade that’s too small for your project – doing so could cause serious injury.

5. Reinforced Polyurethane Foam Boards

If you’re looking to save money and still get a similar look, then this type of wood might be the best option for you. These panels are easy to sand and can be painted if your design requires it. Since these boards are made from recycled materials, they tend to not hold their value as well as solid wood furniture pieces since they don’t have much character like an antique desk that’s been passed down two or three generations.

As far as beauty goes, these aren’t generally considered a pretty material unless there’s a grain or interesting pattern in the board – but this doesn’t mean your project won’t turn out great! Make sure you choose what works best for you and your budget when making any project; there’s no right or wrong answer.

6. OSB (Oriented Strand Board)

OSB is a material that’s considered a step up from particleboard, but not quite as good as plywood. It’s made from recycled wood products and is very versatile so you can cut it to any size or shape your project requires without the fear of warping.

You’ll find OSB on many walls because it’s easy to work with and inexpensive, plus it doesn’t warp like plywood which means there won’t be any creaking noises on the wall where it was installed – talk about convenience! It can also withstand water damage with no issues making this an ideal option for kitchen updates such as installing new cabinets, countertops, and even flooring if you’re looking for something that can hold up to the water and grease from cooking.

If you’re looking for a budget-friendly way to add some character and personality to your living space, OSB is an excellent option that’s usually inexpensive compared to its other options – but keep in mind that it will have a shorter lifespan than solid wood pieces.

7. HDF (High-Density Fiberboard)

HDF is a panel that’s mostly used outside of the United States because it was created in Japan. It comes in a variety of colors and thicknesses to give you multiple options when making your furniture piece, but it tends to be more brittle than plywood if not handled with care. When buying this type of wood, make sure it has no moisture damage before you buy since it will crack or warp over time if water ever gets to its core. This board is porous so extra care must be taken when using chemicals or cleaners around it – otherwise, it could get damaged pretty easily.

It might look like particleboard, so make sure to ask the seller about its strength before you buy; some sellers might try to sell you particleboard when you’re looking for HDF. The best way to tell the difference is by weight – particleboard has a density of about 75 pounds per cubic foot and HDF has a density of about 100 pounds per cubic foot so it’s much stronger than its cheaper counterpart.

Conclusion

In conclusion, there are many types of boards you can choose from when making your furniture piece. We recommend you to use solid wood because it has the most character and is the most durable. Plywood is also a really great option and OSB is a good alternative for those looking for something that’s inexpensive yet strong.

How Long Do Liquid Nails Take To Dry?

When you need to assemble something but you want to avoid the dangers of working with a hammer and nails, you can use a liquid adhesive, such as Liquid Nails.

Liquid Nails is a type of low-solvent construction adhesive that has multiple uses. This type of glue forms a strong bond that rivals traditional adhesion methods like nails. We will look at Liquid Nails, including how long it takes to dry and what can affect the drying process. 

Table of Contents

What Are Liquid Nails?

Liquid Nails are a type of construction adhesive that forms a permanent bond between pieces of material. This adhesive is suitable as an alternative to using metal nails or wood glue. 

You can use Liquid Nails to bond cork board, green board, fiberglass, foam board, or plywood. Once it’s fully cured (from the outside), the bond is still flexible, allowing the glued piece to have more durability and impact resistance.

Danger alert! While the Liquid Nails adhesive is still drying, it will be flammable. This danger recedes once the glue dries. 

A search of the Liquid Nails website revealed 39 types of Liquid Nails for interior use and 23 kinds for exterior use. These formulas are for specific services, such as heavy-duty construction, extreme heavy-duty construction, drywall adhesive, or adhesive for deck and subfloors.

Wood Glue vs. Liquid Nails

Liquid Nails and wood glue only have one thing in common. They’re both adhesives. But that’s where the similarities end. 

Liquid Nails is the name of a line of heavy-duty construction adhesives. It has a wide range of uses, including wood and other materials. You can use Liquid Nails to install tile board, paneling, plastic, vinyl, metal, or concrete. It’s wonderful for non-porous surfaces but not as much for connecting wood.

But wood glue refers to the type of adhesive you would use on wood, although you can also use it for other materials. 

There are different brands and types of wood glue, including PVA (polyvinyl acetate), epoxy resin (transparent), polyurethane (all-purpose crafts), cyanoacrylate (superglue), and aliphatic resin (carpenter’s glue). However, wood glue is not as versatile in material use as Liquid Nails. Therefore, it’s best for crafts and DIY projects.

When you’re in a situation where dry time is essential, wood glue has a dry time of 30 to 60 minutes with a wait time of 24 hours before applying pressure to the joints. Liquid Nails can take only 15 minutes to dry but 24 hours to several days to cure. 

Wood glues are generally safe to use in all locations, regardless of ventilation, because they do not create fumes. But because Liquid Nails is a solvent, it produces toxic fumes that can be dangerous if inhaled. And these fumes are flammable until the liquid dries. Therefore, you must have proper ventilation when using LN to be safe. 

And in terms of cleanup, wood glue will leave you less stressed out if you get the adhesive on your skin or a surface. You can usually use water and soap to remove any glue. But if Liquid Nails gets on anything, it can be more problematic. Then, you’ll have to use petroleum jelly or oil to loosen it enough to pry it off.

Liquid Nails Pros and Cons

Here are a few benefits and disadvantages of Liquid Nails.

Pros

Some lines of Liquid Nails are waterproof, allowing you to use them indoors or outdoors, giving you a broader versatility on what you seal with the glue. However, for it to be waterproof, it must contain latex. 

After you apply Liquid Nails, the pieces form a permanent bond in 15 minutes. Heavier or large parts may require clamping or some applied pressure until the adhesive dries. Once the bond forms, the joints can withstand force without breaking.

You can also use Liquid Nails to seal small gaps and cracks in materials. The adhesive can fill in gaps and holes while bonding pieces together. 

Glue can be a challenge to cover over, leaving you with messy appearances. But when you seal something with Liquid Nails, it forms a smooth surface that you can paint over. Once it’s painted, you won’t be able to notice the adhesive spots.

Cons

While Liquid Nails can work on multiple surfaces and materials, it is not as compatible with wood to wood applications. Liquid Nails need a non-porous surface to create a solid bond.

Because Liquid Nails is a solvent, it emits fumes during application. These fumes are toxic and can be harmful if breathed in. Therefore, when using Liquid Nails, you’ll need to ensure proper airflow, using a fan, and open windows if indoors. 

People with breathing problems have the potential to experience breathing irritations from inhaling the fumes.

Liquid Nails can also create a mess that’s difficult to clean up. You’ll want to use extreme caution when working with this adhesive because it won’t wipe up if it gets onto something. And you should always wear gloves during the application, as it can cause skin irritations if it gets on you.

Liquid Nails Dry Time

Liquid Nail is a fast-drying adhesive that can dry in as fast as 15 minutes. But you do have to keep the piece clamped or braced together for 24 hours to ensure a stronghold. 

And once Liquid Nails is dry, you still have to wait for the piece to cure – reach full strength. It can take up to 7 days for the hold to cure, but some assemblies can take multiple weeks. 

 Factors that Affect the Dry Time

Although Liquid Nails can dry in as quick as 15 minutes, multiple factors impact the time it takes to dry thoroughly. 

The Liquid Nail type also affects how fast the adhesive will dry. The majority take 24 hours, but some products can dry as fast as four to six hours. Then there are a few that will take as long as 48 hours or more. But a small number of polyurethane-based adhesives can dry and cure in only 10 minutes.   

The drying time of Liquid Nails can also be affected by moisture, including humidity. If the humidity levels are at 60% or higher, it will take Liquid Nails longer to dry. The same will happen if the surface is wet. If you’re trying to bond moist materials, look for an option that’s rubber-based (polymer, polyurethanes, or silicones), water (and moisture) can help the product dry quicker.

The dry time of Liquid Nails is dependent mainly on temperature, both of the surfaces you’ll be bonding and the surrounding air. Therefore, low temperatures can cause Liquid Nails to take longer to dry and cure. 

If applied in temperatures below sub-40 degrees, Liquid Nails might not dry at all. For example, liquid Nails used at 50 degrees can take twice the time to dry as they would at 70 degrees. 

The ventilation of the area where you’ll be using the Liquid Nails can also affect how long it takes to dry. The more airflow there is in a room, the faster the glue will evaporate. It won’t pull out as much moisture when the air is stagnant and closed off, leaving the wet glue longer. 

How thick you apply Liquid Nails to your surface can influence how long you’ll have to wait for the glue to harden. The thicker the layer, the longer it will take for it to dry. So it could up your wait time from hours to days. You can reference the package for the optimal thickness.

You’ll also need to consider the type of materials you’re trying to glue together. A material’s porousness affects its drying time. Porous materials like brick, cement, masonry, and treated wood help the Liquid Nails dry faster because they draw out the moisture in the adhesive. 

Materials like metals, glass, painted surfaces, or plastic have a non-porous surface, meaning it absorbs the Liquid Nails, causing it to take longer to dry. So you could see times over 24 hours, several days, or a few months.

Performance Compared To Competitors

Liquid Nails is one of the strongest construction adhesives, outperforming options like wood glue, superglue, and other light-duty options.

Liquid Nails Dry Time FAQ

We’re sure there are still some questions we haven’t covered yet. So check out these frequently asked questions readers have about the dry time of Liquid Nails. 

How long does it take liquid nails to dry?

Liquid Nails can take from 15 to 30 minutes to several hours to dry. But even after this adhesive dries, it can still take seven days to multiple weeks to cure.

How do you speed up drying liquid nails?

You can speed up the drying process using multiple techniques. For example, for enclosed areas, you can use a fan to circulate air. Heat also speeds up the drying process – above 70-degrees is best. And don’t add a thick layer of Liquid Nails. 

How long does it take for Liquid Nails to bond?

You can get a bond using Liquid Nails in a few minutes (less than five). 

Are Liquid Nails stronger than wood glue?

Liquid Nails are a heavy-duty construction adhesive that provides a stronger hold than wood glue. 

Conclusion

Liquid Nails are a suitable choice for creating a durable, permanent bond between two objects. You can get Liquid Nails in various formulas for indoor or outdoor use for use on many kinds of materials. This adhesive works best on non-porous surfaces. Liquid Nails can take 15 to 60 minutes to dry and seven days to several weeks to months for the bond to cure to max strength.

How to Remove Calcium from Water (4 Simple Methods)

Although your water may look transparent when you look at it, there are tons of microscopic minerals – some picked up as the water moves from the ground into your home and others used during water treatment.

While these microscopic components – calcium, chlorine, and magnesium – aren’t necessarily harmful to your body, they also don’t provide any nutritional benefits. Even worse, these tiny pieces – which form hard water – can wreak havoc with your appliances, your cleaning habits, and even your bathing. 

Keep reading to learn how to remove calcium from water. Once water gets treated to remove these impurities, your water classifies as soft. We’ll also explain the differences between soft and hard water. Then we’ll look at some issues you may experience if your water system has hard water.

Table of Contents

Soft vs. Hard Water

Classifying water as hard or soft does not have any reference to the liquid’s physical state. In fact, you can’t tell from sight (and rarely from the taste) if water is hard or soft. However, soft water can sometimes have a salty taste due to its sodium content. And some hard water can have an odd taste, depending on the mineral content.

But there are some signs that your water system creates hard water compared to soft water – which is preferred. 

When water falls from the sky – rain – or when it’s in the ocean, it’s pure soft water, meaning it has a low mineral count. But as the water travels over or underground, it picks up traces of minerals – magnesium and calcium.   

Soft water has a mineral content of no more than 17 milligrams per liter. But to classify as hard water, the liquid content must have a mineral content higher than 17 milligrams per liter. 

Problems Caused By Hard Water

There are numerous issues caused by hard water. The most significant problem that arises from water with a high mineral content is damage to your appliances and plumbing system. Water heaters, washing machines, and dishwashers can wear down faster due to high hard water content.

The minerals in hard water typically leave behind a residue. As the water evaporates, it leaves behind these tiny components. Over time, this sediment can build up to form – limescale. This chalky residue can restrict water flow through your system, resulting in pipes that rust or burst. You can even experience lower water pressure.

You may also experience this chalky buildup on your dishes, sinks, faucets, and glassware. It won’t matter if you use a dishwasher or wash it by hand; your dishes can still experience white spots – a buildup of mineral deposits and soap.

Hard water also affects the performance and ability of soap. If you’re noticing that your soap isn’t developing a thick lather while you’re showering, or if your hair doesn’t feel like it’s clean after you’ve washed it, you likely have hard water. 

You may also notice your skin covered with a layer of white residue. Hard water can also be to blame for skin or hair that’s dried out. You may even experience itchy, irritated skin and minor to significant hair loss. Hard water can also be to blame for dull hair.

If you’re noticing that your clothes are fading in color, wearing out faster, or there are stains that you can’t get out during a stain-treatment wash, you’ve probably got hard water. Rather than cleaning your clothes, hard water can stain your clothing, leave behind mineral deposits to form holes or tears, or your clothes can end up feeling rough and stiff.

Why Remove Calcium from Water?

Hard water can cause your appliances to wear down faster, requiring expensive repairs or replacements. In addition, high calcium in your water can lead to buildup that damages your plumbing and makes cleaning a nightmare.

As calcium builds up on metal surfaces like your faucets, it can cause premature rusting. And when it forms a scum ring around your bathtub, you can feel grimy every time you get in. 

And calcium can even mess up your ability to get things thoroughly cleaned. For example, the buildup and hard water can cause your clothes to stain and leave a white chalky buildup on your skin after showering. And your skin and hair can get dried out and irritated.

How to Remove Calcium From Water

Luckily, it’s not that difficult to remove calcium from your water. We’ve collected five simple methods that will remove calcium and other microscopic minerals from your water. Removing minerals (hardening ions) from the water makes it soft.

Use A Water Filter

Many people rely on water filters to purify the water to remove minerals like calcium. For example, you can choose an activated carbon filter to absorb and trap various impurities, including calcium, chlorine, and heavy metals.

The best choice is an ion exchange filter, a handy, technologically advanced device. Some people use these filters in-home water purifier systems. But there are also small filters that you can attach to your faucets and taps. Unfortunately, most systems will require installation, and you’ll have to replace the filters regularly as they get worn down with use. 

These filters have beads and resins inside that bond with the magnesium and calcium ions (positively charged) in the water to exchange potassium and sodium. We mentioned earlier that soft water could taste saltier – it’s due to these exchanged minerals.

However, if someone in the household is at risk for kidney disease, this potassium content could pose potential dangers. Installing a reverse osmosis unit is an excellent way to get rid of all the ions in the water – including potassium and sodium. 

If you’re looking for a way to remove calcium from your water to make the water purified for drinking purposes, a filter is one of the best methods. 

But depending on the type of filtration system you install, there may not be any benefits that soften the water in your plumbing, appliances, or showers. 

Chemical Treatment

Chemical treatments to remove calcium from water are more often employed at large-scale locations and facilities. With this method, chemicals (calcium hydroxide – lime soda or slaked lime) increase the pH of the hard water supply.

A higher pH causes the magnesium and calcium salts to precipitate, which fall out of the water as it’s run through an industrial filtration system.

There are also ways to use chemical treatments to remove the calcium from the water in your home. But be aware that any water treated with chemicals should not be used for drinking. 

The main reason to use chemical treatments in your home is to preserve your home’s drain, plumbing, and appliances from the dangers of hard water. 

If you choose this method, you have to use extreme care to ensure you get the precipitated mineral salts out of the water. The right filter is crucial to remove these particles from your water once it’s treated.

Water Softeners

Water softeners are a standard method used to soften their water to remove traces of calcium, chlorine, and magnesium. You can find these products readily available for daily home use. 

This method of removing calcium from water uses a mid-scale ion-exchange filtration that you can attach to the taps supplying your appliances – a washing machine or dishwasher. There are also softener systems that you can connect to your faucets and drinking water purifiers. 

Multiple salt-free softeners won’t remove the calcium from the water but cause the hardening salts to become inactive. 

However, here’s a note of caution about the location of where you install your water softener. It would be best if you choose an area that’s easily accessible. Also, you’ll have to replace the softener regularly – most ion exchange filters become damaged with time and use.

Boil Water

The simplest way to remove calcium from your water is to boil it. After bringing the water to a boil and letting it roil for around ten minutes, wait for the water to cool to room temperature. 

This method will help break down calcium mineral deposits (carbonate hardness) – calcium hydroxide, calcium bicarbonate, and calcium carbonate. But it will not remove all of the calcium traces. 

Another downside of this method is that you’ll be stuck doing limited quantities. If you’re trying to soften the water supplying your washing machine or dishwasher, boiling will not help. You’ll need to find a way to filter the water before they enter these devices.

Boiling water to remove calcium is best reserved for demineralizing the water before using it for drinking (potable), cooking, or cleaning. 

Conclusion

While, in most cases, hard water isn’t harmful to your health and is rarely distinctly noticeable by taste, there are numerous reasons why people choose to soften the water in their homes. Calcium and other microscopic minerals found in hard water can cause damage to your pipes, reduce the effectiveness and lifespan of your appliances, and leave you, your clothes, and your home feeling grungy and dingy. 

Save the headache by softening your water to remove calcium and magnesium from your water. As we’ve shown with the multiple methods above, it’s typically a simple process to purify your water of mineral sediment. However, to ensure you get whole-house protection, it may be a good idea for you to use more than one of these tips. There are many things you need to make sure are covered if you want your home water system to be calcium-free!