34 Stylish Throw Pillow Ideas for Brown Couches

Some colors give us pause when trying to pick complementary tones to get a cohesive interior design. Brown is one example that comes to mind.

Many styles of couches come in different shades of brown, from light to dark tones. This list will provide numerous brown couch pillow ideas to use for inspiration. It might also help you narrow down your preferred style by checking off the design ideas that don’t appeal to you. No matter the style of your brown couch or your room decor, there’s sure to be a pillow idea that you love.

What Pillow Colors Go Best With a Brown Couch?

Picking the right throw pillows is crucial for a room design that looks cohesive and stylish rather than an overwhelming clash of colors. One great design idea for pillows on brown couches is to choose styles with a combination of complementary colors. 

Black + Cream

An excellent color combination that goes great with brown couches is a black and cream theme. First, choose pillows in a neutral tone, like cream or off-white, picking whatever style goes with your room theme. Then add in one or two contrasting pillows to add depth. Adding black or gray pillows in different sizes or shapes provides dimensional appeal.

Green + White

Another color combination that can go well with brown couches is green and white. A few green pillows will add pops of color against the backdrop of brown. And adding two patterned white ones can soften the look while adding texture. Then complete the design with a pale blue pom lumbar. 

Black + Green (with Navy Accent)

Green can also harmonize well with black to create a stunning combination of leather or fabric brown couches. Start with a pair of patterned black square pillows for a dark contrast. Then soften the look with a light neutral and a green square pillow. Finally, finish the design with a patterned lumbar pillow in a dark shade of blue.

Gray + White (with Red Accent)

Combining gray and white gives you a soft color that contrasts lovely against a brown couch. To keep the look from getting boring, go with a neutral design for the large pillows, such as a gray with embroidered strips. Then choose two white pillows with gray patterns for pops of light. Finally, bring in a patterned faded red lumbar pillow for a bold accent.  

Navy + Cream

Navy and cream palettes are great for rooms where you want them to feel light and summery. It’s also a great color combination for coastal themes. Keep the look subtle by choosing neutral shades like cream or white with navy blue accents like checkers or geometric. Adding a solid cream pillow with decorative trim and a navy blue lumbar with white accents brightens up any shade of brown. 

Creams + Charcoal

Neutral colors are an excellent way to add warmth to the dark rich tones of brown. Shades like beige, tan, and cream in various textures and patterns provide slight color contrast and depth. Then use a charcoal wool pillow in a deeply textured print for a single pop of color.

Cream + Green

A cream color can go with any darker color, including charcoal, navy, and green. Adding striped cream pillows lightens rich browns’ tone, while a thick textured cream wool pillow adds texture. A patterned green pillow adds a pop of color, while a beige and navy blue pinstripe lumbar brings in a hint of a different color.

Creams + Burnt Orange

Burnt orange goes fantastic with brown due to the same rich earth tones. Throwing in cream pillows in various patterns and textures like stripes, ruffled seams, or knitted wool brighten up the heaviness, giving you a relaxing warm space.

Black + Cream + Orange/Gold

If you’re looking to go bold with your design, consider a color palette of stenciled black pillows paired with a cream and orange striped pillow, a solid cream textured pillow, and a gold lumbar. The contrast of dark and light with warm earth tones ties the look together and complements brown sofas.

Grays + Black

Another bold design is to use a color palette of gray and white with black accents for contrast. Start with two gray and white striped large square pillows. Then soften the look with a solid small textured pillow in white or ivory. Finally, tie the look together with a patterned white and black pillow and black striped lumbar.

More Brown Couch Pillow Ideas

If none of these color combinations rock your world, don’t give up yet. We’re just getting started. So here are some more brown couch pillow ideas. 

Same Color 

If you’re not a fan of patterned pillows, you can skip the designs and go with solid-colored pillows instead. Or you can pick patterned pillows in the same colors as your couch. For example, picking patterned browns in similar shades to your couch’s color gives dimension without becoming overwhelming.

Black And White

Black and white geometric pattern pillows can go for brown couches in light tones or those with grayish tones. Jazz your design up by looking for pillows with white threaded tassels. 

White And Brown Two-Tone

A white and brown two-tone pillow is another unique design idea for brown couches. The brown compliments the color of the couch, while the white brightens up the dark brown tones. This style is great for a look that’s airy and sophisticated. 

Fluffy And Furry

Fluffy, furry pillows can give your couch a cozy feel that invites you to sink in and curl up with a warm blanket and a fun book. Cashmere or cable knit pillows give the same nuance if you don’t like the feel of faux fur or fuzzy types.

Farmhouse Look

Aiming for a rustic farmhouse chic-themed living room? Adding monogrammed pillows to your brown couch can be just the touch. Instead, go with a design featuring your family name in a simple wreath or a family motto on a cream or white pillow. 

Leather

If you want to get a unique look, consider picking pillows with brown leather accents. Whether your brown couch is leather or fabric, leather pillows will complement the couch color. Rather than pick a pillow of all leather, look for ones that have a leather center and fabric sides in a contrasting print or pattern.

Oversized Pillows

Brown leather couches can benefit from the placement of oversized textured pillows. Since leather is notoriously slippery, the large size helps these pillows have more weight to keep them in place. And the texture gives a contrast to the smoothness of the couch.

Bright Contrasting Color

Bright pillows can give the contrast your space needs to keep a brown couch from looking too drab and dark. In addition, multiple bright colors can pop against a brown sofa and give your area more personality and a casual ambiance. 

Pink

Pink tones can give a dark brown couch a softer touch, so it feels less masculine. A little goes a long way, allowing you to use minor pink accents to achieve a lighter nuance. A creamy white pillow with a narrow pink stripe can make a significant impact. 

Aztec Print

Small prints like an Aztec design can give your couch dimension and a little pop of color that doesn’t dominate the space. Patterns are a great way to draw the eye and give your couch a unique texture and style.

Skip Pillows

If you’re not a fan of pillows, no rule says you have to use them. Throw pillows are indeed a great way to add accents and splashes of color to your furniture. But if you prefer more of a mid-century modern aesthetic, skip the pillows altogether. You can still use carpets and other decor pieces to bring color into the room. 

Match Upholstery

Picking throw pillows that perfectly match the couch’s upholstery is the perfect way to ensure you don’t end up with browns that clash with your couch’s color. Contrasting browns can give your couch an earthy look when done right. 

Mustard Yellow

Pairing brown with other earth tones like mustard yellow is a great color combination for mid-century modern designs. However, if you’re going with a solid color pillow, choose one with a small pattern in a creamy brown that will add texture. 

Grey

Pillows with varying shades of gray give your brown couch contrasting tones of color. Picking this type of design can be more successful than choosing multiple solid gray pillows, which can cause color clashing against brown upholstery.

Neutrals

Picking neutral pillows is always a guaranteed way to match your accents to a brown couch. Creams, whites, or off-white color palettes lighten up the darkness that can occur with dark couches. Keep the space from looking boring by going with more extensive-sized options with various shades of brown decor. 

Pillows With Texture

Textured pillows give your room more visual interest by providing dimensional differences against the monotony of an oversized brown couch. Different textures are crucial for when there are multiple pillows of the same color. You’re ensuring that you’re getting more than one look by having various textures so everything looks tied together. 

Navy Blue

Navy blue goes with any color of a brown couch, but if it’s a darker shade rather than a light camel color, you’ll want to add some white pillows to brighten things up. Picking a navy blue accent pillow with white stamping gives the best of both worlds.

Orange

Brown and orange complement each other very well, with the orange giving a pop of color warmed by the undertones of brown. However, orange is a bold color choice that won’t appeal to all people. Keep the look from being overwhelming by looking for cream pillows with orange accents or an orange pillow with white accents.

Solids And Patterns

Combine different design elements to get an eye-popping focal point. Start with solid-colored pillows for a curated look. And then pair it with two to three-patterned pillows for a cohesive, dimensional look. Picking at least one pillow with textures can keep the space from looking too similar. 

Creamy Bohemian

Bohemian goes great with every style and can give your space a modern, funky feel. Look for a boho pillow in a solid cream color that will add a light pop of color against any brown couch. This style of pillow goes excellent with sofas pushed against a window or wall with plants nearby. 

Velvet

If you want a soft, comfortable yet classy throw pillow, a velvet type might be your pick. You can choose bold colors to pair with rich, dark browns or more neutral colors for lighter browns or those with gray hues.

Earthy Tones

Brown is an earthy tone, which complements well with other earthy hues. If you enjoy the rich tones of autumn, consider adding pillows of similar colors to your brown couch. Shades like deep red, orange, other brown shades, and gray give dramatic pops of contrast.

Embroidered Cushions

Embroidery can give your room an elegant look with suitable motifs and colors. Look for lighter base colors with embroidery that’s similar in color to your couch. There are various styles, from a custom design to an Asain-inspired motif. 

Mix And Match

Get creative with your cushions by mixing and matching. While it’s a great idea to choose different designs, you will want to work with colors that complement your couch’s shade of brown. Combinations could include a solid color, a floral, striped, chevron, and a stamped or embroidered styles. 

Conclusion

Adding throw pillows can improve the style and comfort of your couch. When you have a brown sofa, you have to be creative with the colors and designs you pick to avoid pillows that will cause your room palette to clash. Whether you want to use solid colors, patterns, or texture, you’re sure to enjoy a brown couch pillow idea on this list.

The 10 Best Bed Skirt Alternatives

A bed skirt is a decorative piece that most commonly falls from the bottom of a box spring to cover the legs and frame.

There are many alternatives for making a bed skirt, some low cost and beautiful designs.

Ditch the traditional bed skirt and update your bedroom with these creative designs.

1. A Fitted Sheet

Placing a fitted sheet on the bed frame doesn’t cover the under-bed area but will look sleek to outsiders, offering a more subdued cover for the unattractive box springs.

Using a darker color can also keep the print on the box spring from showing through the sheet.

Pros

  • Clean and simple
  • Covers box spring print
  • Low-cost solution

Cons

  • Box spring print shows through sheet

2. Drapes or Curtains

Drape a long piece of fabric over the box spring and connect to the bed frame for an instant, customized skirt without sewing a stitch. This look is ideal if you have brightly colored walls, but it doesn’t look just right with natural colors.

Pros

  • Cost-effective
  • Attractive Design
  • Easy Installation

Cons

  • Not suited for light color walls (dark walls show through)

3. Making Your Own

If you don’t like the look of a bed skirt, consider making your own.

Use plain fabric to cover the under-bed area by cutting two squares, each slightly longer than both sides of your box spring frame. Using heavy-duty staples, attach the fabric on either side of the box springs for a polished appearance that is quick and easy to make yourself without sewing a stitch. You can use any color or pattern choice; just be sure to coordinate it with your comforter and other accessories in the room.

Pros

  • Customized size
  • Cost-effective
  • No sewing required
  • Easy installation

Cons

Less attractive design than store-bought fabric covers (multiple staples can be visible)

4. Skeleton Bedskirt

It looks like Halloween, but this skeleton bed skirt offers an entertaining solution for covering up bottomless beds when you open dresser and closet doors.

Pros

  • Easy installation
  • Cost-effective (free)
  • Attractive Design

Cons

  • Can’t be washed or cleaned easily, so spot cleaning is necessary

5. Wrap-Around Bed Skirt

The “wrap-around” bed skirt offers a quick alternative to more traditional style skirts. These sheets are ideal for those who wish to hide the space under their bed and are available online to purchase at many retailers.

Pros

  • Easy to use
  • Reusable
  • Attractive design (most come in different colors and patterns)
  • Invisible once installed under the bed

Cons

  • Must be purchased new each year if desired, since they cannot be washed or cleaned without falling apart

Instead, consider making a reversible bed skirt as an alternative that can easily be switched out when cleaning is necessary.

6. Reversible Bed Skirt

You can turn any decorative fabric into a reversible bed skirt sheet with this simple technique! This method also allows you to add flair by varying the fabrics or textures of your choice and allows you to customize the look based on the season. As an added bonus, you won’t have to purchase replacement skirts each year because these are washable.

Pros

  • Easy to make
  • Simple Construction
  • Customizable pattern/fabric choice, based on the room’s decor and changing seasons
  • Reversible (two colors) for two season versatility

Cons

  • More expensive than store-bought skirt alternatives ($15-$25 average) depending on fabric choice and materials used in construction

7. Quilted Bed Skirt 

Instead of purchasing a bed skirt from a store, consider sewing one yourself using quilting cotton or wool fabrics. It will be just as stylish as an off-the-shelf option, but you can tailor it to fit your bed perfectly since custom bed skirts are in demand.

Pros

  • Can create a custom fit
  • Easy to make
  • Privacy provided

Cons

  • Requires sewing experience and supplies (a small project that will take multiple hours)

8. Velcro Bed Skirts

For no-sew options, velcro bed skirts provide an inexpensive solution for bedroom privacy. An added bonus is that they are also easy to use – just stick them on the box springs and mattress and you are good to go! As a downside, this option doesn’t look as nice as other alternatives, but it can be a great choice if you need something fast. 

Pros

  • Easy installation
  • Can wash skirt when dirty (velcro doesn’t come loose or fall off)
  • Invisible under comforters/bed sheets

Cons

  • Ugly design compared to other options (hidden cheap hook & loop tape shows through the fabric)

9. Box Spring Wrap

Instead of purchasing a bed skirt that only works with your mattress, this wrap-around design can be used on both the box spring and mattress simultaneously.

In addition, you can use any type of fabric or pattern since it is fully customizable by sewing three panels together to create a cover that goes over the entire bottom of the box springs. Once attached, a bed skirt along each side will look like it was made specifically for your style and budget!

Pros

  • Customizable fabric/pattern choice (based on room decor)
  • Easy to make yourself, no sewing required
  • Cost-effective if you have fabric and basic sewing supplies available at home
  • Consistent appearance across multiple beds in various rooms (take time to

Cons

  • Needs to be washed more regularly than other bed skirts, since sheets can’t always cover it completely when soiled (an easy wash cycle or dry cleaning will work with this skirt)

10. Window Valance

Window treatments are often overlooked when designing bedrooms. This bed skirt method is an easy way to add extra decoration near the box spring by simply placing a window valance over it, and then covering the box springs with regular sheets.  Since they come in many styles (bows, pleats, etc.), you will be able to find one that matches your overall room decor perfectly. 

Pros

  • Easy to make yourself (just need two panels of fabric [60” x 14”] that can be easily cut)
  • Full-room look under the bed from just one purchase

Cons

  • No privacy if you use thin fabrics like muslin or voile without adding other layers behind it for more privacy (use lightweight blankets or quilts to complete the look)

How Many Bed Skirts Do I Need?

How many bed skirts do you need depends on how many beds are in your home. If desired, you can use a different style for each room; however, the same style is fine if you are looking for an overall theme and continuity for a particular room design. If you have multiple beds that require skirts, consider buying multi-packs of varying sizes that include both flat and box spring skirts. Here are some additional measurements to better help determine the right size: 3-inch drop = 12-inch length, 6-inch drop = 24-inch length, 9-inch drop = 36-inch length.

How to Choose a Bed Skirt Style for Your Home

If you’re looking for that extra touch to enhance your bedroom decor and feel like you have more than enough beds in the house for that, but you still want to add that special something, by using one of these suggestions we’ll show you it’s easy to get a custom look with store-bought bed skirts.

No matter what style or design aesthetic you’ve created within the room where your bed is going to be located, there are many bed skirts styles available. No matter if it’s a dusty miller style or even an elegant lace look, there is something available for you to use as an addition to your bedroom decor.

It makes it much easier for you to get a good look that will fit within the room where you’re placing the bed and provide some much-needed privacy or an elegant touch using any of these options, but just like anything else, shopping online is always going to save you money. With prices ranging from $10-$325, there’s no doubt that getting some ideas about what styles are available can be useful.

Conclusion

No matter what style or design aesthetic you’ve created within the room where your bed is going to be located, there are many bed skirts styles available. No matter if it’s a dusty miller style or even an elegant lace look, there is something available for you to use as an addition to your bedroom decor. It makes it much easier for you to get a good look that will fit within the room where you’re placing the bed and provide some much-needed privacy or an elegant touch using any of these options, but just like anything else, shopping online is always going to save you money.

30 Ideas for Basement Kitchens and Kitchenettes

Many people transform their basements from musty wasted space that you use to store junk furniture and boxes full of knick-knacks into full living spaces. 

A common growing trend for basements is to install a kitchen, or if space is tight, a compact kitchenette. There are many options for basement kitchens, from installing a simple bar and sink, a food prep area, or a full kitchen for overnight guests to make meals without having to come upstairs. 

This list will cover thirty basement kitchen ideas to inspire you to convert your dull basement into a functional kitchen or kitchenette.  

Wood Countertops

An industrial-chic design is one of the easiest designs to achieve in a basement kitchen. To get this look, you can use wood countertops and a stainless steel sink.

This aesthetic is excellent for basement kitchens designed for entertaining guests due to the warmth and appeal of the design.

Dining Area

If you have the extra space in your basement kitchen, you can set up a dedicated dining area rather than using your counters. 

Some people like to use the space in the middle of the kitchen, where you’d typically place an island to set up their dining area. But if the site is large enough, you can create a dining room instead. For example, a bistro set table works great for smaller spaces in place of an island. Or with larger rooms, go with a full-size dining set.

Island For Storage

There are many benefits of using an island in your kitchen. It can serve as an additional space for preparing or serving food. But when you pick the right island design, you can also use your island for storage.

The best island will have enough room for food prep or to serve as a place to eat, using a few stools for seating. But it should also have multiple shelves that can store essential items you want to be within close reach. 

Mini Fridge/Microwave Combo

Kitchenettes are often an excellent solution for basements by providing the essentials without taking up all of the room. If you have a smaller basement with low ceilings, the best option is a microwave and mini-fridge combo.

You won’t be using a kitchenette for cooking meals, but it’s perfect for snacks while hanging in the basement. For example, you can use the microwave for cooking popcorn or hot pockets, and you can place it on top of the mini-fridge, which can store beverages.

Bar Elements for Entertaining

If you’ll be using your basement for entertaining, a great decor idea is to install many bar elements, like a fridge and a wine rack.

You’ll also want a long counter and stylish bar stools for a great place to congregate over a cold drink. A sink, cabinets, and elegant lighting can complete the look for an elegant bar area.

Expose Brick

Some basements have the luxury of red brick in the basement, possibly hiding behind the walls. Many people cover over exposed masonry rather than use it as an aesthetic design.

But you can easily use exposed brick to achieve an industrial nuance to your basement. So, clean your brick up, and add some supporting pieces, like a stainless steel sink and fixtures, a dark wood countertop, and gray shaker cabinets.

Compact Essentials

If your basement kitchen is a fully functional space, you’ll need to stock the area with essentials. But since this is your second kitchen, the best way to get all you need is to choose compact appliances. 

Not only will you need to ensure that your space doesn’t get cramped with equipment, but you’ll also want to be sure you can store these items when not in use. 

Creative With Corner Space

If your basement is too small for a full-size kitchen, placing a small kitchenette in an awkward corner could be the solution you need. 

For this basement kitchen idea, you’ll need two corner cabinets, where you’ll store glasses and dinnerware. While there won’t be any space for standard kitchen appliances, there’s still enough room for a small microwave and a coffee maker on the counter and shelves above to serve as a pantry of sorts.

Bar for a Communal Space

Building a basement kitchenette bar is the perfect solution for when you don’t want to use a table and chairs, but you still want a space where people can gather to eat, drink, or converse. 

This informal design serves as a stylish feature but also as a serving space. You don’t have to go large with your design. The size of your basement can help narrow down the appropriate size for your bar.

Alternatives To Cabinets

If your basement is small, or you want to keep the remodel simple by using a kitchenette instead of a full kitchen, you probably don’t want to have large cabinets taking up space.

But you don’t have to give up storage space just because you aren’t using cabinets. There are choices like hanging baskets or open shelves to free up the floor. Or you could also use a bookshelf, which will take up the wall and floor space but might hold more stuff. 

Maximize Space

The small size of most basement kitchens means that you need to use excellent organization skills to keep the space from feeling cluttered and chaotic. 

The best way to maximize space in your small kitchen is with cabinets. These storage units give plenty of vertical space and the potential for wasted space and a giant mess. In addition, having built-in shelves and wire racks for your pots and pans provides plenty of organization while also making use of all of your area.

Creative Storage

If your basement lacks windows and seems dark, you’ll want to forego the use of many cabinets. Too many can make your space feel smaller and blocks light, so the room feels even darker.

Getting creative with storing some of your items so you won’t need as many cabinets is a great way to brighten things up while achieving a homey feel and enhanced visual appeal. Use your pans as wall decor, decorative containers for essential ingredients stored on open shelving, and hang your coffee mugs beneath the shelf.

Basement With Light Colors

To make your basement look brighter and more open, choose a light color palette. For example, white cabinets and a light-colored backsplash can make any basement kitchen feel spacious. 

Go dark with the counters, like black marble, to contrast and finish the design with light-colored barstools. Lighter surfaces help bounce light around, which is a considerable benefit for basements with no windows to let in natural light.

Hutch For Storage

A hutch is a perfect accessory for storage in basements where you can’t install a full kitchen or kitchenette. Hutches come in many different types of designs and may offer a small amount of counter space.

Besides serving as excellent storage for all of your items, which reduces the need for a renovation, a hutch can work as a stylish piece of decor to improve your room’s aesthetic.

Mini Fridge

Even if you don’t have the room to go with a full kitchen, all basement kitchenettes need one major appliance – a fridge. Many people opt for a mini-fridge versus a full-size refrigerator, so you don’t take up all the usable floor space in your basement. 

This fridge style is excellent for basements with low ceilings where it might be challenging to fit a standard-size refrigerator. And it saves people the trouble of having to go upstairs to get a cold drink.

Vibrant Backsplash

Basement kitchens can benefit from colorful backsplashes, which can make your space feel more cheerful and stylishly designed.

Patterned backsplashes can look fantastic instead of using a plain neutral or white-colored tile. You can show your personality while giving eye-catching decor.

Hardwood Flooring

If you want to make your basement look more like a well-thought-out design instead of an afterthought, skip the typical basement floorings like linoleum, carpet, or tiles.

Putting hardwood flooring in your basement can make the space feel more inviting and look great with decor. If you’re installing a kitchen in your basement to convert it into an apartment, hardwood floors are sure to wow potential renters.

Stovetop

Something you need to remember about basement kitchens is to be strategic about what you add to your space. Think about your needs and go from there.

Many people come up with the solution to skip using a full stove with an oven but install a stove top unit. This solution is suitable for when you want a way to warm things up but won’t be baking. 

Lots of Lights

Most basements lack windows, which can make the space feel dark and gloomy. Add in low ceilings, and your basement could still feel dreary, no matter your design.

The best way to set a comfortable ambiance in your basement kitchen is to use lots of lights. Think creatively and don’t just rely on overhead lighting. Adding some small lights underneath the upper cabinets can add a warm ambiance to your area while brightening up space.

Eat-In Kitchen

The best basement kitchens provide full function, so there’s no reason to leave the area for things you may need, and that includes a place to eat the meals prepared in the kitchen.

A great space-saving option for basements where you want it to have separate dedicated areas, like a downstairs apartment, creates an eat-in kitchen. If you don’t have the space to set up a table and chairs, you can get crafty by installing a galley kitchen with a peninsula and a couple of bar stools for a dedicated dining space and prep area.

Glass-Front Cabinetry

If you want your basement set up as an adult game room, give your space an adult feel using glass-paneled doors for your upper cabinets with an open shelf in the middle positioned over the small white sink and recessed lighting for the perfect lighting nuance. 

A white counter gives you a space for your blender and other accessories, while a mini-fridge and a wine fridge built into the lower blueish-gray cabinets keep your drinks chilled. Multiple drawers and shelves in the lower give plenty of storage space for snacks and other items.

Fun and Functional

If your basement will be a place for your kids, friends, or the whole family to hang out, how about going with a fully functional basement kitchen? 

Give your basement a modern feel with stainless steel appliances, including a dishwasher, oven, fridge, microwave, and gray wood-toned cabinets. Keep your walls and ceiling a bright white, and add some colorful storage jars on open shelves to create a fun focal point that is sure to please the kids and guests alike. 

Cellar Bar

This idea isn’t technically a kitchen nor a kitchenette. Still, it’s a fantastic idea for those who enjoy collecting wine and other fine drinks but won’t use their basement for cooking. 

Turn the corner of your basement into a cellar bar using a large glass door cabinet that stores multiple bottles of wine on top and liquors on the bottom. On the other wall, add a glass-door upper for glasses and a lower dark wood cabinet for storage with a white counter for mixing drinks. 

Traditional Shaker

If your basement has an odd layout with a nook between the walls, consider going with a simple kitchenette featuring Shaker-style lower cabinets and a white farmhouse sink.

Paint your cabinets a pale green-blue while using a darker shade such as teal for the floating shelves. Finish the look with wide plank hardwood floors. 

Contemporary Style

If you want to achieve a contemporary style kitchen that flows into the rest of a basement, you use it for an apartment or separate living space for guests, build a kitchenette along one side of the room. 

Keep the palette light using gray and white, with stainless steel appliances and recessed ceiling panel lighting. Add a small glass dining table to separate the kitchen from the living room. And use glass end tables and coffee tables with white chairs and a convertible sofa. 

Clever Lighting

Lighting is often crucial in basements, especially if there are no windows or doors for natural light. An excellent solution for these situations is to use recessed lighting in the ceiling. 

Most people go with the traditional canned design but if you want something more modern, try something like glass block-style LED panels overhead.  

Dark Wood Peninsula

If you’re using a lot of light colors to brighten up your basement, such as white walls and pale gray floors, and layered lighting, your space can benefit from a dark wood peninsula to add a bit of contrast.

You can tuck your peninsula away in the back of the room, with a sink that faces the room, and contemporary cabinetry with glass fronts on the uppers gives the space an airy feel. 

Brick Wall

Another attractive basement kitchenette idea is to install faux brick for a feature wall that extends from the kitchenette along the entire wall. Again, choose subtle, neutral colors so that the wall can blend into the background rather than being the dominant focal point. 

Add some open shelving in place of upper cabinets, a dark-colored countertop, and pale gray lower cabinets flanking the centrally placed wine fridge.

British Style

If you want your basement to feel more like a British design, think of keeping a classic look like black and white. 

White cabinetry with exposed wood beams (faux if you don’t have real ones), brick painted white, and black piping are signature features. An open shelf to hold a plant for a touch of greenery and a lovely oil painting give your basement a more homey feel. 

Feature Wall and Hidden Storage 

A neat way to add a kitchen into your basement is to build the kitchenette into a feature wall, such as exposed brick. Shelves on each side of the sink provide open storage for decor or decorative dishes.

Then you can install cabinets on one side of the kitchenette for additional storage of dishes or pantry items while reserving the other half for a large refrigerator. Finally, an island in the middle gives you a place to prepare or serve food while also being suitable for dining by adding a few stools on the opposite side. 

Basement Kitchen Ideas FAQ

What should I put in my kitchen in the basement?

If you’re doing a full kitchen, you’ll need the essentials, like a sink, refrigerator, cooking utensils like a stove, microwave, or small appliances like an air fryer. You’ll also need storage from cabinets or shelves and counter space for food preparations. The proper lighting is also crucial to ensure your basement doesn’t look dark and creepy.

How much does it cost to put a kitchen in the basement?

A modest style and size of kitchen in your basement can cost between $1,000 and $5,000. But if you’re doing a full large kitchen for a basement apartment, you may see costs from $12,000 to $20,000.

What is a basement kitchenette?

A basement kitchenette is a small, simple kitchen in a larger living area. Kitchenettes are typically for beverage and snack preparation and serving. There may be a sink, a microwave, and a small fridge or beverage cooler, plus a countertop.

How do I build a basement kitchenette?

There are numerous ways to build a basement kitchenette. The exact method will depend on the type of design you’re hoping to achieve and the purpose of your kitchen. However, there are plenty of DIY videos and step-by-step guides that can walk you through picking out materials, installing the necessary things, and setting everything up. 

Conclusion

As more people turn their basements into additional living spaces, there’s an excellent need for basement kitchen ideas. No matter the size of your basement or your dream, you can have a kitchenette or even a full kitchen. So once you’ve figured out the goal for your basement kitchen, pick one of these thirty basement kitchen ideas to add to your space.

What Are Potato Bugs? Do They Bite? Are They Poisonous?

A potato bug is called a Jerusalem cricket. These insects are nocturnal and feed primarily on plant material such as flowers, fruit, seeds, and leaves.

They only bite when provoked or threatened––potato bugs (Jerusalem crickets) do not attack human beings.

These large insects can get into homes and basements and they will often inflict a painful bite if they feel cornered or bothered in any way.

The majority of injuries. resulting from collisions with these animals occur between July and November

Typically, the most common complaints involving potato bug bites are swelling, redness, pain and itching.

The Jerusalem Cricket (Potato Bug) Bite

Jerusalem crickets have strong jaws and can cause you to screech in pain if they bite, but the insect is not poisonous. These pesky bugs use their powerful mouthparts for digging into the dirt which makes it even more painful when attacks come from them.

Jerusalem crickets can be found under plant leaves, in flower beds, and amongst decaying plants. Though they seem dangerous because of their size (they are about as large an ant) -you’ll only experience pain if touched by one; which isn’t likely since these creatures don’t like being handled-the worst that will happen is some minor irritation at the best.

To avoid being bitten by a Jerusalem cricket bug, it’s important to know the warning signs before they are agitated. When these pests get ready for attack and start looking bigger than normal with their back legs lifted up in preparation of pouncing on you or making hissing noises that mean just one thing-you’re about to become prey!

What Does a Potato Bug Bite Look Like?

Potato bug bites look like red, swollen areas of skin. You might get a raised bump or blister that can develop into an infection if it’s left untreated.

The Jerusalem Cricket (potato bug) bite is very painful with symptoms initially being swelling, pain, and itching.

If you are bitten by this large insect, see your doctor immediately to prevent the bite from getting infected.

What Should I Do If I Get Bit By A Potato Bug?

If you are bitten by a potato bug—do not panic! The only reason why they would attack is that they feel threatened so remain calm and walk away slowly without causing any further harm.

If you have been attacked by one of these insects—after removing clothing—rinse the affected area with warm water and soap. You can also apply an antibiotic cream to prevent infection.

If the site of the bite becomes infected, seek medical attention immediately.

When to Get Medical Attention

Bites from Jerusalem crickets (potato bug) usually respond well to home treatment; however, if there is no improvement or severe symptoms such as redness around the bite or it continues to swell, see your doctor for professional medical advice.

If nobody gets bitten then this insect has no reason to attack anybody! Many people do not like these insects because they look like a cross between a large ant and a fat wasp; but since they are completely harmless-save your pity on these poor that just want some peace.

How to Treat a Potato Bug Bite

The Jerusalem cricket bite is very painful. To treat a potato bug bite, wash the affected area with warm water and soap or an antibacterial cleanser to avoid infection. You may apply an antibiotic cream over the site of the bite to prevent it from becoming infected. If you see signs of infection such as redness around the bite area, talk to your doctor about home remedies for dealing with a potato bug bite.

What is Jerusalem Cricket (Potato Bug)?

The Jerusalem cricket (also known as the potato bug) is a large insect that has wings and can fly. Although they are not usually aggressive, these insects can bite if handled or threatened. They live in soil and feed on decaying organic matter. When the weather becomes colder in autumn, Jerusalem crickets dig into the earth and form a pupa that will become an adult insects within two months. During this time, they go through several changes including shedding their skin to grow larger. It is at this point that they are most likely to bite if picked up or squeezed by accident as part of their natural defense mechanism against predators such as birds and other insects.

What Is The Lifecycle Of A Potato Bug?

The lifecycle of a potato bug can take anywhere from two months to three years. At birth, young Jerusalem crickets are about one-quarter of an inch long. The average adult Jerusalem cricket is one to one and a half inches long. One egg case will house up to 24 eggs that hatch within three weeks into larvae that grow into nymphs by shedding their skin several times over about six days. Once they reach adulthood, it takes about another six months for them to develop wings, at which point they become sexually mature adults with an average lifespan of two years if they survive the mating season.

What Damage Can A Potato Bug Cause?

Potato bugs do not cause much damage in the garden or around your property unless you have a large infestation on your hands. Jerusalem crickets do not cause any type of soil erosion or property damage, but their presence can be very annoying because they fly towards lights at night and swarm around porch lights in large groups. Their loud chirping noises are also bothersome if you have to share your home with these cricket-like insects. If you get bitten by a potato bug it may startle or scare you depending on how bad the bite is and how much venom was injected into the wound.

Where is the Jerusalem Cricket (Potato Bug) Found?

Potato bugs can be found in many areas, including Canada and the US. They live in a wide area ranging from Mexico all the way up to Canada. Since they are normally found outside, your best bet for getting rid of Jerusalem crickets is to prevent them from entering your home or yard by sealing cracks and gaps in doorways and windows using silicone caulk or foam insulation.

Although these insects naturally feed on decaying plant matter, you can discourage their presence around your garden by placing mothballs along the perimeter to keep them away from the plants you want to protect. Eliminating other food sources such as dump sites will also help reduce potato bug populations over time.

How Do You Get Rid Of Potato Bugs?

Handpicking methods: wait until night when they are on the move, do some research to find out where they congregate, and then place a bucket over them. Once you have collected as many as possible, pour boiling water over those that remain

Insecticides: can be used in cracks or crevices around your home that these bugs typically use as an entryway into your home.

If you have a very large infestation on your hands, calling a professional exterminator might be a better option than attempting to get rid of them yourself. Using fumigation is one of the most effective methods for killing potato bugs along with other insects such as fleas and ticks found lurking indoors. The best time to implement this method is during springtime when the adult Jerusalem crickets are most likely to be out in the open.

What Should You Do If You Are Bitten By A Potato Bug?

If you are bitten by a potato bug, it won’t do much damage unless you have an allergy to their venomous saliva. Symptoms of being bitten include reddened skin, itching, and swelling which can last anywhere from five days to two weeks depending on the severity of the bite. If you suffer severe allergic reactions including hives or shortness of breath after being bitten by this insect, seek medical attention immediately as these may indicate anaphylaxis which is a life-threatening condition.

When Is The Best Time To Get Rid Of Them?

It is best to get rid of Jerusalem crickets at night when they are most active. If you live in an area where you have a large potato bug infestation, it may be best to call a professional exterminator as the easiest way to get rid of these insects is by using fumigation.

What Do Potato Bugs Eat?

Jerusalem crickets eat decaying plant matter such as fallen leaves and flowers so do not kill them if you see them in your yard or garden. If they become a nuisance around the home, place mothballs along the perimeter of your property to discourage these insects from entering your lawn and flowerbeds.

What Is The Difference Between A Cricket And A Jerusalem Cricket?

Although both crickets and Jerusalem crickets have been known to inflict painful bites that can cause severe irritation for several days, there is one major difference between the two bugs. Crickets are nocturnal whereas Jerusalem crickets are diurnal which means that they are active during daytime hours which makes it easier to get rid of large infestations using targeted insecticide sprays.

How to Get Rid of or Kill Potato Bugs

Prevention is better than cure, so make sure to take the necessary precautions when it comes to potato bug infestations.

If you have a small insect problem in your yard or garden, remove all sources of food from the area including fallen leaves and other decaying plant matter that these bugs feed on. If they are becoming a nuisance around the home, seal cracks and gaps using silicone caulk or foam insulation to prevent them from entering your living space.

If you have an outdoor infestation around the home, handpicking potato bugs at night while they are most active can be effective in reducing their numbers over time as long as natural predators such as cats and owls aren’t more prevalent in your immediate environment.

Insecticides can also be used in crevices and cracks around your home to kill them from within. This means you won’t have the risk of being bitten by accidentally disturbing a potato bug hiding away in a crack or hole when attempting to control their numbers with insecticidal sprays.

If you do not have a pesticide that specifically states it is effective in killing potato bugs, try spraying natural products such as neem oil which can be used on both indoor and outdoor plants for this purpose.

If you have a very large infestation on your hands, calling a professional exterminator might be a better option than attempting to get rid of them yourself. Using fumigation is one of the most effective methods for killing potato bugs along with other insects such as fleas and ants. Professional exterminators usually use aluminum phosphide to kill potato bugs while at the same time limiting any damage to the environment.

Pesticides made from Bacillus Thuringiensis (BT) may also be effective in killing or controlling large numbers of this insect if they are sprayed onto soil and plants where they live and breed.

However, you will need to follow all instructions listed on the pesticide label when applying it and make sure that children and pets cannot come into direct contact with them until dry.

Mass Cane Plant: Care and Growing Guide

The mass cane plant, also known as corn plant or Dracaena massangeana, is an evergreen houseplant that can grow up to 12 feet tall.

The shiny green leaves have golden yellow stripes running down the center and they fold out into long sword-shaped objects typically around 2 inches wide at their widest point with a stiff central blade covered by soft petioles (which help support your flowers).

How to Care For Mass Cane Plant

To ensure the best growth and health of your mass cane plant, place it in a pot with well-draining soil.

Water when necessary but avoid letting them sit around too much as this can cause rot or fungus.

It’s important that you keep an eye on humidity levels; they need high humidity to survive properly (70%+) so make sure there is plenty sitting near their roots at all times during summer months unless containerized away from direct sunlight if possible).

Fertilize once per month during peak growing season only – don’t go more than twice without applying nutrients again after the initial dose has worn off because your mass cane plant will be hungry.

Mass Cane Plant Information

Though not as tall or wide growing outdoors, a potted mass cane plant will still grow between 4 and 6 ft (1.2 – 1 .8 m) indoors with proper care in an appropriate container.

With glossy green leaves gracing thick stems up 3 feet long and4 “wide, these plants make for excellent decorative accents anywhere around your home.

How to Propagate Mass Cane Plants

To propagate mass cane plants, use tip cuttings for best results.

Remove sections of stem about 4 inches long and place in water until roots begin to form them transfer the rooted sections into soil mixture.

The best time to propagate a Dracaena plant is in the spring or summer when growth has been fastest.

Propagating by stem cutting requires little effort and can be done easily with just one cut of your blade below a horizontal line on the top-side of each section you want as new plants, then placing them immediately into fresh soil mixture inside pots for setup before potting up again so they stay healthy.

Mass Cane Light Requirements

Your mass cane plant loves plenty of indirect sunlight all year round, but it does not like direct sunlight, so avoid placing near an open window or anywhere else where it might sit in the sun on a regular basis.

The Dracaena massangeana needs bright light, but shouldn’t be exposed to direct sunlight. The indoor tree-like plant will grow better with plenty of artificial lighting and protection from intense sunbeams that might cause discoloration or drying out too quickly (which could lead to leaves crisp).

It’s best placed next an east facing window where there are fewer strong shadows for this reason; it helps promote even moisture distribution throughout its roots.

Mass Cane Best Soil

The mass cane plant needs well-draining soil, so make sure it has good drainage holes in the bottom of the pot.

Plant your mass cane in a loose, high quality potting mix with added compost or peat moss for better drainage.

To keep your corn plants happy and healthy, make sure there are plenty of drainage holes in their potting soil. If you notice that the mix is too thick for these cane-like plant lifeforms then add some perlite (lightweight aggregate) so excess water can drain quickly out from beneath its roots.

Pruning Mass Cane Plant Leaves

Dracaena is a leafy tropical plant with natural bushy growth.

Pruning doesn’t speed up its development and can be done only to remove dead or yellowing leaves to control height; new buds will form at the end of each stem after pruning away from older ones so you don’t lose any potential flowers.

How to Water Mass Cane Plants

You can water your mass cane when you notice that the top inch (2.5 cm) or so of soil feels dry to the touch – however, never allow them to sit around completely dry for any length of time because they will die quickly if allowed to become too dry at all.

You should only need to water them about every 2 weeks depending on how warm and sunny their environment is naturally yet still only during the summer months.

Watering your cane plant is a little more complicated than watering any other type of houseplant. The best way to know when enough water has been applied and what kind will work for the light it’s in, you’ll have an easier time with this if you follow these guidelines:

The general rule with most succulents (cane flowers) like aloe vera or sempervi grows well under bright indirect sunlight; however some may also do fine inside on shady days as long as they’re given plenty enough moisture during their growing period which usually lasts about two months after planting out those babies into individual pots before transferring them straight home from gardening store.

Temperature Requirements for Mass Cane Indoor Care

Keep your houseplant healthy by giving it the right conditions. The ideal temperature range for Dracaena plants is 60°F to 75 ° F (15 C – 24).

However, you need to keep an eye on your mass cane plant because too-cold temperatures can cause it to lose its leaves or go dormant yet too hot conditions can kill or seriously weaken it.

So, average room temperatures are perfect for growing a strong cane plant with heavy yields.

During night time you can tolerate 50 degree Fahrenheit drops down below 10 degrees Celsius on occasion—but make sure not too sudden changes in these ranges happen all at once because this could kill them off quicker than expected.

Mass Cane Plant Humidity Requirements

The humidity of the air affects how well your plants grow.

The ideal range is between 40 and 50%, but if you want to give them extra love then misting will be appreciated regularly in order for their leaves stay hydrated as well having corn nearby can also help create an environment where it’s more humid than usual.

Misting or wiping with damp cloths are two ways that could work wonders.

During winter months humidity levels should be around 50 percent and up for indoor air quality, though you want to maintain high humidity year round with frequent misting if possible.

Misting your mass cane plant is great as long as you avoid getting water on the leaves because wet leaves can cause plant diseases.

Mass Cane (Dracaena Massangeana) Flowers

Mass canes are flower-like plants that grow in clusters and have pinkish white petals.

The tightly closed flowers open at night time, looking like delicate spikes from afar but bloom freely when you get up close with them! These beautiful tropical blooms will appear late fall through springtime depending on your location.

Though they may flower indoors, mass cane flowers are typically small and insignificant-looking compared to those of their outdoor counterparts.

Flowers range from white to pink with a yellow throat.

They also grow on long spikes up to 3 feet long which will shortly be followed by bright red berries.

In the wild these bright red berries make for an important food source for local birdlife who know exactly where to go in order eat some seeds before and after feeding their young and plucking out scales from around the berry’s center to avoid poisoning themselves with nasty alkaloids found here just like all parts of this beautiful plant can be poisonous to humans if ingested, so keep it out of reach.

Mass Cane Growth Rate

Indoor growing is the perfect solution for those who don’t have enough space or light. Mass cane plants are slow growers, meaning it can take many years before they reach their maximum height of 6 ft (1 8 m).

However, this also makes them ideal as indoor decorations because you won’t need to worry about your plant overflowing its boundaries in this case!

Your mass cane plant will grow significantly faster than an outdoor version just like other houseplants typically does in most indoor conditions compared to their outdoor counterparts.

It’ll typically grow 1-2 feet (30 – 60 cm) per plant annually but don’t be surprised if yours grows much slower or not at all because there are too many factors that could hinder growth including improper care, over/under watering/drainage and pest infestations.

Repotting a Mass Cane Plant

Repotting your Dracaena cane plant is important for its health.

It’s a good idea to repot every two or three years at the most, transferring into an even larger pot with fresh soil from time to be sure you don’t have any dead roots on account of poor drainage in previous containers.

When you’re finished repotting your cane tree, make sure to shake off all dirt and rinse it thoroughly.

If there are any brown or mushy roots leftover from when the plant was originally in its pot then cut them away with sharp scissors so that future growth will be healthy.

Now fill up a new sterile pot halfway full of the soil before putting in place an absorbent amount around each root ball while also ensuring plenty more space between individual branches for good airflow throughout their environment as well as watering consistently daily.

Fertilizer Needs for Healthy Mass Cane Plant Growth

To keep your Dracaena healthy and vibrant, fertilize it once a month during the growing season with general household fertilizer. Feeding can lead to mineral burn which is when excess salts build up in soil causing damage for these plants that do not need much attention at all.

You should only apply plant fertilizer during the active growing season (spring through summer) when your mass cane plant is actively growing and blooming.

Do not fertilize your mass cane during fall or winter because this can cause damage to the roots if you do it at an inappropriate time of year .

The conditioner should be applied every 2-4 weeks only as a foliar spray for best results.

To promote healthy growth, it’s important to flush the soil every once in a while.

Fertilizer can be unnecessary if you grow mass cane plants with organically rich dirt – but just remember that over-fertility is never good for either plant! Flush your houseplants by running water through their potting mix for two or three minutes after watering them before putting them back into position.

Mass Cane Plant Problems / Diseases

Common pests that can affect mass cane plants are spider mites, mealybugs, and thrips.

If these pesky bugs attack your plant you will see signs of infestation under leaves or on stems like brown spots from their droppings which could be harmful if left unchecked.

Getting rid is easy- just apply neem oil solution with care so as not to damage any tissue while wiping away all moisture present in order avoid stressing out the roots too much – this may lead to further problems down the road such us root rot where they turn black due lack water reaching them at the bottom of the soil.

Prevention is key because once they hit, you’ll need to use a pesticide spray to get rid of these pests immediately before the damage spreads further into the inner parts of your plant.

Here are a few pests affecting indoor mass cane plants:

Spider mites. They are very small and can be seen on the undersides of plant leaves or green stems if there is an infestation.

Spider mites pierce individual leaf cells and suck out their contents, which causes white spots to form on leaves as they dry up and fall off.

You can control them by spraying your cane plants with neem oil solution every 2 weeks only for around 3 months or so until the problem no longer occurs unless you see that it’s not working at all – then just go with pesticide spray.

Mealybugs. They are flat-bodied insects that cause a cottony wax buildup but don’t worry because getting rid is true. Just apply neem oil solution to get rid of them especially if you see any signs of damage from their droppings.

Thrips. These tiny 1/16 inch pests feed on a variety of plant parts and flowers by rasping the surface and withdrawing the clear, body fluids that result in silvery patches on leaves or flower petals – usually seen when they are flying at a good speed during daytime hours.

Just use neem oil solution for this pest too because it’s easy to control with a natural pesticide used over all other harmful chemicals.

Insecticidal soap may also be applied once a week throughout the growing season only if the problem persists after using other methods mentioned above for at least 3 months.

Fungal diseases can also affect Dracaena corn plants.

The common signs of fungal disease are leaf spots and weak growth due to root rot, which is often caused by excessive watering or letting the roots sit in water for too long without drainage; this leads us back to our original point about not allowing soil to dry out at all since that will only make matters worse.

Allowing your plant’s potting mix (or even just loose-layering) might help prevent these problems–and if you notice any diseased cane pieces before they spread their spores around then remove them immediately so it doesn’t spread further.

Common mass cane plant problems include fungal diseases and root rot fungus.

You can prevent these following a few tips for proper care and growing to avoid root rot fungus.

First, do not over-water your mass cane plants because that could lead to fungal problems – just water when the top 1/2 inch of soil has dried out slightly which is about every 2 weeks depending on the humidity levels of your place or how much sunlight it gets daily.

Secondly, never let roots stand in water for hours at a time–be sure they drain very well. And lastly, since this is an indoor plant species you can use lime-free compost only so the right balance doesn’t turn into too much acidity later on with all the fertilizers you’ll be using on it.

FAQs About Mass Cane Plant Care

Why do mass cane plant leaves have brown tips?

This problem could be caused by too much direct sunlight or even if the plant isn’t getting enough fertilizer.

The best thing to do is simply look into your lighting setup and ensure that they are not being exposed to it because lack of light will cause brown tips just as well which you can fix by using grow lights if possible – but first you should always start with adjusting their exposure time to be lessened gradually until the leaves stop having brown tips.

On the other hand, too much fertilization can lead to iron or calcium deficiency thus turning the tips brown also so water only when the top 1/2 inch of soil has dried out slightly so you avoid any type of fungus problems later on.

Do mass cane plants like the full sun?

It depends on their exposure time and how much sunlight they get daily.

For one, mass canes will also need at least 6 hours of direct sunlight every day so the more the better depending on your lighting setup such as using grow lights if you want to increase sun exposure for your plant.

Aside from that, during summertime when days are longer it is best if your plant gets indirect light without harsh midday sun shining directly onto where it stands because too much heat and bright light (such as seen in full-sun conditions) can cause damage over time which leads us back to the original topic about protecting your mass cane plants from leaves curling up and scorching.

23 Types of Spiders Found in the Garden or Home

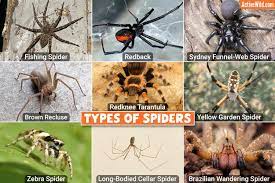
Many people have a fear of spiders—arachnophobia. Let’s be real. A creepy-crawly with multiple eyes and legs that can appear out of nowhere is enough to give anyone the heebie-jeebies.

One way to battle the fear is to learn the differences between spiders. Many species are not harmful. But some contain venom that can be dangerous for humans.

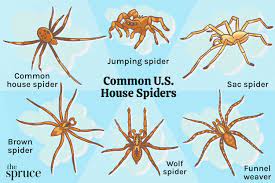
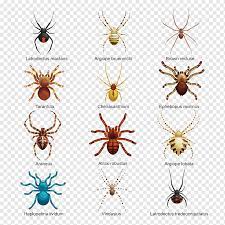
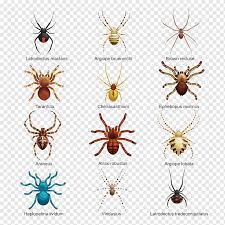
We’re going to look at 23 types of spiders found in the garden or home so you can identify these species by sight.

What Are Spiders?

Spiders are an arthropod (invertebrate species with an exoskeleton, segmented body, and paired jointed legs) that require oxygen to survive.

These creatures are the largest species of arachnids (scorpions, ticks, and mites are also arachnids) and rank number seven for species diversity.

Spiders live on every continent except Antarctica, so they’re common around the world. In total, there are currently 48,200 different species of spiders.

Regardless of the species, all spiders have eight legs, two body parts (abdomen and cephalothorax), and spinnerets to produce silk webs.

Anatomy of a Spider

Spiders have unique anatomy. Most people know spiders as eight-legged insects (yes, all spiders have eight legs; no more, no less).

Other people know that spiders have a lot of eyes. How many? Three or four pairs. That’s six to eight eyes in total.

Now, some things many people don’t know about spider anatomy. Like, how about the fact that they have two separate body parts? There’s the cephalothorax (the upper half of the body) and the abdomen.

All spiders also have pedipalps (feelers), spinnerets (organs that allow spiders to spin silk), chelicera (mouth), and fangs, which connect to the mouth.

Types of Spiders

1. Brown Recluse Spider

Brown Recluse SpiderBrown Recluse Spider

Appearance:

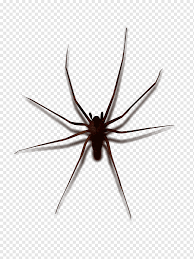
Brown recluse spiders can vary from dark to light brown, which is similar to other spiders. However, you can identify a brown recluse from its less harmful relatives due to a dark brown violin on the back.

Habitat:

This spider got its name due to its reclusive nature. They prefer to make their homes in dry, warm, dark environments. These spiders do well outdoors, making their homes in woodpiles or other debris.

Some of these spiders may make it indoors, where you might spot them under furniture, hiding in closets, the attic, or crawl spaces, or near baseboards or window moldings where it’s dark and rarely disturbed. They also like to hide inside storage items you’ve put away and never use.

Location:

Brown recluse spiders are common in the Midwest United States (Ohio to Nebraska) and southern states from Texas over to Georgia.

Danger Level:

Brown recluse spiders do their best to avoid humans and only bite if threatened. However, their venom is poisonous to humans and will cause presenting symptoms.

If bit by a brown recluse, you may be aware at first until the wound starts to sting then turns into intense pain.

Symptoms of a brown recluse bite include difficulty sleeping, restlessness, and fever. In severe cases, the bite may turn into an ulcerating open sore and need medical care.

2. American House Spiders

American House SpiderAmerican House Spider

Appearance:

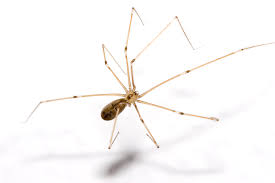
American House Spiders can vary in color, although the majority are brownish-yellow and have an elongated abdomen.

Habitat:

This spider is common in the home, often hiding under furniture, closets, or window molding.

But there’s a higher chance you’d spot these spiders in your outdoor buildings, such as the garage, barn, or shed. They want to be where there’s a better chance of capturing food.

You may also notice these spiders spinning webs outside your home, with their favorite places being around the windows or under eaves near a prominent light source.

Location:

The American house spider is a common spider species found throughout the United States and Canada, and worldwide.

Danger Level:

Given that these spiders are a common sight in homes, it may ease your restless mind to learn that these spiders are not poisonous and rarely bite humans unless threatened.

If bitten, you do not need to seek medical treatment, and people rarely experience any symptoms. You may feel discomfort at the bite site, but it goes away shortly after occurring.

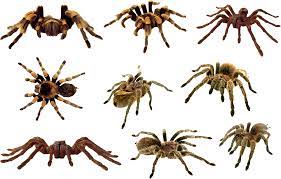
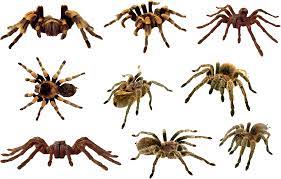
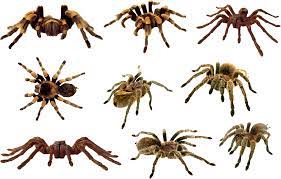
3. Tarantula

TarantulaTarantula

Appearance:

Tarantulas (all 850 species) are the world’s largest spiders, ranging in size from 4.5″ to 11″ long. This species can weigh between 1 and 3 ounces.

They have fierce downward-pointing fangs (which are powerful) and very hairy, prickly bodies. The color can vary from dull brown, black, striped, or even brightly colored (depending on the location).

Habitat:

Most tarantulas prefer to stay outdoors, living in dry, well-drained dirt. These species are ground-dwellers, meaning they live in the ground.

Some species in other parts of the world live in caves, cliffs, trees, or crops (pineapples and bananas are the most likely).

Location:

Tarantulas span the globe, preferring deserts, tropical and subtropical environments. The biggest populations are in South America, but they’re also common in the southwestern US.

Danger Level:

Tarantulas have a mild venom that is not threatening to people. Though it may hurt like hell if one of these giant hairy spiders bites you, you won’t die (unless it’s from the humiliation of screaming in terror).

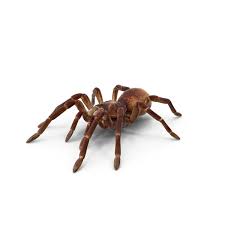
4. Goliath Bird-Eater Spider

Goliath Bird-Eater SpiderGoliath Bird-Eater Spider

Appearance:

The Goliath Bird-Eater is a tarantula species that holds the record for being the largest in the world. If you haven’t guessed by the name Goliath, these giant spiders grow to sizes of 4.75″ (body) with legs up to 11″ long. Excuse me while I cringe!

Habitat:

Thankfully, for most of us, we’ll never encounter these horrifying species in the wild. They prefer deep-rainforest conditions where they live under roots and rocks.

Location:

If you live in or visit northern South America, you increase your chances of encountering these giant spiders. They live in the rainforests of northern Brazil, French Guiana, Guyana, Venezuela, and Suriname.

These spiders do not appear north of Central America due to the lack of rain forest climates. Not even the sultry, humid tropical climate of Florida or Louisiana is enough to lure these spiders into the US. I, for one, consider this a blessing.

Danger Level:

Despite the massive size of these behemoth spiders, they are not poisonous to humans. A bite from a Goliath bird-eater would feel like the sting from a wasp. You may feel sore for a few days, but you won’t die or need medical attention.

5. Camel Spider

Camel Spider Camel Spider

Appearance:

Although not technically a spider, Camel spiders have eight legs and two long pedipalps, which help rip their prey into small pieces. The size of the pedipalps gives the impression of ten legs instead of eight.

They have a dark brown or tan color that helps them blend into the native desert environment. Tiny fine hairs cover the body, offering insulation.

These spiders can grow between three and six inches long and weigh up to two ounces. For comparison, three golf tees laid end to end equal the size of a 6-inch camel spider. A tennis ball held in your palm has a similar weight.

Habitat:

The camel spider prefers desert conditions and scrublands. They live in between rock crevices or under logs to stay cool during the day and hunt at night.

Location:

Camel spiders originated in the Middle East and have made it into the United States from soldiers returning from overseas.

You can also find some species in Mexico and the southern and western parts of the United States.

Danger Level:

Camel spiders often shy away from humans, although many may seem to be chasing a person; they are chasing your shadow.

However, these spiders are aggressive and will bite when they feel scared or threatened. Although they are not poisonous, their powerful chelicerae can bite through human flesh, which is severely painful. If left untreated, it can lead to infections.

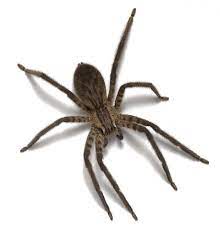
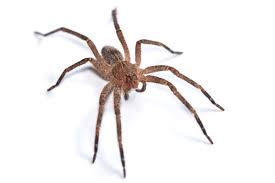
6. Wolf Spider

Wolf Spider Wolf Spider

Appearance:

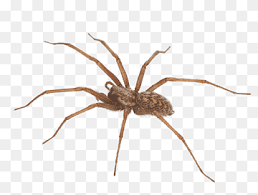
Wolf Spiders have a few features that make them even creepier crawlies than just being a spider. For example, many of these spiders grow big and hairy (hence the name).

In addition to brown fur, these spiders also have a dark brown coloring, although some may have pale streaks. Their long legs are thin and spiny. They have three rows of eyes (eight eyes total) and can grow up to 2″ (not including legs).

Habitat:

These cringe-worthy arachnids tend to come into homes in search of prey. People who bring in firewood from outside have a higher chance of finding these spiders in their homes.

Once inside, wolf spiders stay near the floor, making webs under your furniture or on the lower parts of the walls.

Outdoors, wolf spiders thrive by hiding under landscape timbers, firewood piles, stones, leaves, and other resting debris. During the day, they rest inside sheltered areas, such as sheds and porches.

Location:

The Wolf spider is an abundant species throughout much of North America. Between the United States and Canada, there are over 100 different species of the Wolf Spider.

Danger Level:

Despite their intimidating look, wolf spiders are not aggressive and rarely bite humans unless provoked.

If you decide to pick one of these fuzzy spiders up and let it crawl on you, your furry friend may bite in self-defense. But the bite is harmless, as this species does not have venom.

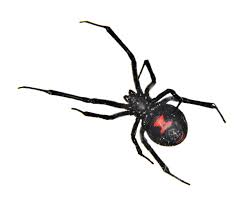
7. Black Widow Spider

Black Widow SpiderBlack Widow Spider

Appearance:

Black widows are a shiny, black spider with long, thin legs and an ovoid-shaped body. The easiest way to identify this type of arachnid is by the signature hourglass design on the abdomen’s bottom.

Although younger spiders may have an hourglass with an orange-yellow color, this hourglass is a bright red on mature females. Females grow up to 1.5″ long, while males are less than half that size.

Another way to distinguish between male and female is by color. Females have a shiny, black body; males are a lighter color with pink or red-spotted backs.

Habitat:

This spider species prefers dry, dark places where they won’t get disturbed. You’ll commonly find them in basements, garages, barns, rodent holes, dense vegetation, brush, decks, under stones, firewood piles, hollow stumps, outdoor toilets, and trash.

Location:

This spider species is a global traveler, found in the United States (south and west regions), Asia, southern Europe, Africa, Australia, and the majority of South America.

Danger Level:

Female black widows are highly aggressive and will bite to protect themselves. Male black widows are less likely to strike and are not as venomous.

This spider species is poisonous and has the notorious title of being the most venomous spider in North America. The venom of a black widow is 15 times more toxic than that of a rattlesnake.

Symptoms of a black widow bite start with a sharp pin prick that results in spreading pain within minutes. Other signs are:

  • Nausea
  • Muscle aches
  • Severe back and abdomen pain
  • Profuse sweating
  • Difficulty breathing due to hypertension and paralysis of the diaphragm

The pain usually lasts between eight and twelve hours, while other symptoms may take several days to stop. Black widow bites should receive medical treatment. In most cases, the bite is not fatal, although death may occur in some situations.

8. Brown Widow Spider

Brown Widow SpiderBrown Widow Spider

Appearance:

Brown widows have a brown and tan mottled color with black accents. Females have an abdominal stripe along the dorsal and three diagonal lines on the flanks. Each strip has a square-ish black mark.

A signature trait of all widow spiders is the hourglass mark. However, the color is more orange than red with brown widows.

Habitat:

These spiders live in secluded areas around the house and along the branches of woody vegetation. They prefer empty containers (pots, mailboxes, buckets, recessed handles of garbage cans).

Brown widows often make webs under eaves, in the corners of garages and closets, and underneath outdoor furniture and railings.                                                                                                        

Location:

Brown widow spiders have unclear origins. Some experts say it was first described in South America, while other experts say the species originated in Africa.

This species thrives in Florida, Hawaii, parts of Australia, Japan, Cyprus, South Africa, and some parts of the Caribbean Islands.

Until 2000, this spider only lived in Florida. It’s a common sight throughout the Gulf Coast states from Georgia to Texas, South Carolina, and southern California (San Diego, Los Angeles, and Orange counties).

Danger Level:

Brown widows are poisonous to humans, but their venom is not as potent as black widows. These spiders cause pain at the bite site that forms into a bright red mark.

In some people, severe complications can arise from a brown widow bite. Seek medical treatment for bites that you suspect came from this spider species.

9. Red Widow Spider

Red Widow SpiderRed Widow Spider

Appearance:

Red widow spiders are a threatened species due to the loss of habitats. These spiders have a black abdomen covered with red dots, outlined with yellow borders.

 The thin legs, thorax, and head are an orange-red color.

Females grow up to a ½” diameter with ½” to 2″ long legs. Males grow to ⅓ to ½ the size of their female counterparts.

Habitat:

These spiders live in sand pine scrub habitats where there are shrubs such as palmettos to make their nests.

However, due to the destruction of these habitat types, there are becoming fewer places for these spiders to live.

Location:

The Red Widow spider is endemic to Florida but only in limited areas, such as Lake Wales Ridge and some central and southern parts of the state.

Danger Level:

As a widow family member, red widows have a poisonous bite that can be harmful to humans. The toxin of females is more potent than males.

No deaths have ever been reported due to a red widow bite, and there aren’t many records of bites that have occurred.

The poisonous neurotoxins can cause muscle spasms, high blood pressure, vomiting, and sweating. It’s essential to get medical treatment if there’s a suspected bite.

10. Hobo Spider

Hobo SpiderHobo Spider

Appearance:

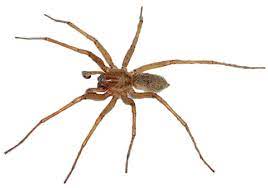
Hobo spiders are a light to medium brown color with lighter midline stripes and a single dark stripe down each side’s center. They have solid light brown legs without bands.

These spiders grow to sizes of 1″ to 1 ¾” in diameter, including legs. The body can be 5/16″ up to 9/16″ with females being slightly larger than males.

Habitat:

These spiders are poor climbers, so they tend to live inside crevices, holes, and cracks. They prefer moist, dark conditions like crawl spaces, basements, and window wells.

Location:

Before 1930, the hobo spider was a native species of Europe. However, now it’s a dominant species in six states in the United States.

It travels by hitching a ride on the undercarriage of vehicles, hence the name. They are common in the northwestern states of the US, primarily in the Pacific region.

Danger Level:

Hobo spiders are an aggressive breed that bites when intimidated or scared. Males are more likely to bite than females.

Symptoms of a bite from a hobo spider include localized mild pain and redness around the injury. In most cases, it’s not necessary to see a doctor for treatment.

11. Golden Silk Spider

Golden Silk SpiderGolden Silk Spider

Appearance:

Golden Silk spiders can be greenish-yellow or reddish yellow with white patches along the stomach. They also have striped brown or black feathery tuft legs.

These spiders grow up to 2″ as females or 1″ as males. Location can affect the spider’s growth.

Habitat:

These spiders build large golden webs along the edges of dense forests and in open woods. Their webs are sticky and a nuisance for hikers and hunters walking through the trees.

Location:

Golden Silk spiders are found in warm climates around the globe. The highest concentrations are in Madagascar and Australia.

They are found as far north as North Carolina and as far south as Texas in the US. They are common in the Gulf states, Florida, and the West Indies.

Some species have traveled as far as Argentina, South America, the South Pacific, and Southeast Asia.

Danger Level:

Golden Silk spiders may bite when held, but these spiders are not poisonous. A bite from this spider can produce slight pain less than a bee sting – and the area may turn red.

12. Jumping Spiders

Jumping SpidersJumping Spiders

Appearance:

Jumping spiders are the things of nightmares, with a small, compact black body and short legs, covered with brightly colored scales or prickly hair.

Untrained eyes often mistake the jumping spider with a black widow due to the body and size’s similar black coloring.

Habitat:

Jumping spiders are not picky about where they build their webs. They appear outside and indoors if they’re lucky enough to find a way inside.

Once in your house, you’ll most likely find them lurking in your windows and doors. They prefer sunlit areas to improve their vision and capture more prey.

Outside, these spiders like to live under boards and rocks. You may spot them climbing over your trees, bushes, decks, fences, or along the exterior walls of buildings.

Location:

These fuzzy, wicked-looking spiders are a common occurrence throughout all of the United States.

Danger Level:

For the most part, jumping spiders avoid human contact and run away if approached. However, if they feel threatened, some spiders may bite in self-defense.

Although slightly painful, a jumping spider bite is not poisonous or harmful to humans and would not need medical attention.

13. Red-Back Spider

Redback spiderRedback spider

Appearance:

Redback spiders are a relative of widow spiders, with the signature hourglass marking on the stomach that can be orange or red, depending on gender. Young spiders have more white markings on the abdomen.

Females are brown or black with a red or orange stripe on the top part of the abdomen. They have a body size similar to a large pea with slender legs.

Male Redbacks have a light brown body with white marks on the abdomen’s top with a pale signature hourglass marking.

Habitat:

These spiders don’t mind human companionship and often build their webs in sheltered areas like sheds or toilets and along rocks, junk-piles, inside logs, and shrubs.

They can survive in a variety of habitats, including forests and desert climates. And they’re drawn to human-made urban areas.

Location:

Redback spiders are native to Australia, hence the nickname Australian black widow. It’s believed to have originated in South Australia.

It’s present throughout Australia, New Zealand, the United Arab Emirates, the UK, Japan, and Southeast Asia.

Danger Level:

These spiders are responsible for over 2,000 hospitalized bites every year. But there have not been any deaths from this spider in over 50 years due to antivenom development.

These spiders have a potent venom that produces latrodectism, a name for presenting multiple symptoms related to being bit. Symptoms last 24 to 48 hours up to a few weeks.

Larger females cause worse symptoms than smaller or male species. In some cases, the bite may not contain as much venom.

Symptoms include severe pain that gets worse with time, localized sweating and swelling of the bite site, vomiting, nausea, chest or abdomen pain, headaches, increased blood pressure, and generalized sweating.

14. Brazilian Wandering Spider

Brazilian Wandering SpiderBrazilian Wandering Spider

Appearance:

Brazilian Wandering spiders, also named banana or armed spiders, are a giant and dangerous species. These monstrous arachnids can grow up to 2″ body size with 6″ long legs.

Color can vary, but all of these spiders have hairy bodies with a black spot on the stomach. Most Brazilian Wandering spiders are brown.

Habitat:

Brazilian Wandering spiders do not create webs. During the day, they hide in crevices or under logs in the forest. At night, they hunt and wander along the forest floor.

Location:

As the name implies, this spider is native to Brazil. There are eight different species. Other species live from Costa Rica to Argentina and throughout Latin America.

Stories have surfaced about giant Brazilian wandering spiders being transported in banana bunches to Europe and North America. But it’s believed these were harmless species of Cupiennius, which share similar features.

Danger Level:

The Brazilian Wandering spider is the most poisonous spider in the world. One bite can cause goosebumps, severe burning, and sweating.

Additional symptoms include altered blood pressure (high or low), hypothermia, nausea, blurred vision, convulsions, and vertigo.

15. Long-Bodied Cellar Spiders (Daddy-Long-Legs)

Daddy-Long-LegsDaddy-Long-Legs

Appearance:

Perhaps one of the most well-known spiders, the daddy-long-legs has signature traits that make it easily identifiable.

These large spiders have long, skinny legs (as the name implies), with a small pale yellow or light brown body.

Habitat:

As the name implies, you can often find cellar spiders in basements, crawl spaces, and cellars. These spiders prefer interior areas where there’s a lot of moisture and humidity.

Other common areas are in the corners of barns, sheds, warehouses, garages, closets, cabinets (especially around the kitchen or bathroom sink), and the eaves, ceilings, or windows.

Location:

You can find cellar spiders anywhere in Canada or the United States. There are over twenty different cellar spider species throughout both countries.

Danger Level:

There have been no documented cases of this spider ever biting a human. Many people like to play with these spiders and often relocate them instead of killing them. Unlike other spider species, which get the shoe if they show their presence.

One myth about the daddy-long-legs spider is that it is the most poisonous spider globally, but the fangs are too small to penetrate human skin. Recent research busts this myth, stating there is no scientific evidence of these spiders’ toxicity to humans.

16. Huntsman Spiders

Huntsman SpiderHuntsman Spider

Appearance:

Huntsman spiders are large hairy species, growing up to 1″ (body) and 3″ to 5″ legs. They have a brown, flat body with little pattern.

However, the species Giant Huntsman spider can have a leg span of almost 12″, giving this species the title of largest spider (by diameter) in the world. Some can grow to have a span rivaling a dinner plate.

Females have a larger abdomen, while males have longer legs. Either sex has a wide marginal band around the carapace (cream – males, tan – females). All of the legs have black spots.

Habitat:

These spiders are a common site in barns, sheds, garages, and inside the house. In some areas, they may come into greenhouses.

But they cannot stand cold weather, which makes them rarely seen outside, especially in cold months. Outdoors, they live under rocks, foliage, loose tree bark, and in crevices. When it’s cold out, these spiders are coming inside, even if your house is a spider-free zone.

Location:

The Huntsman spider may have originated in Asia, but it’s now common in Africa, Australia, South America, and some of the United States – coastal, tropical, and subtropics.

There are over 100 species of Huntsman spiders in Australia; it’s believed there are more not yet discovered.

States where these spiders live, include California, Texas, Florida, South Carolina, and Georgia.

Danger Level:

The bite of a Huntsman spider is painful, and swelling is common around the injury. Mild nausea and headaches are also possible. No medical treatment is necessary for most bites.

17. White Spiders

White SpiderWhite Spider

Appearance:

White spiders, otherwise known as goldenrod crab, flower, or crab spiders, have a light coloring that can be white (female) or a faded yellow or green (male).

These spiders blend well into nature, making them difficult to spot. Females can change their color to match their surroundings. White spiders resemble crabs due to their legs growing out to the sides instead of under them, hence their nickname.

Females have two bright red dots on their stomach, which may blend in with the lines or appear not there at all. They can grow from 7 to 10mm, with the front two legs longer than the rest.

Male spiders have a white or green belly that sometimes has brown stripes. These spiders are often smaller than the females.

The eyes of a White spider are unique to their species. They have two rows, with the top row being straighter and larger. The eyes have a wide bottom and a narrow top.

Habitat:

White spiders do best in temperate climates and are partial to forest biomes. Locations where plants like milkweed, white fleabane, white flower, trillium, and goldenrod grow, are sure to have these spiders nearby.

Location:

The White spider is one of the most common spider species in the Northern hemisphere and lives in almost all countries above the Tropic of Cancer. You can only spot these spiders in Europe or North America.

Danger Level:

White spiders are harmless to humans, as their fangs are too small to penetrate a person’s skin. They do contain venom but not enough to harm large animals, let alone humans.

18. Orb-Weaver Spiders

Orb-Weaver SpiderOrb-Weaver Spider

Appearance:

Most species of Orb-weavers have bright colors with a large abdomen and spiny or hairy legs. Most have a gray or reddish-brown coloring.

Some species may have a leaf pattern on their triangular belly. There may be a brown or white dorsal stripe (sometimes with a white edge).

But with over 2,800 different species classified as orb-weaver, appearance, size, and color can vary.

Habitat:

Orb-weavers are apt to set up their webs anywhere there’s a structure where they can spread their web out to catch flying insects—openings in trees or shrubs, light fixtures, or even tall grass.

These spiders create a large web (up to three feet in diameter) at night to catch prey, then take it down before dawn. This species’ unique feature is they weave vertical orb (circular) webs that resemble Halloween decorations. Many people compare them to wheel spokes.

Location:

Orb-weaver spiders are an abundant species found in North America, including all continental US, Hawaii, Alaska, and Canada.

Danger Level:

Bites from an Orb-weaver spider are rare, and they never attack unless provoked or threatened. If you’re attempting to pick one up, don’t be surprised if they bite you.

Being bit by this spider will feel similar to a bee sting and rarely presents any symptoms other than soreness around the injury. Numbness, swelling, dizziness, and nausea are rare but potential side effects.

19. Sac Spiders

Sac SpiderSac Spider

Appearance:

Sac spiders are a pale yellow, cream-white, or brownish-red color with distinct black markings around the mouth. They are a small species, growing less than ¼” long.

Females of the c. mildei species can grow up to ⅜” while males grow between 3/16″ and 5/16″. C. inclusum females grow between 3/16″ and ⅜” and males get between ⅛” and 5/16″ long. A darker colored stripe runs down the abdomen.

Habitat:

There are two different species of sac spiders in North America. Cheiracanthium inclusum is usually outdoors, while cheiracanthium mildei are more common indoors.

These spiders are not afraid of humans, and there are reports of people being bit by these spiders as they climb up a couch or into a person’s bed. You may notice silken sacs in the corners of your baseboards, ceilings, or underneath and behind furniture.

Outdoors, they form these sacs underneath logs or stones, around door frames, under window sills, and along soffits. They also hide under loose tree bark.

Location:

Historically, it’s believed that c. mildei originated in Europe, but it’s also common in most North America, including the northern states. C. inclusum, on the other hand, lives in the southern states but isn’t seen in most northern states in the US.

Danger Level:

Sac spiders contain a cytotoxic venom that’s extremely harmful to humans. Spider bites from this species should seek immediate medical attention and be treated as an open wound.

Failure to treat a sac spider bite can cause septic or necrotic tissue, leaving scarring and damage. Although no deaths have been reported from a sac spider bite, it often requires a round of Prophylactic antibiotics to prevent infection and permanent damage.

C. Inclusum spiders account for the largest number of spider bites to humans in the US. These spiders often bite a person multiple times, but their venom is not as severe.

These bite wounds turn into a hard, red area with a 1″ up to several inch diameter. Then it forms a white pustule that requires proper cleaning and disinfecting.

20. Grass Spider

Grass SpiderGrass Spider

Appearance:

As with most spiders, female grass spiders get bigger than males, averaging a length of 10 to 20mm, while males only reach 9 to 18mm.

These spiders have a brownish-yellow carapace with dual longitudinal stripes. They have a darker colored abdomen than the rest of their body. They are usually brown, but some species may be beige, ivory, black, gray, or a blend.

Grass spiders have eight eyes, in rows of three, two on the top and bottom, and four in the middle.

Their appearance resembles their relatives – hobo or the domestic house spider. They are also commonly mistaken for wolf spiders.

Habitat:

If the name hasn’t already said it all, grass spiders prefer to stay outdoors, building their nests in tall grass and shrubs.

Location:

The grass spider is a common species found all across the United States, including Hawaii and Alaska, Mexico, and Canada.

Danger Level:

Grass spiders are more reclusive, preferring to avoid human interactions when possible. But when scared, they will bite. However, they have small fangs, which have trouble piercing human skin.

Babies, the elderly, and people with thin skin are in danger of grass spider bites. These spiders contain harmful venom, and if it does manage to get into the skin, it can cause necrotic lesions and infections.

21. Ground Spiders

Ground SpiderGround Spider

Appearance:

The name ground spider can refer to many spider species, including the Parson spider, which is the most common.

Most ground spiders are grayish-brown or red and may have striped marks or solid coloring. They are small in size, rarely above ½” in length.

Habitat:

Ground spiders prefer making homes under logs, mulch piles, leaves, heavy ground covering (ivy), rocks, and other ground-level objects. Unless they are hunting, these spiders do not leave their homes once established.

If they come indoors, they hide in quiet, dark spaces during the day and may venture out after dark to hunt. You may spot them under appliances and furniture or moving along baseboards.

Location:

Ground spiders are common worldwide and are abundant in Mexico, Canada, and all 50 states of the US.

Danger Level:

Ground spiders are not poisonous and do not contain any venom. Some species may bite when cornered but will not need medical treatment.

22. Crab Spiders

Crab SpiderCrab Spider

Appearance:

There are over 2,000 species of spiders that classify as crab spiders. For this reason, the color can vary from dark brown, black, or light gray, allowing them to blend into the ground.

Some species may be bright or light-colored or even able to change shades. Females are larger than males.

Crab spiders move sideways with a length of 2 to 11mm. They have a flat body and thick legs, with the front two pairs being longer than the back two pairs. All eight small eyes are the same size.

Habitat:

This species is common in landscaping and home gardens. They hunt along leaf litter, soil surface, mulch, plant leaves, flowers, trees, and shrubs.

Location:

With so many different crab spiders species, it’s easy to understand why this species is found worldwide on all continents.

Danger Level:

Crab spiders contain venom, but their mouths are too small to puncture human skin, so bites are rare. If a bite occurs, there may be mild localized pain that quickly goes away.

23. Funnel-Web Spiders

Funnel-Web SpiderFunnel-Web Spider

Appearance:

There are three different classifications of funnel-web spiders. In the agelenidae family, there are almost 1,200 species globally, with 100 native to North America. These spiders are gray or brown, up to ¾” long, with eight eyes in two rows, spotted backs, and banded legs.

Hexathelidae species are dangerous to humans and include the northern tree funnel and the Sydney funnel species. These species grow 1″ to 2″ long and are brown or black, and have sharp fangs and extended spinnerets. Light hair grows along the shiny carapace.

Dipluridae species are considered funnel-web tarantulas. Spiders in this family can range from 3mm to 15mm (½”).

Habitat:

Funnel-web spiders enjoy temperate grassland regions, and some prefer tropical conditions. All species of funnel weavers stay low to the ground and form funnel-shaped webs.

Location:

Spiders in the Dipluridae family are native to tropical regions, preferring South and Central America. But they also occur in Central Asia, Australia, and Africa.

Those in the agelenidae family live throughout North America, including all 50 states in the US (Alaska and Hawaii) and Canada.

Dipluridae species are native to Australia.

Danger Level:

Some species of funnel-web spiders are not harmful to humans. A bite results in mild pain

but no lasting issues. Spiders of the Hexathelidae species are the opposite. These are dangerous to humans, and many of these are on the list of the deadliest spiders globally.

Types of Spiders FAQ

Are most spiders harmless?

The majority of spiders are not harmful to humans and are beneficial for getting rid of bugs and other common pests.

How many types of spiders do we have?

There are over 4,000 different species of spiders throughout the world. Over 3,400 of these are in North America. Out of these, only three are poisonous. Others can cause irritation but nothing serious.

How can you tell a poisonous spider?

Poisonous spiders have unique markings and colors that help distinguish between safe and unsafe.

In the US, three signature markings you need to watch for are:

  • hourglass shapes on the abdomen (Black widow)
  • a brown violin mark on the back (brown recluse)
  • yellow markings on the belly (hobo spider).

Do spiders have genders?

Spiders can be male or female. Determining a spider’s gender can be done by studying the size and color. Female spiders are almost always bigger than males.

Conclusion

We hope you enjoyed this detailed guide on the 25 most common spiders found in gardens and homes. Now that you know the differences between all these different species, you’re better prepared to face your fears and maybe save the life of a harmless spider friend or two.

36 Different Types of Screws (Custom Graphic & Ultimate Guide)

It’s easy to become confused and overwhelmed when trying to figure out the right materials to use, such as screws and nuts.

We’ve found thirty-six types of screws commonly used and compiled them into this resourceful ultimate guide. We will talk about each of these screws, their features, and typical uses.

By the time you finish this article, we expect you to be a screw master! Here we go.

The 36 Types of Screws

You may be surprised to see how many different screws are available. Here’s our custom graphic, a brief description of the 36 screws that are most common.

#1. Decking screws

Deck screws are a must-have if you’re putting together a deck, patio, or other heavy load-bearing structures.

If you’re unfamiliar with the many various types of screws, you may unintentionally confuse decking screws with wood screws due to their similarities.

However, deck screws are copper or coated steel material, making them strong and resistant to corrosion – a must for screws used outdoors.

Deck screws have a flat head, similar to wood screws, but the head is larger, so it can support more weight. Another notable difference is that the head will have a slight flare or bugle shape that keeps the screw from sinking into the wood, causing cracks or splits.

Another trademark of deck screws is sharp, deep tapered threading along the skank with an aggressive tip.

#2. Pan-head screws

Pan-head screws are a great solution when you need a decorative look, or there’s potential to run into the head. Machine screws like these require a pre-drilled and threaded hole due to the flat tip.

These screws have a broad head that’s flat or slightly domed with high, chamfered, or curved edges that create a deep socket. The bottom is flat, which provides a firm hold and reduced crushing. These screws are ideal for enlarged holes.

Pan-heads can be compatible with multiple socket types: slotted, hexagon, Phillips, square, Torx, or Pozidriv. And there are numerous coating options: stainless steel (white, black, or non-coated) or zinc-plated.

#3. Hex cap screws

Hex cap screws are a type of fastener that’s commonly confused with hex bolts. These screws have a hexagonal head (six sides), a washer face that lays flush with the bottom of the screw, and a chamfered point.

This type of screw is common in construction and the assembly of machines due to their ability to secure a tight fit. To install a hex cap screw, you turn the head to feed the threads into the tapped hole.

There are multiple grades of hex cap screws. Grade 2 screws are low carbon steel and useful for securing wood or light hardware that doesn’t require a lot of strength. You do need to use nuts and washers with hex cap screws.

Grade 5 fasteners are medium carbon steel that goes through quenching and tempering to add extra strength. These screws are often used in the automotive industry.

Grade 8 hex cap screws are medium carbon alloy steel that has been quenched and tempered to the hardest strength possible.

And the most common type of hex cap screw is 18-8 stainless steel, a composite made of 18% chromium and 8% nickel. These screws resist corrosion and have high strength. This category consists of multiple grades of stainless metal (302, 303, 304, 305).

#4. Carriage bolts

Carriage bolts are fasteners made of stainless or galvanized steel to secure wood and metal materials. Both materials mean that these screws are corrosion and scratch-resistant. Other common names are a coach or plow bolts.

These screws have a round head, with a straight threaded shank (the bottom half is threaded, the top half is smooth metal) and a flat bottom.

You will need to predrill holes before placing carriage bolts and tapping them into place with a hammer. Secure your bolt with a nut and bolt.

Carriage bolts are versatile enough to use in multiple ways, including farming, railroad, and mining industries.

#5. Lag bolts

Lag bolts are a thread-forming wood screw with a gimlet point (threaded cone tip) with a 45 to 50 angle. These screws are ideal for securing wood to wood or metal and for mounting to masonry or concrete.

The coarse, wide threads and the pointed tip means that you can use these screws to create your hole – no pre-drilling required. And because the threads mate with the material, you don’t need a nut to keep it secure.  

The lag bolt size can range from ¼” to ¾” diameter and 1″ to 16″ in length. The head is typically hex-shaped, and the size varies. You need to ensure enough room around the head to fit a wrench to secure the bolt fully.

These bolts are usually steel or stainless steel construction. You can get these with hot-dip galvanized or zinc plated finishes making these screws non-corrosive. When using pressure preservative-treated wood, it’s best to use galvanized or stainless steel.

#6. Hammer drive screws

Hammer drive screws are self-tapping permanent fixing for heavy-duty use. These screws are also known as U-drive, drive, or unslotted round head.

U-drive screws have unslotted, round heads that require a hammer to secure them in place. Although these screws can mate with a surface once pushed through, you need to drill a small starter hole before inserting your screw. And your screw must be harder than what you are mating.

Hammer drive screws are 316 or 18-8 steel and can have zinc or black oxide finishes. These have a non-threaded pilot point tip and large helical angled start threads.

#7. Square Head bolts

Squarehead bolts have a broad square head with plenty of room for a wrench, which is needed to mate these bolts to their surface.

This type of bolt is preferable when you want a rustic theme or match older bolts in a building restored. These bolts are also used in the railroad industry.

Squarehead bolts can have a full thread or partial thread, ranging in size from diameters of ½” to 1 ½” and lengths of 1″ to 17-inches.

Materials used for square head bolts include plain steel or steel with zinc or hot-dipped galvanized finishes.  

#8. Socket-head cap screws

Socket-head cap screws are known by many names, including socket cap screws, Allen socket bolts, or socket screws. Socket screws are an everyday use in machinery.

These screws have a cylindrical button head cap screw with a hexagonal hole. You can get a socket head screw with a button, cap, flat, or flange head. To drive a socket-head, you will need a hex Allen key or an appropriately sized socket wrench.

You can find these screws with a full or partial external thread. There are metric or inch sizes, with various lengths and diameters made of stainless steel, silicon bronze, or Ni-Cu Alloy Steel.

#9. Oval head screws

Oval head screws are countersunk screws with an oval head and a decorative finish. These screws are often used for mounting switch covers and lay flush against the surface.

However, the head’s roundness does mean the screw will still stick out of the plate slightly. Oval head screws have a cone-shaped underhead with a tapered shank.

You can also get an undercut oval head screw, which differs from a regular oval head by the head underside’s flat bottom. This design provides an entirely flush look.

#10. Wood screws

Wood screws are a common sight in garages and workshops. If you’re making furniture, cabinets, or mounting something to your wall, you’ll need this type of screw. It’s a versatile tool that you’ll use on many projects.

You can get wood screws with pan, oval, or flat heads that lay flush into the wood. With some projects, this deep-set can cause the wood to damage.

Wood screws have a straight shank with medium threading and a sharp tip. However, the top part of the shank is smooth instead of threaded, up to the head. Wood screws share a similar thread look to deck screws.

Because wood screws are steel, they cannot stand up well to wet conditions. Steel will start to rust and corrode with frequent exposure to water.

#11. Sheet metal screws

Sheet metal screws are a versatile fastener you can use to secure plastic, wood, and metal. This type of screw has a fully threaded shank with sharp grooves that mate with the material for a secure hold.

Self-drilling screws have a sharp conical tip that allows you to start the hole using your screw, while self-tapping screws require you to predrill a starter hole before inserting your screw.

The size of sheet metal screws is displayed as three numbers. The first is diameter, then thread count, and the final number is the length.

Sheet metal screws come in multiple head types – Pan or round heads stick out from the surface, while flat or oval countersunk heads will flush. They may be flat, Phillips, or combo drive.

The most economical sheet metal screws are of carbon steel, which is not weather-resistant. For a higher price, you can get galvanized stainless steel, which is better for outdoor use. Zinc or nickel-plated screws are also available.

#12. Thread-rolling screws

Thread rolling screws are an excellent option for drilling into materials like plastic or sheet metal. You need a predrilled hole for thread-rolling screws to work.

These screws have a trilobular lobed cross-section that pushes material from the hole while drilling through the surface. If you want to reduce loose chips, you should use thread-rolling screws.

Thread-rolling screws are steel or 18-8 or 410 stainless steel that has been quenched and tempered for extra strength. You can get these screws in a range of diameters and lengths.

#13. Socket-head screws

Socket-heads are a type of machine screw that has a cylindrical barrel head with a hexagonal socket. Other names for socket-head screws are socket head cap screw, hex socket head screw, or cap head socket screw.

The most significant difference between a socket head screw and other types is the smaller size head, which is 1.5 times bigger than the thread’s nominal diameter. This feature makes these screws perfect for tight spaces.

Typical uses of a socket head cap screw are in sporting gear, like bikes, where there’s a need for a flush setting, so there’s no potential for catching on exposed screws. This screw type creates a recessed set where the cap head sits flat inside a counterbored hole.

When purchasing these screws, remember that the described length includes the shaft and head. The measurements of this screw type use two numbers with a point in the middle.

This dot is not a decimal but a separator between the first number – ultimate tensile strength (UTS) in MPa then divided by 100; and the second number – the yield strength to UTS ratio.

The head of a socket cap screw can be a flange button, button head, flat head, metric, or socket, made of 304, 18-8, or 316 stainless steel. Chrome-plated steel is also available.

#14. Set screws

Set screws are a type that applies pressure at the tip to secure objects, rather than using the threads. This design does not contain a head and needs a tapped hole before installation. You also will need a hex socket or key.

There are different point types for set screws. A cup tip contains a thin edge that bites into the surface for a firm hold on hard or soft surfaces. Knurl-grip cup tip has serrations around the edge of the cup. The end of a flat set screw is flat, ideal for securing to a flat surface.

Oval tips are useful for U or V-shaped or angled surfaces. Cone set screws have a sharp point for securing soft materials. And the extended, or dog-point, set screw has an extended tip that mates with a slot or hole.

Set screws come in multiple materials, including 18-8 or 316 stainless steel, nickel alloy, brass, or plastic. You can also get them with black oxide finishes.

Set screws come in multiple diameters and lengths, and both metric or inch hex sizes.

The screw size is listed as the thread diameter (inches or metric) and threads per inch. The second number will be the thread distance in metric sizes, measured in mm.

#15. Weld screws

You can use weld screws to produce a protruding shaft. You have to weld these screws to a metal surface and secure your items using a washer and nut.

There are three weld screw designs. These are bottom projection spade projection or top projection screws.

Weld screws come in various lengths, diameters, and thread counts. Once welded, these screws become permanently attached to the mount.  

#16. Raised or slotted cheese screws

Cheese head screws have a round head that resembles a wheel of cheese, hence the name. This screw will have a flat disc top head that’s round on all sides with a flat bearing surface. The height of the head is half the diameter.

Cheese screws are a type of cap screw used in automotive, bicycles, electrical, and appliances. Pan head screws have primarily replaced slotted cheese screws, but these are still preferred when there’s a need for a deeper socket and strong head strength.

There are multiple drive types, including slotted – the most common – and crosshead, Allen, spine, hexalobular, and Pozidriv.

Raised cheese head screws are called fillister screws. It has the same cylindrical sides and a flat mating surface, but the head is domed and deeper.

#17. Fillister head screws

Fillister head screws are often referred to as cheese head screws due to the cylindrical head shape. This screw has similarities to pan head screws. However, they have higher sides.

The head of a Fillister screw is oversized with a slight convex. These screws are great for connecting metal to metal or wood to wood. However, they are rarely used in new production, so you’ll likely need these as replacement screws for older material.

Materials of a Fillister screw are typically A386, 18-8, or 316 stainless steel. Grade 5 titanium, brass, plastic, or alloy steel. Zinc or black oxide finishes are also available.

#18. Drywall screws

Drywall screws hold drywall into place without damaging your surface. However, these screws are not for building.

When picking your screws, you’ll want to base the length on the size of your drywall.

  • ¼” drywall – 1″ to 1 ¼” screws
  • ½” drywall – 1 ¼” to 1 ⅝” screws
  • ⅝” drywall – 1 ⅝” to 2″ screws

You’ll also need to consider the threading on the screw. Fine-threaded screws self thread and are great for metal studs but not wood. For wood studs, you’d want to use a coarse thread.

The gauge, or diameter of the screw, is also important to consider. To hang drywall, the best screw gauge is #6 or #8. The larger the gauge, the thicker the diameter. A #6 screw is 0.1380” and a #8 is 0.1640.”

#19. Concrete or masonry screws

Concrete and other masonry are hard surfaces that need concrete screws. The best concrete screws to use are self-tapping.

You do need to predrill a hole before inserting a screw into the concrete. It should be slightly deeper than the width of the screw. After removing the dust from the hole, insert your screw and thread it into position.

The dimensions are two numbers. The first is the diameter – either 3/16″ or ¼,” and the second number represents the length – 1 ¼” to 6.”

Concrete screws can have a Phillips head, which allows for a countersunk fit, or a hex head that creates a raised fit over the surface.

These screws can be carbon steel or 410 stainless steel, which is better for outdoor use or areas where there’s high moisture.

#20. Machine screws

Machine screws have a uniform shaft with evenly spaced threads of ¼” or less diameter. Threading can be coarse – 24 threads each inch or fine – 32 threads per inch. These screws are used in appliances, automotive, electronics, tools, and machines.

Machine screws have various heads, such as standard slotted, Allen hex sockets, square-drive, security, Torx six-pointed star, and Phillips heads.

The best thing about machine screws is they can fasten multiple types and amounts of joints. You can secure machine screws with nuts, threaded into a surface, or with threaded couplings. These screws are quite versatile.

#21. Modified truss screws

Modified truss screws, also called self-piercing screws, have a sharp piercing tip that can start and make holes without predrilling.

The head is more extensive, so there’s more material to cover the surface for a tighter fit. A Phillips drive slot sits higher above the flat rim.

This type of screw is used for securing lath (thin pieces of wood) or corrugated siding to steel or wood bases. They’re also frequently used in HVAC.

Modified truss screws are stainless steel and can be painted or zinc coated. These come in multiple lengths in a #8 gauge.

#22. Washer-faced screws

Washer face thumb screws are a solid piece screw with a full unified thread along the shank and a flat, smooth cylindrical head.

These screws have knurled sides and a two-piece shoulder that separates the head from the shank. The broader part of the shoulder holds the washer face.

Washer-face thumb screws are stainless steel or aluminum and come in various lengths and thread counts. You need to predrill a hole before inserting these screws into the surface.

#23. Thread-cutting machine screws

Thread-cutting screws are self-tapping, which means they cut new threads through metal when put into an existing hole. These screws are commonly used in places where there’s the need to remove them frequently.

This type of screw has a flat head with a conical neck and a uniform thread along the shank. The tip is flat, so it can’t pierce to start a new hole. But unique grooves cut into the threads allow these screws to rethread an existing hole.

There are five types of thread cutting machine screws for metal, plastic, or wood: Type 1, Type 17, Type 23, Type 25, and Type F.

Type 1 screws have a single flute that creates a fine standard thread. Type 17 is better for wood and has a coarse thread and a long fluted sharp point on the tip that catches chips.

Type 23 screws cut fine wide threads and remove a large portion of chips. A similar design is the Type 25, which has a coarse thread with a large cutting edge great for plastic and soft materials.

F screws have a blunt, tapered tip with multi-cutting edges and chip removal. These are ideal for heavy gauge metal, zinc, aluminum, cast iron, brass, and plastic.

#24. Self-drilling SMS

Self-drilling sheet metal screws (SMS) is the most common fastener used in industrial settings. These come in a variety of lengths, diameters, and drive types.

These screws have a sharp drill point on the tip that allows you to use these screws to start your hole and drill through the material without predrilling a spot.

Sheet metal screws are often confused with self-tapping screws, which have mating threads that hold in a pre-piloted hole.

But it’s important to remember that there is a difference between self-tapping and self-drilling. Both are for sheet metal. All self-drilling screws are self-tapping. However, not all self-tapping screws are self-drilling.

#25. Self-tapping screws

Self-tapping screws can work on a variety of materials, including sheet metal, plastic, or wood. These are often called sheet metal screws because they are widely used in industrial settings.

These screws have a sharp, pointed tip with a tapered threaded shank. They come in different head shapes, drives, diameters, and lengths.

Self-tapping screws can create new threads, but they require you to create a pilot hole first, using a drill bit slightly smaller than the screw’s diameter. Once the initial hole is made, you can use the self-tapping screw to create the hole.

#26. Framing screws

Framing screws, sometimes called bugle heads, are used in construction when framing a building. Some types of framing screws are for installing drywall or gypsum board.

The most common type for connecting two by fours is a 2 ½” #9 or #10 hardened steel screw. You can get these with hot-dipped galvanized coating for better corrosion resistance.

These screws typically need to be long enough to go through a 2×4, which is 1 ½” thick, so a minimum of ½ is necessary. However, using a screw that’s too long can waste time and damage the wood.

This type of screw has a flat or concave head with a thin rim and a diameter between ¼” and 5/16″ with various drive types – square, Torx, Phillips, hex-head, and T-star.

#27. Tamper-resistant screws

Tamper-resistant screws are ideal in places where you’re trying to prevent unauthorized entry, such as on electrical or HVAC panels.

These screws require a specific tool to fasten or remove. You cannot use a standard wrench or screwdriver, making them less likely to be accessed without the proper tools.

There are various types of tamper-resistant screws, including full, half, or partial thread shanks. You can also find different head types, including:

  • Flat bolts (non-countersinking)
  • Button head
  • One side pan head
  • Triangular socket button head
  • Triwing flat head
  • Flathead bolts

There are even ones you can use with washers and nuts to create a secure, tamper-resistant hold for your secured items, such as cameras or interlocking devices.

#28. Mating screws

Mating screws are one half of a set and require a sex screw to be complete. Mating screws have an unthreaded shoulder and a threaded shank.

When you attach the sex screw, it fits over the mating screw, and the threads mate together to form a hold.

Mating screws come in metric and imperial sizes with various thread options, including ACME, ISO, BSW, UNC, and UNF.

You can choose from a full or partial threaded mating screw. Be sure the sex screw is the appropriate match for the selection you make for your mating screw. The diameter of the unthreaded shoulder should be the same as the outside of the sex bolt.

#29. Sex bolts

Sex bolts, also called Chicago bolts or barrel nuts, look similar to machine screws with a smooth, unthreaded shank. The inside of a sex bolt has threads that screw over the top of the mating screw.

These screws can have multiple drive types, including hex socket, flat head, button head, truss head, Phillips, slotted, or 6-lobe Truss heads.

Sex bolts and mating screws can be used in many assembly applications and require a predrilled hole.

Length, diameter, and threading vary, so you’re sure to find a set that fits your required parameters.

#30. Eyebolts

Eyebolts have a unique look that makes them easily identifiable among other screws. These screws have a threaded shaft with a ringed head that can be enclosed or open.

This eye is open, so you can thread through a rope, cable, or hook. Eyebolts are commonly seen on machinery like cranes or as a design feature to secure items that can’t be screwed or nailed.

Eyebolts that do not form an enclosed circle cannot sustain off-axis loads, while closed rings have a closed weld, so they have more strength.

The different eye bolts are anchor eye bolts, screw eyes (also called eye screws), ring bolts, eye nut, pigtail eye bolts, or roller eye bolts.

#31. Eye lags

Eye lags are a type of eye bolt used for wood. These screws are also called turned/bent eye lags, screw thread eye bolts, or eye screws.

These screws work as an anchor but are not intended for heavy loads. They have a threaded shank with a sharp-pointed tip that helps the screw stay secured in the material.

The top of these screws has the expected eye, made from bending the unthreaded metal into a loop. Like eyebolts, eye lags can have an enclosed or open ring.

#32. J-bolts

J-bolts are a common type of fastener used in concrete formation and construction. These may be used for building new foundations, a garage, or attaching a new wall to concrete around the house.

These bolts get their name due to the signature “J” shape. They have a long threaded shank that ends in an unthreaded hook on the bottom.

You install these hooks onto rebar after the cement has been poured and smoothed, but before it dries. Once the concrete cures around the bolt, it becomes an anchor.

You can get J bolts in multiple lengths and diameters. Bolts with ½” diameter are the most common for residential construction.

#33. U-bolts

U-bolts are a piece of steel formed into a “U” with threading on each end. These bolts are ideal for fitting around tubing or pipes.

You can find U-bolts in carbon steel, 304 or 316 stainless steel, and coated with zinc, fluoropolymer (PTFE, Teflon, or Xylan), thermoplastic or hot-dipped galvanized.

Sizing varies for U-bolts, from as small as a ¼” diameter up to an inch and various lengths and widths.

U-bolts require nuts to secure them into place, which usually comes with the part. Once you get your bolt where you want it, put a bolt on each threaded end and tighten it with a wrench or power tool.

#34. Shoulder bolts

Shoulder bolts, also called stripper bolts or shoulder screws, are a type of machine screw that has a shoulder between the thread and the head.

This type of screw is not often used in residential settings but is common in many consumer products.

There are three main parts of a shoulder bolt – thread, shoulder, and head. The thread should have a slightly smaller diameter than the shoulder, and the head should have the largest. The size is displayed by the diameter of the shoulder and then the length.

#35. Elevator bolts

Elevator bolts have a broad flat head with a standard square bolt head underneath, separated from the threads. This head rests countersunk so it can be tightened or loosened easily. The flathead part of the bolt rests flush against the surface for more weight resistance.

You can get elevator bolts in various lengths and dimensions, as well as drive type.

The most common uses for elevator bolts are on conveyor and lift machines, floors in automobiles, bucket lifts, and soft surfaces like wood.

#36. Hanger bolts

Hanger bolts have two separate ends – one pointy insert into the wood, and the other is flat and inserted into a threaded insert.

Hanger bolts are often used for installing legs onto furniture or working with crafts. Because both sides are threaded, you’ll have to predrill holes before inserting a hanger bolt into your material.

Use caution when installing these screws, so you insert the right side. The pointy tip should go into the wood while the smooth based side attaches to a plate.

Types and Shapes of Screwheads

Screws can have many different shapes of heads and require different tools to install. All screws will fall into countersunk or non-countersunk.

The difference between the two is non-countersunk heads are fully exposed or stick up from the surface. Countersunk heads lay flush against the surface.

Types of non-countersunk heads include a button, cheese, binding, fillister, round, flange, socket, low socket, hex, pan, square, or truss. Binding heads are also called binder heads.

Countersunk heads are flat, bugle, or oval-shaped. Some of these types can be covered by a beauty cap or a screw cover that disguises the screw’s presence.

In some cases, there is a combination of these, like slotted hex washers, round washer heads, slotted hex, or hex washers.

Drive Types

Drive recess is the notch in the top of your head that coincides with the type of tool you need to install or loosen the screw.

Phillips, slotted, hex, hex socket, combination (Phillips and slotted), Torx, spanner, or square are the most common drive types.

Slotted, combination, and one-way screws use a screwdriver. Phillips screwdrivers should be used for Phillips or combination screws. Hex sockets need a hex key. And Torx drivers are necessary for Torx screws.

Washer Types

Some types of screws will need washers or small round discs. There are three primary types, and which one you would need will depend on your needs and the screw you’re using.

Washers can be various materials, with the most common being stainless steel or galvanized carbon steel. There’s also iron, copper, brass, or zinc-coated washers.

The three types are lock, spring, and plain washers. All washers come in metric or imperial measurements.

Plain, or Type A, washers are a flat disc with a center hole that fits over a bolt’s shank. These can range in size and thickness. Other types of plain washers include fender, torque, finishing, or C-washer.

Spring washers have better resistance to vibrations, so they stay fastened and tight. These washers include Belleville (conical spring), crescent (curved spring), dome, finger, or wave springs.

Lock washers prevent fasteners that rotate. The different types are split lock (helical washers), external tooth lock, or internal tooth lock.

Nut Types

Nuts go on the end of some types of screws to provide a tight, secure hold. As with most hardware, there are many different types. Which one you use will depend on your screw type.

Common nut types are:

  • hex nuts (have six sides and installed on hex bolts with a wrench),
  • jam nuts (half the height of standard hex nuts),
  • lock nuts (also called prevailing torque nuts),
  • push nuts (requires a specialized nut driver and can be uncapped or capped),
  • rod coupling nuts (extension nut that has a hollow threaded center),
  • speed nuts (sheet metal nuts)
  • Square nuts (a four-sided square with internal plating)
  • Tee nuts (long threaded body with a flange on end)
  • U-nuts
  • Wingnuts  

Conclusion

We hope we’ve helped shed light on the many different types of screws. We’ve listed the 36 most common screws you may encounter in residential, commercial, and industrial settings. We’ve also covered the different types of washers, nuts, and drive recesses.

27 Reasons Why Buying A Home Is Better Than Renting

There are numerous reasons why you should consider owning a home instead of renting. In this article, we provide you with 27 home ownership benefits. We’ve broken these up into financial, lifestyle, and social benefits for easier reading.

Financial Benefits

1. Cheaper than Renting over Time

Buying a home and paying a mortgage is generally cheaper than renting if you plan to stay in the same area for more than four years, according to The Lenders Network.

Most landlords charge between 0.8% and 1.1% of the home’s value to determine the price of renting. And many times, these fees will go up each year you are there unless you have a fixed agreement to keep the same rental payment throughout your term.

When you buy a house, you can get lower monthly payments, depending on your credit, interest, and the home’s purchase amount. 

Here’s a helpful rent vs. buy calculator to determine which method would be cheaper for you. 

2. Historically Low-Interest Rates

Over the last ten years, interest rates have slowly declined, which means you have to pay less for your home. This decrease hit record lows in 2012 when the rate dropped to 3.31% from an average of 3.66%. 

These rates have fluctuated between then and now as we’re entering into the second week of 2021. By 2019, the interest rates were 3.63% (low), a dramatic decrease from the average rate of 4.25%. 

Financial projections predict that in 2021, a 30-year mortgage will come with a historically low mortgage rate of just 3.03%, the lowest it’s ever been. There’s never been a better time to buy a home. 

3. Wealth Accumulation

Owning a home has become one of the easiest ways to increase wealth and become financially stable. Having a place to call your own is part of the American Dream, including a great job, marriage, kids, and pets. 

Having a monthly mortgage helps build your savings. Paying down your loan’s principal gives you equity, which increases net worth. 

And the majority of homes increase in value over time. In their House Price Index, the Federal Housing Finance Agency states that home values increase on average 3.6% every year since 1991, which adds to your equity, and therefore net worth.

4. Tax Deductions 

Owning a home can qualify you for federal tax breaks. But only if you are eligible for itemized deductions that exceed IRS standards. In 2020, the deduction qualifications were:

  • $12,400 – Single
  • $24,800 – Married filing separately
  • $24,800 – Joint filers
  • $18,650 – Head of household

For the 2021 tax season, the deductions will be slightly different. These figures look like this:

  • $12,550 – Single
  • $25,100 – Joint filers
  • $12,550 – Married filing separately
  • $18,800 – Head of household

You have two options for your tax return – standard deduction or itemization. When claiming the standard deduction, you won’t be able to deduct your home mortgage interest or claim other tax deductions. 

When you itemize your deductions, you can claim multiple expenses to reduce the taxable income. Be sure you keep detailed records in case you face an IRS audit. 

To determine whether to claim your standard deduction or itemization, figure out which value is higher. That option is the best way to save you money. 

5. Capital Gains Exclusion 

With the Capital Gains exclusion, you can sell your home without having to pay taxes on your profits. However, there are some stipulations you must meet to qualify for this exemption.

The terms for capital gain follow the Taxpayer Relief Act of 1997, which states that any capital gain (the profit you make selling your house) below $250,000 for a single filer or $500,000 for married couples is not taxable. 

Now, to qualify for no capital gain tax, the house you sell must be a primary residence that you lived in for two years. These years do not have to be consecutive. 

You can also count all of your full costs and subtract this value from your sales price, reducing the capital gain and helping you qualify as exempt. 

To figure up your full costs, factor in the price you paid for your home, purchase expenses (settlement fees, insurance, closing costs), improvements, additions, and selling costs (agent commissions for sale, attorney fees, transfer taxes). 

However, you can only qualify for the capital gain exemption once every two years. If you sell two houses within two years, you will owe capital gain taxes on the second house you sell.

6. Building Equity

Home equity is an easy way to increase your net worth. To determine your equity, you look at your property’s current value and reduce what you currently owe. 

This value should be positive. Your home gains equity as property values increase over time and by reducing the principal balance, you owe on your loan.

Now building up equity does take time. It would help if you considered your home as a piece of long-term investment. The money you’re earning from your home may increase your net worth, but it’s not money you can access and spend. 

Figuring up your home equity can be as simple as using an online calculator, which does the math for you. All you have to do is add your figures. You can also rely on an appraisal of your home, which can help you figure out your home’s actual value. 

7. Improve Your Credit Score

Everyone knows that your credit score matters when you want to take out a loan or buy a house. But owning a home can also help improve your credit score.

All mortgage lenders report your account to the three credit bureaus. As you manage your loan, credit bureaus track your activities and change your credit score to reflect your payments.

Paying your mortgage on time each month can have a 35% impact on your credit rating. If you fall behind in payments, your score will drop. But if you stay on top of your mortgage and pay on time, you’ll quickly see your credit score going up. 

However, having a mortgage may prevent you from qualifying for additional loans if your monthly payments are too high. 

8. Stable/Predictable Monthly Payments

Another benefit of owning a home is that having a fixed-rate mortgage makes budgeting your money a lot easier. 

When you use a fixed-rate loan, your monthly repayment is always the same amount, no matter what. So, you’ll still know how much to save each month, and you can make long term plans for how to handle your mortgage.

When you rent a home, you may face rent increases when it’s time to renew your annual lease. You may know what your budget should be for that year’s lease, but you won’t have a guarantee on how much you’ll need to save for the next year or two. 

9. Hedge Against Inflation 

Given that inflation can change the value of money, it makes sense to invest in hedges that retain or increase value over time. Real estate is one of the best hedge investments you can make.

Home values mostly increase, even during inflation, when the value of money decreases. So owning a home means that you’ll always have something that retains the same value (or more), no matter the inflation rate.

10. Borrowing Power 

When you own a home, you have equity that can help you borrow more money against your property. These extra funds can come from a second mortgage, a line of credit, or an equity loan (HELOC – home equity line of credit).

Many people take out these loans to help pay for home improvements or their child(ren)’s college. Or to cover unexpected or desired expenses, such as medical bills or buying a new toy (RV, boat, vehicle, vacation home). 

Most HELOCs will qualify for lower, adjustable rates based on your home’s equity. And any interest paid on a HELOC is tax-deductible for the majority of borrowers. You can use the funds from a home equity line of credit to pay for anything you want.

11. Forced Savings Plan 

Having a monthly mortgage means that you now have a forced savings plan. Each payment you make on your mortgage reduces your interest and amount owed, which can help increase the money you’d put in your pocket if you decide to sell. 

Many people choose to increase their savings by paying extra payments or paying more than required each month, which reduces the amount of interest you have to pay by getting your mortgage paid off quicker.

12. Gift Money Can Be Used as a Down Payment

Using gift money is one of the most common ways that younger buyers come up with the funds to cover their down payments. 

However, there are rules you have to follow to use gift money. And there are limitations on who can provide gift money, so you can’t get financial help from just anyone.

Mortgage lenders require gift money to come from friends and family or from a government organization that helps first-time buyers. 

You must prove your relationship with a friend or family, usually in the form of a letter signed by both parties expressing that the money is a gift and does not require repayment.

13. Bring in Extra Income by Renting a Room

Depending on the size of your home, you may have extra rooms that you don’t use. A great way to increase your income is to rent these additional rooms out.

Many people now have one or more roommates, which helps increase your income and reduce the amount of money you have to pay. 

There are challenges to taking in a boarder or roommate, such as incompatibility, the potential of getting stuck with someone who doesn’t pay for their room or having someone that doesn’t follow the house rules. It may also be awkward sharing your space with someone. 

Lifestyle Benefits

14. Free to Create the Home you Want 

When you rent a home, you often have limits on the changes you can make. So you’re stuck living in a house that may not be your style. 

But when you own your home, you’re free to do any customization you want. However, you may have to get the approval of a home owner’s associations or historical societies. 

When you’re the owner, you can paint the walls in any color, which is excellent for those who like funky colors or designs. You can also change your flooring or the layout of the home. Whatever dreams you have, you can do to your house when you own it.

15. No Restrictions on Pets

One of the worst things about renting a home is that there may be restrictions on owning pets. You may only be able to have certain breeds or limit how many pets you can keep. 

As a devoted pet parent of two fur babies, one of who is a Pit Bull, owning a home was the only choice we had if we wanted to keep our four-legged children. Most renters have rules against the Pit Bull species (unfounded and unnecessary). 

So if owning pets is an essential factor, you may find it’s better to buy a home than to try renting. When you buy a house, no one will be able to tell you what pets to own or how many (unless there are local or state laws). 

16. Positive Impact on Health 

Multiple studies show that owning a home can positively impact a homeowner’s health, both physically and emotionally. Homeowners have a 2.5% higher rate of better health than renters. 

Most homeowners experience higher self-esteem, an improvement over general happiness and satisfaction, and stronger bonds with their family. 

Being part of a neighborhood can help improve a person’s sense of community, increase their pride in their accomplishments and success, and form a sense of belonging and stability. When you know you will be at a place long-term, you feel more invested and stable.

17. More Privacy Than Renting

When you rent a home, the property owner has legal rights to enter at any time without seeking permission. Owners can also send over employees or service professionals, even if you’re not home, to let them inside. 

But when you own your home, you have full control over who can come and go. You never have to worry about nosey landlords or surprise visits. And you certainly don’t have to concern yourself with strangers having access to your home.

You also have more privacy in the form of a yard that you can fence to prevent prying eyes. You can enclose your property to create an exclusive oasis that no one else can enter.

18. Pride of Ownership 

When you own a home, you can feel a sense of pride in what you’ve achieved. Your house is yours bought from your sweat and tears. It’s something you can show off as proof of all of your hard work. 

Most people put their heart and soul into designing their home, and it becomes a reflection of the people who habitat the area. Your home becomes your safe place, one that you’re proud to show off.

Being proud of your home is one of the most significant benefits of being a homeowner. When you’re proud of what you’ve got, you have proof of your success for everyone to see.

19. Upgrading to a New Home 

When you own a home, you have an equity source, which increases your income and value. This extra money can come in handy when it’s time for you to upgrade to a new home.

You may decide to relocate for a new job, buy a bigger house so there’s more room for your growing family, or move into a better neighborhood. 

When you have a home that’s earned equity and appreciation, you can use these extra funds to put money in your pocket and afford more of a down payment for a new house. 

First time home buyers typically put down as low as a 3% down payment, whereas homeowners who have already owned a home are more likely to put down as much as 22% down.

20. Leaving an Asset to Children/Future Generations

When you own a home, you have a potential asset that you can leave behind for your children or even your grandchildren. 

Some people sign up for a “Transfer-on-Death” deed (in applicable states), which transfers ownership of a property to the named benefactor(s) upon the homeowner’s death. Other families may decide to gift their home to their children or sell it to them at a lower price than the market value. 

Having your affairs in order is smart to protect your family from any legal hassles that may occur from an unexpected death. 

Social Benefits

21. Civic Participation 

Most homeowners have a strong sense of civic participation, which is when you engage in activities outside their home. 

Examples of civic participation include volunteering, voting, or joining neighborhood group activities. When you work on your civic participation, you can enjoy the social skills of belonging to a group of like-minded neighbors. 

As a neighborhood member, you may enroll your children in local recreational sports, sign up as a volunteer, or attend neighborhood cookouts or meetings.

22. Community Involvement

When you’re a homeowner, you often feel more involved in your community. You may feel a stronger urge to keep up with local politics, to cast your vote on your child’s school board, or join neighborhood groups.

Most communities have neighborhood watches, outreach programs, or clean-up days. When you’re a community member, you may feel more inclined to help keep your neighborhood at its best. 

Your neighborhood can play a significant role in the value of your home. So you want to do the best you can to keep it safe and clean so your property increases or maintains the same cost. 

23. Financial Education/Skills

Owning a home may seem simple, but it requires you to have a working understanding of how to manage your finances. 

You can use the money management skills you learn from being a homeowner and implement them into other areas of your life. 

You don’t have to take any special classes or programs to own a home, but it can help you learn to plan your money spending habits properly. 

24. Stable Housing 

Another of the most significant benefits of owning a home is that you have stability. Your home is yours, and you never have to worry about being evicted or relocated if the homeowner decides to sell.

When you own a home, you can put down roots and plan your future without worrying about where you might live in two, five, or ten years. 

For families with children or intentions of having them, having a stable home to grow up in improves self-confidence and provides a happier, adjusted life.

25. Educational Achievement 

Children who grow up with parents who own a home have a higher chance of completing school than kids raised in a rental home. 

When children feel secure in their home and neighborhood, they get better grades, have more stability, and a better chance of forming positive relationships and friendships. 

And young adults that grow up in the same owned home throughout their childhood have a higher rate of getting advanced education and a higher-paying job.

26. Positive Effects on Children 

Many studies have proven the positive effects of having parents who own a home has on children. We’ve discussed how it can improve the chances of completing high school and continuing to higher education.

 Children who live in a home bought by their parents also have fewer behavior issues, better health, and fewer teen pregnancies. They also have higher grades in reading and math.

Overall, children raised in a purchased home over a rental home have a higher chance of being successful as an adult.

27. Less Likely to be Victims of Crime Than Renters

When you own a home, you have fewer chances of becoming a victim of crime than you would as a renter, studies show. Renters face the challenges of not preventing strangers from entering into their homes, which can result in theft or destruction of property. 

And because crime can affect your property value, homeowners often have more security for their homes, such as cameras, security alarms, or neighborhood watches. 

Neighborhoods made up of homeowners instead of renters pay more attention to what’s going around them, which reduces crime levels. There’s less likelihood that a drug dealer can stand on a street corner and peddle drugs to the community when people own their homes. 

Tile and Grout Color Combinations: How To Choose

Choosing the right tile and grout color combinations for your bathroom is hard. You have to consider so many things, like how light or dark you want it to be, what colors will look good with each other, etc. 

But who has time for all of that? It’s too much work. 

We’ve done the research for you and put together this guide on choosing the best tile and grout color combinations. If you’re looking at tiling a new bathroom or updating an existing one then this post is perfect for you. Now there are no excuses.

What color should I choose for my grout and tile to match the style of my home?

The most popular colors for tile and grout are white, black, gray, and beige. As a general rule of thumb, the best color choice is usually going to be the one that goes with your current decor or appliances. If you have black appliances then maybe go with some kind of dark grout and/or subway tile for your kitchen.

There really isn’t a limit on what combo you can choose because there are so many different shades and combinations of shades in each color family. It’s all up to personal preference.

But whatever look you go with just make sure it matches everything else in that room or home.

Which color combinations go well together?

White subway tile and black grout

Here’s a timeless design that you can count on to last. White subway tiles with black grout are simply lovely.
Gray tile with gray grout

Gray is another classic color choice. It’s sleek and formal but it will also make the room look clean and bright. Gray goes well with practically any other color you can think of (it’s neutral, like black), which makes this a great option for your bathroom.
Black tile with white grout

Not too keen on going with all-white tiles? Then maybe go halfway and do an accent wall in black tiles. This is modern and would work well in a contemporary setting or even a beachy cabin sort of feel if you use different colors to decorate around your tub area.

White subway tile with white grout

Or just do it all the way and go with pure white tiles. This color palette isn’t for everyone but if you like clean, bright spaces then this would be the perfect look for your bathroom.

Gray tile with white grout

Another classic color combo that isn’t too bold. This is sleek but still makes the room look cozy and warm thanks to the white grout.

Black tile with gray grout

Sticking with black, you can go with either subway tiles or hexagon-shaped tiles (like these ) for the walls. But this time do it all in black and pair it with grey grout instead of white. It’s a statement piece so be prepared to break the bank if you want to do this because it will need some special attention paid to all your other decor choices around this area.

Pink tile and light pink grout

This would work best in a fun, colorful space like a child’s bathroom or playroom since there are many different shades of pink going on.

Marble tile with white grout

The choice of marble tile is a great one. It comes in so many colors and styles that it opens up a lot of opportunities to experiment with different color combinations.

Light blue tiles with white grout

This is the perfect bathroom for any home since it looks clean, crisp, and inviting all at the same time. The light blue allows you to have some fun in the decor department while still maintaining traditional sophistication.

Light pink tiles with white grout

Going in another direction again – this time with bolder shades – these light pink tiles would look perfect next to some white subway tiles with gray grout. It’s girly but modern so if you don’t want something too over-the- then go for this color palette.

Green tiles with white grout

The green is a nice choice since it isn’t a color you see a lot of. So why not use it to your advantage and create an accent wall in the bathroom or maybe even the kitchen? This shade would work well with hand-painted tiles because there are so many different shades going on here. It’s going to take some extra money and time but if you really love this look then go for it. It would be worth it in the end, especially with how unique the result will be.

Black tile with black grout

This might come as a surprise but dark colors can also look great together. Forget about all those white bathrooms that have been done over again – now it’s time for something a bit more modern. Plus, you’ll never run out of decorating ideas thanks to all those color options with darker shades.

Bronze tiles with white grout

This is another great choice if you’re going for an earthy look since these colors will remind you of the outdoors and nature. There’s a reason people love using tiles that mimic wood – it’s restful and inviting, unlike most other choices. It also goes well with a variety of different decors from contemporary to rustic so there are lots of possibilities here too.

Brown tile with light brown grout

Bathrooms can get pretty dirty so they need to be functional as well as beautiful too – which is where this color palette comes in handy. It’s not too colorful but it is still eye-catching which means you can use your creativity elsewhere in the room.

Blue tile with blue grout

This color palette is perfect for bathrooms that are smaller since it’s very subtle. It won’t make the space feel crowded at all and there are plenty of different shades to choose from if you want something more unique.

Turquoise tiles with white grout

If you love turquoise then why not take this color to the next level by using it as part of your bathroom’s design? It would look especially great against a bright white background – like subway tiles. But this isn’t just an option for those who want to bring some fun into their homes, turquoise also works well with neutral colors like brown and gray.

How to choose the right tile and grout combinations

  • Choose a contrasting grout color. Use a contrasting grout color to bring out the other colors in your tiles. For example, if you have white tiles then choose a contrasting shade of gray or black grout to make them pop.
  • Match bathroom accessories and furniture to your tile’s color. You can complement your tiles with other elements in the bathroom so they also share the same decorating scheme for an overall cohesive look . If you don’t want to do anything too bright but still want to contrast against the dark grout, go for bright pink or orange accessories that will stand out against human skin tones.
  • Choose matching colors that go well together. Try to choose different shades of one color for something more interesting than just sticking with one dominant one throughout. This way it will create an even balance rather than making it look like you did it on purpose to match the grout.
  • Use black and white sparingly. You can add either color into your design but don’t get overboard with them since they’re strong colors that will draw too much attention away from your tile’s design.
  • Choose lighter shades of brown for your grout if you want a wooden effect. If not, then go for something darker instead. Just make sure that whatever shade you use goes well with all the other tones in both your tiles and flooring.

Is there anything else you would recommend when deciding on a color for your home’s flooring?

Yes. When you go to choose a new shade of grout make sure the color is as close as possible to what your tile looks like when covered in grout. If it’s lighter, then buy a shade that’s slightly darker… But if it’s darker then you can get away with buying one that is a few shades lighter. 

The hardest part about choosing a good color for your grout is going with something too light because once you start laying your tile on top of it and adding the border tiles, etc., you’re going to regret having chosen such a light color. But this doesn’t happen very often so don’t worry about it too much. When in doubt, just stick with our advice above and everything should turn out just fine.

What size should the tile be to make them look good with the grout color chosen?

When choosing a color for your new bathroom floors it’s important to think about what kind of light you have in the room and how much of it. If there is a lot of light coming in from outside then use lighter-colored tiles because they will reflect more of the light around the room and bring some warmth into whatever space you are trying to create.

Darker tiles absorb more light and can make small spaces look smaller and darker (if that’s something you don’t want, like in a bathroom). And always, always use lighter grout. It’s better to go too light than too dark. Going with something too dark can make your bathroom look smaller and makes small tiles look even smaller.

Light grout helps brighten up the room as well as make the colors of the tile pop a little more.

Laundry Stripping 101 Guide and Recipe

Laundry is a pain in the butt. 

It’s not just that you have to do it, but also how long it takes and what kind of chemicals are involved.

We’ve got your back with this guide to using natural laundry stripping agents at home. You’ll save time, money, and reduce your exposure to harsh chemicals by making these DIY solutions at home. We’ve even included instructions for both small loads and large washing machines so that everyone can benefit from our tips. Happy Stripping.

Laundry Stripping Recipe

Ingredients

Instructions

  1. Wash in a hot cycle with powdered detergent and dry naturally without drying the clothes.
  2. Fill the bathtub with hot water.
  3. Stir in the mixture until it is completely dissolved.
  4. Add in the laundry (keeping like colors together)
  5. While the water cools, soak for 4-5 hours, stirring every hour or so.
  6. Drain the water and wash the clothes in the washer using powdered detergent.
  7. Dry without dryer sheets.

Does laundry stripping work?

Let’s start with the basics, does stripping your laundry work? In a word: Yes.

Stripping is actually a fairly common practice in families who have dealt with heavy build-ups of oils and grime on their clothes from being outside working or spending time with dirt-loving kids. For those who don’t want to use a lot of harsh chemicals on their clothes, this technique can be a lifesaver.

What causes clothes to smell after washing but not drying fully? When you wash new items there may still be residue from the manufacturing process left behind on them, this will cause the smells. It is always recommended that you rinse your new clothes before putting them in the dryer as well as wash them first before wearing them to minimize any smells.

How to strip laundry, a step-by-step process

Step 1: Wash clothes like normal

Start by doing your standard wash routine with your usual detergent and dryer sheets in the washer. Make sure you’re washing in hot water with the proper amount of soap or about one tablespoon for medium loads, or two tablespoons if it’s bulky items like towels. If you choose to use HE (High Efficiency) instead of conventional washers check out this article from Tide on how to maximize HE efficiency without sacrificing cleanliness. Also, make sure that there is a rinse cycle at the end of this process as well as an extra spin cycle if you have a front-load machine. The extra rinses will help flush any extra detergent from your clothes and reduce the chances of white residue showing upon them.

Step 2: Start the soaking process

After a regular wash, you will then need to start your soak process. Fill a large bucket with hot water and add in 1 cup of borax, 1 cup washing soda, and two scoops of powdered laundry detergent. From here it is an open field as far as what types of powdered laundry detergents you can use, but we recommend adding at least one 5-weight or higher laundry soap because these products are made for tough stains and grime that builds up over time. If you don’t have access to laundy soap just yet, just add about one tablespoon (20g) in for each load of laundry you’ll be doing. If your machine is large enough to handle two small loads at the same time, split this mixture in half and add it to different washers so that you can get twice as many loads done.

Step 3: Add in items

Once the water gets cloudy (it will look like a grayish color), then it’s time to add your clothes. Keep in mind, this is where you’re going to want to use any new items that you’ve gotten since dropping them off at the cleaners or even new clothing like socks or underwear. It helps reduce smells by using fresh things first instead of waiting until they smell bad before stripping them back down with detergent. Why? Because if left untreated for too long some smells can actually get into the fibers of the clothes and be difficult to remove.

Step 4: Soak

After you add your new items, let them soak for about 30 minutes. This will allow the ingredients we added in to really absorb and break-down any grime so that it washes away during our next two cycles. If you have a front load machine or more than one small load going at once, just leave it so that both machines get 30 minutes of soaking time. When finished feel free to drain this mixture out of your washing machine by opening up the lid on top and letting it out. However if you still want use these substances for another cycle (it’s recommended that you do), feel free to store them in a large sealed container so they don’t go to waste.

Step 5: Drain and rewash

Once finished soaking, simply drain the water out by opening up your lid on top of the washing machine just like you would with any regular load. Then, redo another regular cycle with hot water this time for both washers or just one if it’s more convenient for you. Make sure that you have added in some sort of detergent yet again so that your clothes can get clean. We recommend using about 1/2 tablespoon (7g) per small load or 1 tablespoon (20g) per medium sized load. You’ll know your clothes are completely finished when they’re no longer wet after the spin cycle. If this is not the case, then just redo a regular wash with hot water and set it to an extra long spin cycle so that your clothes don’t have any moisture left in them.

Why bother stripping clothes?

A few things can happen when you use too much detergent for too many loads of laundry or if certain clothing become worn down or start to smell bad from being used over time. When these types of substances build up within your clothes, they lose their efficacy as cleanliness agents and instead work more like extra dirt magnets. This means that your clothes will no longer get clean during a regular wash cycle since there’s literally too much grime built up in them to be removed by detergents alone.

Laundry stripping is a great solution to this problem and works by removing excess soap and grime so that cleanliness agents can do their job more effectively. It’s especially helpful when you want to keep clothes feeling fresh or use new items without having the rest of your wardrobe smell funny.

When should I strip my laundry?

There are certain instances where it’s absolutely necessary to strip down your clothing, such as when you get them back from the cleaners and they get stained with chemicals during processing. Since most laundromats only allow detergents in their machines, not very many people know about laundry stripping or how easy it is to make your own at home instead. Other times like mentioned before, if clothes start to smell funky after being worn a little too much or used for a while then it’s time to strip them down and start fresh.

What can be done to keep clothes fresher longer?

Stain removal is a key factor when you’re trying to keep your clothes clean. This means that if you notice any stains like dirt, grass, blood, sweat or other nasty substances, the best thing you can do is try and remove these items as soon as possible by pretreating or spot cleaning them with rubbing alcohol. You may also want to add in some baking soda (about 1/2 cup (100g)) during laundry processing in order to absorb odors surrounding your clothing and prevent potential smells from getting into the fibers of the fabric over time.

Can I use liquid detergent for laundry stripping?

Using your regular dishwashing liquid soap is a great way to strip your clothes of any of the built-up substances that regular detergents may have left behind. You can also use either of these two ingredients by themselves, but you might need to use more than what’s recommended on the package depending on how much buildup has occurred over time. If you’re still not sure on how much to add in, just start with small amounts and go upwards until you see that the water becomes murky or cloudy looking.

Can I use baking soda to strip my laundry?

Baking soda is an amazing stain remover as well as an odor absorber if used properly. Feel free to add this wonderful white powder directly into the hot water before starting your wash cycle, but make sure that you don’t add too much because doing so will most likely stop the soap from getting into your clothes. A good rule of thumb is to use a maximum of 1/2 cup (100g) for small loads or around 1-1/2 cups (300g) for larger ones. If baking soda doesn’t work as well as you’d like, try adding some vinegar directly to the load during processing instead since it’s also a great odor remover.

Certain stains may require more specific treatments or products that can be found at home or in stores if you’re using one of the recommended recipes above. In this case, just be sure to spot-check test any homemade remedies before laundering to see how they work and if any special instructions need to be followed.