10 Best Teak Patio Sets for Your Patio

If you are seeking a new patio set, there is a good chance that you’ve seen a selection of teak table and chair combos. Teak is a popular wood for garden furniture because it is hard-wearing and withstands whatever the weather can throw at it. 

That said, the best teak patio sets are not a budget option, costing much more than other garden furniture sets. To justify the additional costs, they have a lot to live up to. 

Let’s take a look at 10 excellent examples of teak patio sets, rating them on price, quality, and design.

10 Best Teak Patio Sets

#1. Safavieh PAT7044A Collection Chaston Teak, White and Light Blue 4 Pc Living Accent Pillows Outdoor Set

This Safavieh is very stylish, with light teak and white and navy polyester cushions. It comes with two chairs, a couch, and a coffee table with a slatted top for better rain drainage. 

This Safavieh is crafted from durable eucalyptus, which is famed for its ability to withstand everything the elements can throw at it. 

This set is unusual because it consists of a combination of chairs and a settee, unlike other models that have 6 chairs and a dining table. The only downside is the price. Considering you only get a coffee table, this set costs the same as dining sets. 

It is also made in China, so if you value American-made products, this one won’t be for you.

#2. Safavieh PAT7033A Collection Alda Teak and White 4 Pc Accent Pillows Outdoor Set

This set is designed in much the same way as the previous model, in that it has cool lines, a modern finish, and the same white polyester padding with navy cushions. You get the same chairs and couch combo, and the coffee table is slatted for better rain drainage. 

Where this set differs is you get arms, unlike the Chaston set. It is constructed from the same eucalyptus wood, which means it will last years if properly cared for, and the high slatted arms add an extra level of comfort. 

Once more, the price is the only downside. While the set looks like it came out of a 5-star beachside hotel, you couldn’t host a family meal because you only get a coffee table. 

#3. Safavieh PAT7030E Collection Montez Teak 4 Pc Accent Pillows Outdoor Set

Safavieh PAT7030E Collection Montez Teak 4 Pc Accent Pillows Outdoor Set, Natural/Navy

  • This outdoor set will add a fresh look to any outdoor space

This Montez patio set uses the same cool lines, but instead of slatted arms, you get an open design. It looks stylish and modern, again, following the same theme of smart beachside hotel furniture.

The cushion colors are reversed on this set, with the main padding finished in navy blue with the accent cushions in white. That’s not the only difference; the eucalyptus wood is slightly darker, which you pay more for because the price of this set is higher than comparable models. 

Also, some customers have complained that there is very little after sales service, and seeking replacements for broken parts is challenging with a contact number or email. 

#4. Safavieh PAT7031A Collection Nunzio Teak and White and Navy 4 Pc Accent Pillows Outdoor Set

This set is essentially a variation on a theme in that it follows the same classy design, with eucalyptus wood and bold cushions and pillows. Still, instead of the open design, you get an X-shape for added support in the arms.

You get the same contrasting blue accent cushions and white pillows, and the set consists of two chairs, a coffee table, and a comfortable cross-backed sofa. 

It’s also slightly cheaper than the other examples, but that doesn’t mean it’s a more affordable option, especially when you  compare it to other similar patio sets. 

#5. Safavieh Outdoor Collection Rocking 4 Piece Patio Set

Safavieh Outdoor Collection Rocking 4 Piece Patio Set, Teak and Beige

  • This outdoor patio set features a coffee table measuring 40.2″ x 19.7″ x 16.9″ 2 chairs measuring 23.2″ x 26.4″ x 32.5″ and a bench measuring 46.9″ x 26.4″ x 32.5″

Our final Safavieh offering is the cheapest of the bunch. So, what is the difference? It has slatted sides and back, including the coffee table, and while you get the same beige seat padding, you don’t get accent cushions to contrast the colors. 

It’s also made from Acacia wood rather than eucalyptus, which is a slightly cheaper material. The advantage of having slatted sides and back is it improves rain drainage, which protects the longevity of your wooden frames.  

#6. Amazonia Prescott Patio 4-Piece Conversation Set

Amazonia Prescott Patio 4-Piece Conversation Set | Durable Eucalyptus with Teak Finish | Ideal for Indoors and Outdoors, White

  • Sofa: 50 in. L x 32 in. W x 25 in. H. Armchair: 32 in. W x 28 in. D x 25 in. H. Table 19 in. W x 38 in. D x 13 in. H. Seat: 22. 5 in. W x 21 in. D x 15. 5 in

Amazonia furniture is stylish, and this Prescott combo is no exception. You get two armchairs and a sofa, with lines and curves that are easy on the eye and shout hotel-chic. 

The cushions are white polyester, and resistant to the weather and UV radiation, plus the eucalyptus wood finished in teak is highly durable. The cushions have zippers so they can be removed and washed.

And talking of keeping this set clean, you even get a free maintenance kit worth $30 to help you protect the wood. 

If you thought the Safavieh patio sets were expensive, think again. This Amazonia is not a budget option. However, to take the sting out of the price, you get Grade A wood, meaning it comes from the heart of mature trees where the oil content is higher.

#7. Brampton Breaux 9-Piece Outdoor Rectangular Dining Table Set

Brampton Patio Breaux 9-Piece Outdoor Rectangular Dining Table Set | Teak Finish | Ideal for Patio and Indoors

  • 9-Piece Set: This set includes 8 high quality dining chairs and 1 rectangular table. This modern and comfortable set will make your patio an elegant space to enjoy with family and friends.

If you have a large family or like entertaining, this Brampton 9-piece set is for you. This elegant combination consists of a table and 8 comfortable chairs with a bucket-seat design and teak legs.

The resin seats are 100 percent durable, and the legs are constructed from 100 percent FSC eucalyptus wood. The tabletop is made from polypropylene for durability and elegance, with wooden legs finished in teak. 

You also get a free maintenance set that consists of a wood cleaner, a brush, gloves, sponge, emery paper, paintbrush, cotton cloth, and wood sealer. Keeping your table and chairs in top condition has never been easier. 

Now for the negatives: first, the resin chairs have no cushions, so they are not as comfortable as the other sets to feature, and while you get 9 pieces, it costs almost double the previous most expensive patio sets to feature. 

#8. Christopher Knight Home Jerome Outdoor 7-Piece Dining Set

Christopher Knight Home Jerome Outdoor 7-Piece Acacia Wood/Wicker Dining Set | with Teak Finish | in Multibrown, Rustic Metal

  • The beautiful blend of wood and wicker comes to life with this dining Set, complete with six stacking wicker dining chairs, you can enjoy eating in your backyard whenever you want, The wooden table is treated to withstand even the harshest of seasons, ensuring your Set looks great all year long, The rectangular table ensures that there is enough space for both food and people, meaning no one leaves the table hungry

This Christopher Knight Home Jerome set consists of 7 pieces, including 6 seats and a table. The chairs have a stunning mix of faux wicker and metal frames for durability, and they are also stackable, making storage easy.

The wooden tabletop is treated to withstand the weather and repel the harmful effects of UV rays; plus, the rustic metal legs give it rigidity and durability. 

This is a much more traditional garden furniture set, so while it won’t win any design awards, it gives you a comfortable seating and eating space for a great price. This set is cheaper than most of the settee and coffee table combos, yet it seats 6.  

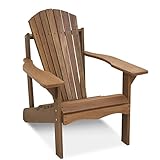
#9. Furinno Tioman Adirondack Chair in Teak Oil

Sale

Furinno FG16918 Tioman Hardwood Patio Furniture Adirondack Chair in Teak Oil, Large, Natural

  • Dark Red meranti wood treated with teak oil: more durable and water resistant

So, not everyone wants a large table and chair set. Sometimes reclining in the mid-day sun in a comfortable wooden chair treated with teak oil for added durability is the perfect way to kill a few hours.

This dark red meranti chair has a style that harks back to steamer chairs on the old cruise liners. The seating position is relaxed, so you are semi-reclined, and if you choose the contoured matching footstool, it elevates the comfort levels. 

Just remember that the footrest is sold separately, which adds to your cost base considerably. 

While this will not compete with dining sets because it has a different audience and use, it is affordable as a single item. Obviously, when you decide to buy more than one chair, the costs start to look less affordable. 

#10. Christopher Knight Home Perla Wood Club Chairs

Christopher Knight Home 302226 Perla Outdoor Acacia Wood Club Chairs with Water Resistant Cushions (Set of 4), 4-Pcs Set, Teak Finish/Blue

  • “Includes: four (4) club chairs material: acacia wood cushion material: water resistant fabric composition: 100% polyester finish: teak cushion color: blue assembly required hand crafted details dimensions: 30.00 inches deep x 28.50 inches wide x 32.75 inches high”

This set of 4 club chairs is the ideal option for entertaining outside in comfort. The super-soft polyester cushions are water-resistant, making them safe to leave out in showers, and the acacia wood frames are treated in teak oil to protect them against the weather and UV rays.

You can get a 2-piece option, which is cheaper because this chair-only set costs as much as many table and chair combos. And the lack of a table might put some people off purchasing, although you can get a table separately.

Pros and Cons of Teak Patio Sets

Teak outdoor furniture is expensive compared to other garden options, so is the extra expense justified? Let’s take a look at the pros and cons of teak patio sets.

Pros

Durable

Durability is one of the principal reasons you would choose teak furniture and pay the extra price. After all, who wants a patio set that lasts a couple of seasons and then needs replacing?

Teak has a high oil content, so it doesn’t dry out like other wood varieties. It makes it the perfect material to withstand the punishing UV rays of the sun. With the right treatment, teak furniture can last decades! It is also resistant to pests and rarely twists or warps.

Withstands Temperature Changes

Teak is capable of regulating its core temperature to cope with extremes. In the summer, it stays cool, and in the winter, it stays warm. It’s one of the reasons why it is such a great choice for outdoor furniture. 

It even outperforms metal because, in extremes, metal temperatures fluctuate between really hot or cold. 

Relatively Low Maintenance

Nothing is entirely maintenance-free, but teak patio furniture is as close as it gets. Other than a yearly check-up, your teak furniture should stay looking fabulous no matter what the weather. It has a high oil content, so it repels the damaging effects of the sun. 

Teak wood starts out a golden color and  fades in the sun over time to a gray hue, so if you want to restore it back to its original color, buy some teak oil and give it a wipe over. 

Eco-Friendly

Teak is responsibly sourced, with many plantations government-managed. Countries like Indonesia and India grow the wood for production, removing the need to deforest natural trees and damage the ecosystem.

High-Quality

Teak is high-quality, so it is ideal for making patio sets, but there are different grades of teak. The quality ranges from Grade A to C, with A being the best. This wood is taken from the center of the tree and is often referred to as heartwood. 

It has a higher oil content, so it is more resilient against the drying effects of the sun’s rays. It is also the most expensive option, which is why some patio sets are so much more costly than others. 

Cons

Cost

Teak furniture is not a cheap option. It costs substantially more than other wooden patio sets, but if the price is not an obstacle, then get the best quality teak you can. 

For those who still want a teak dining set but are working to a budget, you can get different grades of teak, which reduces your costs. 

Best Teak Patio Sets Buying Guide

So, you’ve decided to get that teak patio set you’ve always dreamed about, but what are the important factors to bear in mind?

Grade

As we’ve already touched on, the grade of your teak furniture matters if you want longevity. Grade A is the most expensive because it comes from the center of 20-year old mature trees. This ensures it has the highest density and oil content. 

Grade B teak comes from the heart of the tree but from younger trees. While it still has a high oil content, it cannot compete with Grade A teak, and it lacks the strength of mature wood. While it will still repel the effects of the sun, it won’t match higher-grade teak for resilience. 

Grade C is the cheapest wood and comes from the outer body of the trunk, so it contains the least amount of oil. Patio sets made from this grade of teak are cheaper because they don’t have the same core durability.

Color 

The color of your teak furniture ranges from light to dark, depending on the grade and finish of the wood. If left untreated, it fades to a silvery gray, but the good news is you can reapply teak oil, and its color comes right back. 

Which shade you choose depends on your personal taste and the color scheme you want.

Size

Teak furniture sets come in all shapes and sizes. You can buy single items or 9-piece patio sets to cater to the entire family. 

Obviously, the price escalates dramatically the more pieces you have, so another factor to consider is whether you can add to the set later down the line with individual purchases. 

Most patio sets consist of 4 or 6 chairs and a table, which seems to meet the requirements of most families.

Style

As our diverse list of patio sets highlights, the choice of styles is massive. You can buy 100 percent teak sets or hybrid versions with resin seats and tabletops set on teak legs. 

Some look more like traditional garden furniture sets, while others are straight out of the pages of a designer catalog.

Teak Wood vs. Other Wood Types with Teak Oil

Teak wood is far stronger than other wood types because the wood is more densely packed and contains higher oil levels than other woods. So, every piece of wood on your patio set is protected inside and out, rather than just on the surface.

Softwoods like pine coated in teak oil have some weather resilience but nowhere near the same protection as pure teak wood. 

Teak Furniture Maintenance

While teak is a low-maintenance wood, it still requires some TLC to keep it looking its best. 

How to Protect Your Teak Patio Set

Teak furniture is either natural or sealed, so the way you care for them differs. First, let’s look at how you care for natural teak.

  1. Pressure Washer

Because there is no special protective coating or surface sealant, you can blast your teak wood with a pressure washer, as long as you remember to choose the lowest setting. 

  1. Wide Nozzle

Attach a wide nozzle and hold it about 12 inches from the surface of your furniture and work in sweeping motions. 

  1. Leave To Dry

Once you are satisfied that all the grime is removed, leave it to dry naturally in the sun.

  1. Sandpaper

Once the wood is completely dry, grab a sheet of 400 grit sandpaper and lightly sand the surface of the wood, so the pores don’t open. 

  1. Apply Teak Oil

Once you have sanded and brushed the surface free of wood dust, wipe it down with a cloth and then apply teak oil to keep it protected from the elements. Allow it to dry for 12 to 24 hours before using it again. 

Maintaining Sealed Teak

  1. Brush Clean 

Grab a stiff-bristled brush and rub across the surface of the wood, working with the grain to avoid scratches. 

  1. Teak Cleaner

Buy some teak cleaner, and with a clean cloth, wipe it over the surface of the wood, making sure to get it into every corner. 

  1. Wash Down

Grab the garden hose and wash the furniture down with cold water. Leave it to dry naturally in the sun. 

  1. Apply Sealant

Once the wood is completely dry, apply a sealant to the surface to block out the elements. You should schedule a yearly maintenance regime, protecting your favorite patio set annually. 

How to Clean Your Teak Patio Set

How and when you clean your teak patio set depends on the weather conditions where you live.  If you don’t get that much sun, it might mean you have a less intensive cleaning program. 

The best way to clean your teak furniture is to grab the garden hose and wash it down, using a soft-bristled brush to get at the hard-to-reach areas. 

Best Teak Patio Sets FAQ

Who makes the best quality teak outdoor furniture?

There are many quality teak furniture sets out there, but a few names appear more often than others. Safavieh and Christopher Knight Home feature heavily in our review and have many fans worldwide. 

What is the best patio furniture brand?

It comes down to personal choice and value for money. You can spend thousands on your new patio set, but for most, that is unattainable, so the budgets are a little more modest. 

Christopher Knight Home and Safavieh get a high score for customer satisfaction and quality, but other brands are available and have an equally strong following. 

Is teak wood good for outdoor furniture?

Absolutely it is. It is why so many people want a teak patio set and why they are so expensive. Teak gets its weather-resistant qualities from the high oil content in the wood. They last the distance and rarely need maintenance.

This keeps it from drying out while repelling the effects of rainfall. The quality of the wood depends on the grade. Grade A is the highest quality and will stay looking good for a very long time. It is also the most expensive because it is harvested from mature trees. 

Grade C is the lowest grade of teak. It is taken from the outer body of the trunk, where it has less oil content. 

Is teak worth the price?

When you consider that teak patio furniture lasts the distance, it is worth every penny. You will spend between $500 and $1,000 for an average to good set, although they can be many times more. 

It is not uncommon for teak furniture to last 70 years or more if it is properly maintained. That’s the equivalent of paying 14.28 dollars every year, which is a minuscule sum of money. 

The highest grade of teak comes from mature trees that have been grown for 20 to 25 years. It is often called heartwood, and it contains high levels of natural wood oils. You pay many times more for this teak because it is of the highest quality. 

Can teak furniture be left outside?

You can leave teak wood outside. It is highly weather-resistant and can take everything the elements throw at it. You can also slow down the decaying process by covering the furniture on the harshest winter days. 

And if you have space, it might be an idea to store the patio set inside your garage or workshop for the winter months. 

Why We Love Teak

So, there you have the rundown of our favorite teak patio sets. They make any garden space look stylish and inviting while fending off the sun’s brutal UV rays. Thanks to high oil content and dense fibers, teak is the perfect material to use. 

Whichever style you choose, remember that while your teak furniture needs very little maintenance, it does still need cleaning at the end of the summer season. 

If you maintain it well, your new patio set could last you 70 years or more and even become a family heirloom, passed down to the younger generations. 

10 Best Outdoor Chaise Lounges For Relaxing In Your Backyard

Chaise lounge translates into English as lounge chair. They have a definitive style and have been around for hundreds of years. Recline, relax, read or sleep: the best outdoor chaise lounge lets you soak up the sun while giving you maximum comfort. 

Let’s take a look at 10 excellent examples of outdoor chaise lounges as we bring you everything you needed to know about this classic reclining sofa. 

10 Best Outdoor Chaise Lounges

#1. Outdoor Chaise Lounge with Ottoman

This chaise lounge and ottoman set is the perfect garden furniture 2-piece for creating a comfortable space with additional storage. The chair reclines to 5 set positions, so from full recline to upright, you can choose your best configuration. 

The chair measures 44.44 x 27.36 x 28.46 inches, and the ottoman measures 22.44 x 22.44 x 12.6 inches. The styling is more “modern daybed” than a classic chaise lounge, but nevertheless, it is a stylish piece of garden furniture.

It has a faux rattan woven design with a mesh base that allows the red cushion to breathe and to give you more comfort levels with a sprung feel. It also lets the rainwater drain away to reduce mold and mildew growth. 

You also get an ergonomic design that contours the shape of your back and legs, giving you extra support, and it folds so it can fit into your trunk for transporting and to make it easier to store away. 

The only downside is the price. This is not a cheap option and costs several times that of other models. 

#2. Kozyard Alan Full Flat Alumium and Polypropylene Resin Legs Patio Reclining Adjustable Chaise Lounge

This Kozyard is a different option altogether. It looks more like a modern version of a classic cruise liner steamer chair. It has 5 reclining positions, including fully flat, and the Textilene mesh fabric gives the chair a sprung feel. 

Textilene is made from polyester yarn, coated with PVC and then woven and heat-treated, giving it unrivaled weather and sun resistance.

It is also breathable, and should you decide to buy more than one; it is stackable for more accessible storage. 

The frame and legs combine aluminum and high-quality polypropylene resin, which is easy to keep clean in all weather conditions, but it also never rusts or needs maintenance. 

It has a weight limit of 320 pounds, and for maneuverability, you get a set of hidden wheels. The only negative is you might get some rust residue forming around the stainless steel nails that fasten the legs to the frame. 

#3.  POLYWOOD NCC2280-WH Nautical Arms Chaise

Sale


POLYWOOD NCC2280-WH Nautical Arms Chaise, White

  • Built to withstand a range of climates including hot sun, snowy winters, and strong coastal winds.

This chaise lounge resembles those steamer chairs you see in old black and white seaside photographs. It has a classic styling that borrows much from days gone by. 

It is constructed from Polywood, which is a durable plastic made from recycled milk cartons and detergent bottles, so this is an eco-chair. It is also weatherproof, guaranteed not to splinter, crack, rot or peel, and withstand all weather conditions. 

This model has 4 reclining positions, including completely flat, and it folds for easy storage. It also has UV inhibitors that prevent fading from the sun’s rays. All in all, this is a durable plastic chaise lounge. 

So, now we get to the price. For a plastic chair, albeit durable, it is expensive. You don’t get any tables or accessories, not even a cushion. 

#4. Vivere Aluminum Urban Sun Lounger Black Chrome

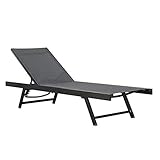
This modern take on the chaise lounge is a great choice if you like cool, unfussy lines and minimalist design. It is constructed from aluminum, which is rust-free and lightweight, and it has a maximum load capacity of 330 pounds. 

You get 5 backrest positions, including fully flat, and it folds flat for easy transportation and storage. The material is acrylic mesh, which requires virtually zero maintenance and it is weather and UV-resistant.

This model is much more competitively priced compared to some, but it does lack the style and retro lines of other models to feature in the review.  

#5. Abba Patio Chaise Lounge with Adjustable Canopy and Headrest Pillow for 2 Person

Sale


Abba Patio Chaise Lounge with Adjustable Canopy and Headrest Pillow for 2 Person, Outdoor Sunbed Wheeled Hammock Bed for Sun Room, Garden, Poolside, Beige, 6.5’L x 6.5’W

  • High-quality Materials: The Textilene fabric is weather-resistant and dries very quickly. The tubular steel stand is powder-coated for rust resistance, anti-flaking and anti-corrosion. You can easily clean the steel stand with a damp cloth

This Abba 2-person chaise lounge daybed has a hammock-style frame and an overhead canopy to shield you from the sun’s rays. 

The Textilene fabric is waterproof, dries quickly, and is breathable for all-year use. You get a built-in pillow, wheels for easy maneuverability, and a powder-coated steel tubular frame. 

This double chaise has a 500 pounds maximum weight capacity, and considering it is for 2 people; it is reasonably priced compared to some models we’ve featured. It is 6.56 feet long, weighs 62.8 pounds, and measures 67.72 x 23,32 x 4.72 inches. 

Powdered steel is less resilient than aluminum, as it will scratch and scuff, exposing it to the weather. That’s when rust happens. It’s also heavier, so it might need 2 people to maneuver this bed into position. 

#6. Crestlive Products Aluminum Adjustable Chaise Lounge Chair Outdoor Five-Position Recliner, Curved Design, All Weather


Crestlive Products Aluminum Adjustable Chaise Lounge Chair Outdoor Five-Position Recliner, Curved Design, All Weather for Patio, Beach, Yard, Pool (2PCS Brown)

  • ✔ 【Durable & Rust-free Frame】 Completely constructed of powder coated Aluminum frame, this lounge chair ensures its durability and rust proof. Also, it provides sturdy support with max weight capacity of 270 lbs. You will feel free to lie down on the lounge.

Invite your friends over with this 2-piece chaise lounge set. You get a chair, and so does your friend, and for the price, it is great value compared to some single chaise lounges. 

It looks similar to the Vivere model, thanks to straight lines and minimal curves. It has 5 reclining positions, including fully flat, the powder-coated aluminum frame is fully rust-resistant, and it has a maximum load capacity of 270 pounds. 

You get the same Textilene mesh material as others featured, for comfort and durability, so it is UV-resistant and weatherproof all year round; plus, assembly is simple with just 10 screws

They lack wheels, so you need to lift them into position, and when it comes to storage, you might find it challenging because only the back folds flat. 

#7. Soleil Jardin Folding Outdoor Adjustable Chaise Lounge Chair with Removable Cushion


Soleil Jardin Folding Outdoor Adjustable Chaise Lounge Chair with Removable Cushion, Fully Assembled, Patio PE Rattan Reclining Lounger for Pool Beach, Dark Gray

  • DURABLE CONSTRUCTION – Made of half-round resin wicker and powder-coated steel frames, patio lounge chair is durable and has long lifespan. The soft cushion provides comfortable feeling when lying and a headrest pillow come with it.

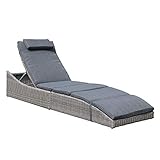
If you want something more traditional in the way it looks, this PE rattan woven chaise lounge is a great choice. It has an ergonomic design that contours the shape of your body; unlike others, the back changes position while the fully flat base stays put. 

It comes with a comfortable, fully detachable cushion for cleanliness and maintenance, and you get 5 reclining positions. This is very much a poolside lounge chair, and when it is folded it makes a cube that can double as a table

The all-weather resin wicker is stretched over a steel frame, so while it might not be the lightest chaise lounge, it is resilient. Just be aware that steel is not as rustproof as aluminum. However, unlike other models, this one requires no assembly. 

#8. Homall 3 Pieces Patio Chaise Lounge Chair Sets

Sale


Homall 3 Pieces Patio Chaise Lounge Chair Sets Outdoor Beach Pool PE Rattan Reclining Chair with Folding Table and Cushion (Beige)

  • 【All-Weather Resistant】 This patio lounge chairs is durable enough to withstand rain wind and exposure to the sun for year-round use.Made of all-weather resistant PE Rattan and rust-resistant steel frame,featuring sturdy construction and durable use.

So, now we have 3-piece sets consisting of 2 chaise lounges and a folding table to place your cocktails. These chairs are PE rattan in a woven pattern for resilience, comfort, and better water drainage. 

Each chaise comes with a removable cushion for added comfort and cleanliness, and the material is also breathable, meaning it dries quickly after a freak summer shower. 

It folds for easy storage, and the ergonomic design contours your body for better comfort. You also get a carry handle for better maneuverability. 

Unfortunately, you only get one recline position, which limits you somewhat, and the tubular steel frame makes this a heavy chair, weighing 49.5 pounds. 

#9. Crestlive Products Aluminum Beach Yard Pool Folding Recliner Adjustable Chaise

Sale


Crestlive Products Aluminum Beach Yard Pool Folding Recliner Adjustable Chaise Lounge Chair All Weather for Outdoor Indoor, Brown Frame (1 PC Brown)

  • ✔ 【Sturdy Durable Material】 This lounge chair is constructed of Aluminum frames, chairs provides sturdy support with max weight capacity of 270 lbs. You will feel free to lay down on the chair.

This Crestlive chair is the lowest priced to feature so far. It has an aluminum frame, which is rust-resistant and lightweight, with a stretched Textilene mesh fabric as the seat cover. Textilene is UV, water and weather-resistant, and breathable.

Plus, the mesh design makes it easier for water drainage. This seat is different because the back adjusts for comfort, and so does the base. The feet are foldable, making this chair a multi-position option. 

It folds flat for storage, and when you want to maneuver this chair, it only weighs 10.5 pounds, so it is super lightweight. The only negative is it doesn’t have a cushion to increase your comfort levels, and it lacks any real style compared to some. 

#10. Kozyard Maya Outdoor Chaise Lounge Weather & Rust Resistant Steel Chair


Kozyard Maya Outdoor Chaise Lounge Weather & Rust Resistant Steel Chair with Polyester Fabric Cushion for Pool, Patio, Deck or Yard (Terracotta)

  • FRAME MATERIAL: Durable wrought iron frame for long product lifeDESIGNED FOR COMFORT. Take your outdoor relaxation to another level. This chaise lounge has three plush and luxurious cushions that are sure to provide comfort that will keep you lounging for hours!

For sheer comfort, this chaise lounge has to take the prize. The cushion is thick polyester for weather and UV resistance, and the steel frame is rust-resistant for longevity and durability. 

You get 5 positions in total, including completely flat, so you can take full advantage of the sun or sit upright to read a book. The maximum weight support is 250 pounds, and some assembly is required to get this chair up and running. 

The steel frame is not as lightweight as aluminum, and it also lacks the same weather-proof credentials, even with the powder coating. Powder coatings chip and scuff, and when water gets in, you get rust. 

What is a Chaise Lounge?

As we said in our opening paragraph, chaise lounge translates from French to English as lounge chair. So, a chaise lounge is a chair you can lounge in rather than sit bolt upright feeling uncomfortable. 

Chaise lounges have particular features: one end is open without an armrest, while the other has a back support. Modern backyard chaise lounges resemble reclining garden chairs, just with a touch more class and comfort.

Traditional chaise lounges were the preserve of the wealthy, who furnished their homes with plush sofa designs, mimicking neoclassical tastes.  

Considerations for Buying the Best Outdoor Chaise Lounge

Looking for the best chaise lounge money can buy is a little tricky. There are so many variables to bear in mind. So, now you’ve established that you are in the market for a new garden chaise, what should you look for?

Comfort

If comfort isn’t at the top of your list, something is amiss. Reclining on a summer’s day is all about comfort. If the chair is too hard, poorly shaped, or the cushions are paper-thin, you will not want to use it. 

The material plays a part in how comfortable the chair is to sit on. Textilene is a woven mesh that gives a springy feel, while PE rattan is harder on your body and far less comfortable for long-term use. 

Look for removable cushions, 5 adjustable seating positions, and, if you can, adjustable footrests. 

Ease of Maintenance

Ideally, your chaise lounge should be durable and easy to maintain. Some materials need more TLC than others. PE rattan is tricky to keep clean because grime gets into the mesh pattern, making it a chore to shift. 

Wooden chaise lounges need more care and attention because they are susceptible to moisture and the elements. They need sanding, screws and bolts tightened, and staining and sealing. If upkeep is your weak spot, go for an aluminum or steel-frame chair. 

Durability

Durability ensures that your investment is protected for as long as possible. No one wants to replace their garden chaise lounge after just one season, especially when you are spending a few hundred dollars. 

They have to withstand the weather, the wind, the cold and heat, and the UV rays of the sun. That’s a lot of punishment! And it also needs to cope with you using it as often as possible, so the moving parts like the joints need to perform as well as the frame. 

Price

Typically, you get what you pay for, so if you are looking at the budget end, accept that your less expensive chaise lounge will lack some durability compared to more expensive models. 

However, if you are spending big, you have every right to expect your chaise lounge to last the distance. After all, what are you spending the extra money for? 

Material 

Most outdoor chaise lounges are either constructed from PE rattan on a steel frame or Textilene mesh fabric stretched over an aluminum frame. You can get a hybrid mix of aluminum and resin, but they are less common. 

What you want is a frame that resists moisture and material that repels the sun’s harmful UV rays.

If you plan on storing the chairs in the garage or covering them in the off-season, that will increase the lifespan of your chaise lounge, but this is only possible if you have the space in the yard or garage. 

Remember that aluminum doesn’t rust, whereas steel does, so even though it is powder-coated, it will eventually succumb to the weather. 

Weight

Maneuverability is crucial, especially if you like to store your chaise lounge in the garage or want to move it around the garden to track the movement of the sun. These chairs can be as light as 10 pounds and as heavy as 50 pounds. 

Also, look for concealed wheels and removable cushions. The wheels make it easier to get the chair in position. 

Storage

When the season is over, you have to put your chaise lounge somewhere, so unless you have acres of storage, you will want a chair that folds as small and flat as possible. This also ties in with the weight because carrying the chair shouldn’t break your back.

If you cannot store your chair set indoors, the weatherproof elements become the most important things to consider. It will sit in the most extreme heat, cold and weather conditions, waiting until the start of the summer season next year. 

Waterproof vs. Water-Resistant

There is a subtle difference between the two, and they are easily confused. However, you should not mix up waterproof with water resistance. It all comes down to the IP rating, which stands for Ingress Protection. 

The ratings range from 0, which means that it cannot withstand a single drop of water to 8, meaning it can be submerged beneath a significant body of water. 

There is a middle ground between the two, and it is water repellant. It has more resilience to water ingress but doesn’t match the performance of waterproof products. Think of it like a wet suit versus a raincoat. 

Waterproof

Waterproof products are more resilient because they repel water no matter the length of time or the amount of water. So, to be classified as waterproof, your chaise lounge should be able to resist rusting even if it is completely submerged. 

Water-Resistant

Water resistance is different because, while your chair has some protection against moisture, it cannot guarantee defense against rust. If the chair cannot be submerged entirely in water without it corroding, it is water-resistant and not waterproof.  

Best Outdoor Chaise Lounge FAQ

What is the best outdoor chaise lounge?

For sheer resilience, it’s hard to beat the Polywood Nautical Arms chaise lounge. It is constructed from a wood effect plastic that is resistant to heat, cold, water, and UV, so it is guaranteed not to fade, split, splinter, or crack. 

It means you can leave this chair outside all year round, and when you come to use it again, a quick wipe down with a cleaning agent should see it looking as good as new. Obviously, Mother Nature always wins in the end, and it will deteriorate, but not for a very long time.

What is the most comfortable outdoor chaise lounge?

For the best comfort, you should go for a cushioned chaise lounge like the Kozyard Maya model. It has extra-thick padding that makes your reclining experience feel like sitting on the most comfortable sofa or reclining chair. 

Remember that you will be reclining on this chair for hours on end, so cushions that are non-breathable will leave you feeling hot and clammy, so the cushion material is also crucial. 

And the second comfort consideration is the design. Chairs that allow your body shape to feel supported without forcing it into an uncomfortable position will aid your lounging experience. Look for terms like “ergonomic.” 

Why are outdoor chaise lounges so expensive?

Imagine a couch or armchair for your garden, and you can see why they are so expensive. They offer a level of comfort that patio sets don’t. 

Also, remember that you won’t need a collection of chaise lounges to furnish your garden. A couple of well-chosen reclining chairs adds that extra level of comfort to your space. So, look at chaise lounges as a way of adding an extra layer of comfort to your garden. 

What should I look for in an outdoor chaise lounge?

Above all else, comfort should be your number one consideration. These chairs are built for extended lounging, so if they are not comfortable, they are failing at their primary purpose. 

Second, weather resistance is crucial because this chair will get everything nature can throw at it, and it should withstand rusting, fading, and cracking. The material you choose has an impact on this factor. 

Steel is more susceptible to water and sun, with the powder-coating chipping, peeling, and cracking, exposing the bare metal underneath. When moisture gets in, it starts to rust. 

Aluminum is much better at repelling water because it doesn’t rust. It may be more expensive as a material, but as we said earlier, you get what you pay for.

It’s Time To Relax

Chaise lounges are the ultimate in garden luxury, and the only stress you should feel is fighting family and friends for the best seat in the yard. Once you get a chaise lounge, you will never look back. 

You’ll dream of the sunnier days so that you can dust off your favorite chair and soak up the rays. 

8 Best Lift Chairs (Guide & Reviews)

As we age, we need every helping hand we can get, especially when it comes to mobility. Ask most young people, and they would scoff at the idea of struggling to get in and out of a chair, but the harsh reality is sitting, and standing can be a challenge for some people. 

The best lift chairs give us a way out of this dilemma. They offer hope to the less mobile, those with hip and back issues, and anyone suffering a medical condition that severely hampers their ability to move. 

The 8 Best Lift Chairs

#1. Mcombo Electric Power Lift Recliner Chair Sofa with Massage and Heat for Elderly


Mcombo Electric Power Lift Recliner Chair Sofa with Massage and Heat for Elderly, 3 Positions, 2 Side Pockets and Cup Holders, USB Ports, Faux Leather 7040 (Medium, Dark Brown)

  • Power Lift Assistance: Counter-balanced lift mechanism with TUV certified actuator pushes the entire chair up to assist the user stand up easily without adding stress to back or knees, smoothly adjust to lift or reclining position you prefer by pressing two buttons on the remote control.

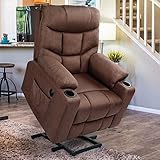
This Mcombo is a 3-position lift chair, so you can adjust the seating position for different levels of comfort. It reclines, has a TV position with raised feet, and a lift setting to provide easy access. 

The material is faux leather, and you can get this chair in 7 vibrant colors ranging from cream to fire red. You get two cup holders, side pockets to store your favorite book, magazine or newspaper, and push-button control. It even has two USB charging points for your tablet or smartphone. 

You also get a full-body massaging vibration and lumbar heating covering 8 points across your body. It has a maximum weight capacity of 320 pounds, and the motor is TUV certified as a stamp of quality. 

Be aware that the USB charging points are only compatible with low-power devices, so you might struggle to charge your laptop. 

#2.  Esright Power Lift Chair Electric Recliner


Esright Power Lift Chair Electric Recliner for Elderly Heated Vibration Massage Fabric Sofa Motorized Living Room Chair with Side Pocket and Cup Holders, USB Charge Port&Massage Remote Control, Brown

  • ????【Non-toxic Material】: We insist on choosing environmentally friendly timber with higher production costs. All wood boards used in our products are formaldehyde-free, conform to the P2 Requirement of California Air Resources Board(CARB). We committed to protect the health of the elderly who chooses our electric lift chair.

If you want your lift chair to come with environmentally-friendly credentials, this Esright could be a good choice. The wood used in construction is sourced from eco-friendly producers, and their wood boards are guaranteed to be formaldehyde-free. 

It also conforms to the California Air Resources Board (CARB) P2 requirement. The silent-lift motor moves the seat to a 150-degree angle to allow you easy access in and out of the chair. 

Unlike the Mcombo, this chair only has 4 points of massage, but you still get the USB charging point and double cup holders. You also get heated lumbar supports and 5 massage modes, including auto, press, wave, pulse, and normal. 

This is a soft fabric chair, so you might find you overheat in the summer, and the USB points are intended for low-power devices. However, it costs a lot less than the Mcombo, so its shortcomings may not be such an issue. 

#3. Flamaker Power Lift Recliner Chair


Flamaker Power Lift Recliner Chair PU Leather for Elderly with Massage and Heating Ergonomic Lounge Chair for Living Room Classic Single Sofa with 2 Cup Holders Side Pockets Home Theater Seat (Black)

  • [Power Lift and Recline] The motor equipped recliner can lift you up when you want to get up from your chair, by pressing a button on the remote control, it lifts or reclines smoothly and quietly, it enables you to stand up easily without putting force on your back or knees. And it features reclining to different angles by electric control, you can lie down in a cozy position and take a rest, or TV watching, and the footrest can be extended and retracted that allows you to stretch your body.

Thi Flamaker chair has 3 positions; recline, TV, and lift. You get 8 individual massage points for the head, lumbar region, thighs, and ankles to help with joint and muscle pain as well as improving circulation. 

You get the obligatory twin cup holders, a side pouch for storage, a 15, 30, and a 60-minute timer for the massage settings. Plus, the lumbar region is heated to ease back pain. 

Styled in synthetic PU leather material, this chair is comfortable, functional, and can take a maximum weight of 360 pounds. 

When you compare this chair on a like-for-like basis, it seems to do everything the previous models do, so it’s a mystery why this one costs almost $200 more. The price might be the reason why you would choose a different model. 

#4. Signature Design by Ashley Yandel Upholstered Power Lift Recliner

Sale


Signature Design by Ashley Yandel Upholstered Power Lift Recliner for Elderly, Brown

  • CONTEMPORARY POWER LIFT RECLINER: Style and functionality merge together in this dual motor lift chair recliner, With just the touch of a button, the power lift eases you back and elevates your legs for the ultimate lounging experience

The price of this chair is similar to other models featured, but it lacks some of the key features, like massage settings and heated lumbar support. It has the same faux leather material with two color options; saddle and black. 

From recline to fully lift, it only takes 1 minute, so the emphasis is on gentle action, which should suit most elderly users. 

While this is an oversized chair with comfort at its core, it will struggle to compete with similar models that offer so much more without the extra price tag.

#5. CANMOV Power Lift Recliner Chair


CANMOV Power Lift Chair Recliners for Elderly, Electric Recliner Antiskid Fabric Sofa Living Room Chair with Overstuffed Pillow Design, Chocolate

  • ❤️【STURDY AND FUNCTIONAL POWER LIFT RECLINER】Modern style and functionality merge together with single motor and heavy duty mechanism, lay back or lift and tilt to stand, smoothly adjust to any customized position which provide ultimate lounging experience.

Instead of having set positions like the other chairs, this CANMOV allows you to choose the recline angle, giving you complete freedom. It also has a maximum weight capacity of 300 pounds.

You get super-soft cushions and armrests, as well as a pillow for head and neck support. Generous side pockets give you ample storage, and the remote control is so simple to use, with just two buttons. 

The obvious downside is the lack of features. It costs the same as other comparable chairs, so it is hard to justify why. 

#6.  Harper&Bright Designs Smoky Brown Wilshire Series Heavy-Duty Power Lift


Harper&Bright Designs Smoky Brown Wilshire Series Heavy-Duty Power Lift Recliner Chair, Built-in Remote and 2 Castors,

  • [Premium Upholstery] Thick velvety smooth faux leather upholstery is double-stitched throughout and in a warm smoky brown

This Harper and Bright chair also comes in brown faux leather, but it has the addition of casters to make maneuvering it easier. The maximum weight it supports is 330 pounds, and it lifts to a maximum angle of 160 degrees. 

The cushions have been designed to provide extra support at key points of the body, like the neck, lumbar region, and knees. 

This chair has the styling of an old leather armchair, thanks to the nailhead trimming on the front panels and the armrests. It is also competitively priced, costing a couple of hundred dollars less than other models, so you can forgive its lack of features. 

#7.  Furgle Large Power Lift Chair Electric Recliner Chair with Massage Vibration


Recliner Chair, Furgle Back Fabric Recliner Mid Century Modern Compact Recliner, Wingback Chair, Gray

  • 【Function & Design】Manual lift recliner extremely easy to use with push-back design, 90°~ 160° adjustable recline functions makes the recliner be better suitable for comfortably rest, watching TV, or lying down.

So, we come to our first push-back recliner, which means you don’t get fancy electric buttons and power reclining. If you want to recline this chair, you need to use arm and leg strength, which might be an issue if you suffer from severe mobility issues. 

On the plus side, this looks like a standard chair, so it doesn’t have that oversized look, so it should blend in better in your lounge. Also, it uses a high-density sponge, so the seating is super comfortable. 

It comes in 3 colors, ranging from white, gray, and brown, and you can upgrade to a faux leather chair with cup holders, but that would cost you extra.

Thanks to large padded arms and waterproof material, this chair is both comfortable and robust. However, there is always a downside, and for this model, it’s the price. You can get better chairs with more features for the same price and, in some cases, a lower price. 

#8. ERGOREAL Power Lift Recliner Chairs


ERGOREAL Power Lift Recliner Chairs for Elderly with Massage, Heated Electric Chair Lift for Senior, Petite Lift Chair Linen Fabric with Remote Control, Motorized Single Sofa-Blue

  • ECO & DURABLE MATERIAL: Selected environment friendly material camphor wooden board, Class E1 material with water-proof and durable linen fabric upholstered, which got 2 times life longer than regular fabric. Silence actuator makes less than 25 dB sounds when working, 100% harmless to pets and human body, if your fellers try to satisfy their curiosity with what’s in there or give a grind on claws, health is the last thing to be worried, formaldehyde,lead and arsenic free guaranteed.

This ERGOREAL chair is environmentally friendly because the materials are sourced from eco-friendly producers, and their wooden boards and materials contain zero formaldehyde, lead, or arsenic, so it’s kind to your pets too. 

You get 5 modes, with two intensity settings and 8 massage points to relieve stress on your joints and muscles. 

You also get 2 remotes and a side pocket, plus the seat cushions have been stress-tested over 2,000 times to ensure they stay comfortable and keep their shape. It also has heated lumbar supports and 4 seating positions, ranging from 100 to 150 degrees. 

This chair has more modern styling, so it should fit most room schemes, and the casters make it more maneuverable. 

What Is a Lift Chair?

A lift chair is a super-comfortable seat designed to aid the elderly, disabled, and those with other medical or mobility issues to sit and stand. Typically they have a minimum of 2 or 3 seating positions from fully reclined to raised, and they come with a range of bonus features. 

They have extra lumbar support, remote controls, cup holders, side pouches, with some even providing USB charging points and massage zones. 

Types of Lift Chairs

2 Position

2-position lift chairs have an upright seating position and a lift setting that raises you to almost standing height. They lack a recline setting, making them cheaper because they give you fewer options and less comfort. 

3 Position

You get the same positions as the previous 2-position chair, but you also have the option to recline to 45 degrees. 

Infinite

As the name suggests, infinite chairs have no preset seating positions. You can adjust the chair to any angle you choose within the highest and lowest angle parameters. These are great because you can set up the chair for your individual needs. 

They also have 2 motors, so you can recline with the footrest down and operate the footrest independently. 

Lift Chair vs. Normal Chair

When you compare the two, there are fundamental differences. Lift chairs serve the elderly and less able because the chair lifts the seated person to a height that means they are almost standing. 

It relieves strain on bones, joints, and muscles, giving those with mobility issues more independence. They often come packed with features like massage zones, heated lumbar support, and cup holders. 

However, all this fancy gadgetry comes at a price. Lift chairs cost a lot more than standard models, mainly because the audience is so niche. And where there is a niche, there is an added cost. 

Standard recliners are more for general use. While the elderly might enjoy reclining in a chair, they don’t offer that final level of comfort to get them into a standing position. Typically, regular recliners are also manually operated. 

Again, this makes them unsuitable for some because they require a degree of arm and leg strength to get them into the recline position and back again. Trying to get the most comfortable position could be like getting a gym workout. 

Considerations When Buying the Best Lift Chairs

So, what should you be on the lookout for when shopping for a new lift chair? What are the critical points you should not ignore? Let’s find out.

Reclining Options

The 3-position lift chair is the most commonly sold type today. It reclines to an angle of about 45 degrees. These chairs typically have one motor, so you need to extend the footrest if you want to activate the recline position. They are ideal for watching TV and taking a nap.

Infinite chairs have no preset positions, so you can choose the angle that suits you. Also, because they have 2 motors, the footrest can stay down while the backrest reclines. They are more expensive, but of all the options, infinite chairs are the most comfortable. 

Budget

To put it simply, the more features you want, the more you have to pay. Some chairs seem to have everything, like USB charging points, heated and massaging cushions, and cup holders, while others mainly focus on their reclining capabilities. 

You should expect to pay somewhere between $300 and $800, depending on how much technology the chair has. 

The most budget-friendly chairs are the basic 2-position models. Plus, the material you opt for makes a difference to the overall cost. Leather chairs are more expensive than cloth materials. 

Functionality

It all comes down to how you intend to use the chair. If you want a comfortable seat that aids you to stand and sit and reclines when reading your favorite book, opt for the 2 or 3-position models. 

If you select the chair for a specific medical or mobility reason, you might want to buy the more expensive infinite chair with its array of different settings. Additionally, if you suffer from back problems, getting a chair with lumbar supports is vital. 

Size/Measurements

Some of these lift chairs are big, so making sure it fits into your space is crucial. If the chair is too big, it will dominate the room and make it feel cramped.  Also, you need a certain distance between the chair and the wall for it to recline.

You should allocate additional space for the width and depth, as well as the height, and also consider you size/height. You wouldn’t want your head and feet hanging over the edge of the chair. 

Upholstery

The type of upholstery you have makes a difference in your comfort levels. Most cloth seats are fine, but they can become warm in the heat of the summer. Likewise, faux leather makes you sweat more. 

Then there is the color. Does it match your color scheme? Most lift chairs come in sober browns and beiges, especially the faux leather models. And keep in mind that if you spend a lot of the time in the chair, you wouldn’t want a material that generates sores

Cloth varieties are more cheerful, with a host of vibrant shades, increasing your color choices. 

Bells and Whistles

If you are spending big, you want to get the most for your dollars. Lift chairs are typically packed with additional features like cup holders, heated lumbar supports, massage zones on the crucial parts of the body, and USB charging points.

Keep in mind that the more gadgets you want, the more you will spend, ramping up the purchase costs by hundreds of dollars. 

Warranties

Most chairs come with a 1-year warranty but bear in mind, the more complicated the chair, the more likely it will malfunction. So, while you are spending a lot of money, keep one eye on the future and possible mishaps. 

A warranty gives you peace of mind, knowing that no matter what, if the chair malfunctions due to a manufacturer defect, you are covered.

Will Insurance Cover the Cost of My Lift Chair?

Medicare typically won’t pay for the lift chair in full but it may cover the lift mechanism if it malfunctions under Medicare Part B and C if your doctor determines the chair is part of your medical needs to help with your condition. 

Everyone Needs a Lift

A lift chair can make an immense difference to an elderly relative’s life. It can help the less able and aid those with medical conditions that mean they don’t have the mobility of non-disabled people. 

We get that lift chairs aren’t going to win any design awards or that they are cumbersome and take up valuable space, but that is a small sacrifice to make to bring additional comfort to the life of someone you love.

7 Best Water Heater Blankets (Guide & Reviews)

Older water heaters lose more heat because they have insufficient insulation. While your heater is working overtime getting up to temperature, thanks to poor quality insulation, it is working so inefficiently that it increases your energy expenditure. 

So, what’s the answer? It’s time to invest in a water heater blanket. The best water heater blankets can reduce the amount of energy your heater uses and reduce your overspend on energy costs. 

The 7 Best Water Heater Blankets

Let’s look at the 7 best water heater blankets money can buy and highlight their strengths and weaknesses. 

 #1. Smart Jacket: Water Heater Blanket Insulation, “NON-FIBERGLASS”


Water Heater Blanket Insulation, “NON FIBERGLASS”, Fits up to 80 Gallons, Energy Star Certified,

  • Save Money, Energy and Help the Environment!!! SAVE 2x MORE WITH OUR PRODUCT!!! 5MM THICKNESS!!!

This is a non-fiberglass water heater blanket. It contains no carcinogenic or toxic materials and reduces your water heating bills by a maximum of 9 percent. This blanket reduces heat loss by 40 percent, so there are savings to be made. 

It is easy to install and fits all 30 to 60-gallon tanks. You also get an R-rating of 7.1. R-ratings are the industry standard measurement for heat loss and insulation. The higher the R-value, the more efficient the product.

The manufacturer claims you will recoup your initial purchase costs in energy savings within the first couple of months. Whether that is true or not remains to be seen. 

The biggest complaint with this water heater blanket is that it is tricky to install, with some people recommending it is a 2-person job. 

#2.  Frost King SP57/11C All Season Water Heater Insulation Blanket

Sale


Frost King SP57/11C All Season Water Heater Insulation Blanket, 3” Thick x 48” x 75”, R10

  • Vinyl backed fiberglass insulation blankets are designed for gas, oil or electric water heaters up to 60 gallon size

This model comes with vinyl tape to make installation easier. It certainly removes one of the main complaints that people made about the Smart Jacket, which was untidy seams. 

These heater blankets are made from fiberglass, which has excellent insulation qualities but is not kind to the environment. The blanket fits 60-gallon tanks, as well as gas, oil, and electric water heaters.

The other significant difference in this blanket compared to the Smart Jacket is the R-value. This one boasts an impressive R-rating of 11, so it is more efficient and should reduce your energy costs even further.

It also scores well on price. This one is almost half the price of the Smart Jacket, but that may also reflect the environmentally damaging fiberglass construction materials, compared to eco-friendly options. 

#3.  Reflectix ST16025 Staple Tab Insulation Roll


Reflectix ST16025 Staple Tab Insulation Roll, 16 in. x 25 ft

  • The staple tab edge is manufactured by perforating the bubbles 3/4″ Down each edge of the product

This reflectix insulation roll uses reflective technology to improve heat retention. It is fiber-free, completely safe for the environment, and lightweight, making it a breeze to install. 

This product is more of a general insulation material, so while it can be adapted to cover your water heater, it also fits inside attics and crawl spaces. Additionally, you can use this insulation in the construction process for floors, walls, and ceilings. 

It benefits from an air bubble inner layer to repel heat, keeping your water heater working efficiently. This product is also affordable. It costs half the price of the Smart Jacket. 

The only negative thing is that this insulation is more challenging to install around your water heater because it has to be adapted to fit. That said, with a little bit of skill, it can make an affordable alternative to a fiberglass water heater.  

#4.  US Energy Products Water Heater Blanket Insulation,”Non-Fiberglass”

This US Energy Products heater blanket is very similar to the previous model. It has a foil outer skin and a double bubble insulating layer in the middle to trap in heat. 

It reduces your heating bills by up to 9 percent, which equates to a 40 percent energy saving. The company claims this product will improve the efficiency of 95 percent of boilers.

It fits all 20 to 80-gallon water tanks, and you get an R-value of 8, so it outperforms the Smart Jacket but falls short against the Frost King. 

This insulation sheet is weatherproof, making it an ideal choice for use in construction for floors, walls, attics, and crawl spaces. 

#5.  SmartSHIELD Reflective Insulation roll, Foam Core Radiant Barrier, Thermal Insulation Shield

This is another foil insulation, but instead of bubbles at the core, this one has foam between the two reflective foil sheets. 

It reflects 97 percent of radiant heat, which improves the efficiency of your water heater, and because it has a vapor barrier, it is unaffected by humidity and moisture, meaning you can use it indoors and out. 

The foam is 3mm thick and made from polyethylene, which SmartSHIELD claims is more efficient than a layer of bubbles. This is certainly reflected in the R-values. 

For  3mm insulation, the R-rating is 20.42; for 5mm, you get an R-value of 21.10, and when you step it up to 10mm, that R-value leaps to 31.01. 

This insulation is also class 1 rated for fire safety, and it has no toxic or skin-irritating ingredients. The only downside is this product costs over double that of others on the list. 

#6. Thermwell Products SP57-5 Water Heater Blanket


Thermwell Products SP57-5 Water Heater Blanket

  • 1-1/2-Inch X 48-Inch X 75-Inch Water Heater Blanket

Now we are back with fiberglass jackets. This one fits all water heaters up to 60 gallons, and it even comes with vinyl tape, so you get a neat seam and a snug fit. It measures 1.5 inches x 45 inches x 75 inches.  

This insulation is designed for gas, oil, and electric water heaters, so it is versatile, and while fiberglass is a skin irritant, it is vinyl-backed to avoid you making skin contact. However, we do have to face the fact that fiberglass is not environmentally friendly. 

Also, this product is expensive, costing 3 to 4 times the price of other similar products in the review. 

#7.  JR Global Sales- HOT WATER TANK HEATER INSULATION JACKET DIY ‘PREMIUM’ KIT: ENERGY SAVING REFLECTIVE FOIL


HOT WATER TANK HEATER INSULATION JACKET DIY ‘PREMIUM’ KIT :ENERGY SAVING REFLECTIVE FOIL FITS 40 GALLON/180 LITRES. MANUFACTURER OF THIS KIT FOR 27 YEARS. EXCLUSIVELY SOLD BY ‘JR GLOBAL SALES’ ONLY

  • Patented Reflective Foil Stops 97% of Radiant Heat Loss and helps maintain standby water temperature.Original Manufacturer of this Kit for 27 years.Average Consumer Payback is 6-12 months. Improves the Energy Efficiency of your home.

If you have a smaller water heater, you might be better off choosing this JR Global Sales water heater jacket. It only fits heaters up to 40 gallons. However, you can get them in larger sizes at additional cost.

The stats are impressive: It stops 97 percent of heat loss escaping through the tank walls, saves up to 14 percent in energy consumption, and pays for itself within 6 months.  

This is another insulation roll with a bubble-center and a foil outer skin, so it can be used anywhere around the home. Additionally, you can buy larger kits that fit 60-gallon water tanks. 

It’s class 1 fire rated, and it gives off zero toxins when heated. However, the company states that reflective insulation is not measured in R-values, so we don’t know how it compares to fiberglass products. 

What Is a Water Heater Blanket?

A water heater blanket is an insulation layer that fits around the exterior of your water heater and stops heat loss, which then improves energy efficiency and reduces your costs. 

It also helps to maintain a constant temperature, which again saves energy and money. Additionally, it keeps the water inside the tank hotter for longer. If you think of it as a winter coat, you can see why they are so effective. 

When you put on your coat, it keeps the heat in and wards off the chilly weather. Your hat and gloves do the same. A water heater blanket is just a winter coat for your water tank. 

Do Water Heater Blankets Actually Work?

Water heater blankets  have been proven to reduce heat loss and improve efficiency by up to 14 percent. What’s more, they enhance the efficiency of your water heater 95 percent of the time. 

If you have an older water heater, you might find that the insulation fails to live up to the same standards as newer models. A water heater blanket wraps your heater in a protective layer that seals in the heat to stop energy wastage.

In addition, if you live in a colder climate, a water heater blanket is an ideal way to get your water heater working at maximum efficiency, which means the water stays hotter for longer, reducing the need to switch on the energy. 

Some advanced blankets reduce your overall energy usage by as much as 40 percent. As a long-term solution, they are worth the investment, and within 6 months, you should recoup your purchase costs in efficiency savings. 

The best water heater blankets are just like Thermos flasks. They create a barrier between the heat inside and the cold air outside the tank.   

Do You Need a Water Heater Blanket?

If you care about saving money, energy, and ultimately, the planet, yes, you should get a water heater blanket. But the question was “Do I Need a Water Heater Blanket,” and the truth is no, you do not need a heater blanket. 

However, old heaters are inefficient compared to newer models, so while the most up-to-date water heaters have all the insulating qualities to keep your system working correctly, you may need to invest in additional measures to improve their performance.

Pros and Cons of Water Heater Blankets

As with all things, there are upsides and downsides. What you gain with one hand, you lose with the other. So, what are the advantages and disadvantages?

Costs

When you make your water heater perform better, you use less energy because the heater can function without needing as much runtime. For example, some blankets claim to make 95 percent of all water heaters more efficient. 

Attaining a 14 percent saving on energy usage is a real bonus of owning a water heater blanket. Imagine that 14 percent is the equivalent of 14 cents for every dollar spent on heating your water. 

Plus, the longer you can keep your current water heater working at optimum performance, the longer you go between replacements when the inevitable happens. 

Better for The Environment

Reducing your energy burden minimizes the burden on the planet. Most electricity, oil, and gas production is a dirty industry, using methods that produce pollution. So, the lower your energy consumption, the lower the impact on the ecosystem. 

If you compare the initial costs of a water heater blanket against the reduction in energy usage, the benefits far outweigh the negatives. 

And when you see that you could reduce your standby heat loss (when the heater stores the hot water for usage) by almost 40 percent, that’s putting less strain on your heating elements and the entire system.

Convenience

What could be more convenient than a well-run water heater, working at maximum performance for the longest possible time? If the water heater uses less energy to warm the contents of the tank, it costs less, and retains heat better.

Plus, because the water heats more quickly, you get longer periods before running out. And speaking of convenience, nothing will annoy you more than running out of hot water in the middle of a shower. 

So, now we’ve looked at the advantages of owning a water heater blanket, what are the downsides?

Added Expense

While water heater blankets are not the most expensive items you can buy, they are an extra cost you need to factor in. You should expect to pay somewhere between $25 to $100, depending on the type of materials used and added features like weatherproofing. 

Bad for The Environment

Generally, water heater blankets are not made from eco-friendly materials. Fiberglass is the most commonly used, and because it contains formaldehyde, if it leaches into the environment, it can have damaging effects. 

Discarding fiberglass is tricky because it doesn’t biodegrade in the same way other natural products do, which can have adverse effects on the planet.

Factors to Consider When Purchasing the Best Water Heater Blankets

So, the time has come to choose a new water heater blanket, but what are the main points you should be looking for?

Fiberglass

Fiberglass is the most readily available type of insulation in water heater jackets. It is cheap to produce, has excellent insulating qualities, and lasts for a very long time. 

The disadvantage of fiberglass is that it is extremely hazardous if particles enter the atmosphere or make contact with your skin. It can cause rashes and irritations, and if you breathe it in, it has the same effect on your throat. 

Fiberglass strands can also infect your eyes, causing them to swell and itch. In addition, while there is no fixed proof, it is widely believed that fiberglass contains carcinogens that have been linked to cancer. 

Foil

Foil has a reflective quality that deflects heat, so when your water heater warms up, as the heat tries to escape, your foil blanket keeps it in check. Most foil insulation consists of two aluminum foil layers and an inner core of bubbles.

The great thing about foil is you can use it anywhere inside the house. It insulates attics and crawl spaces, as well as floors, walls, and ceilings. The other advantage of foil is that it doesn’t irritate your skin, and is better for the environment. 

Cotton/Denim

Cotton insulation is constructed from 85 percent post-industrial cotton textiles and 15 percent plastic fibers. Originally, it was produced using virgin cotton, but it was more cost-effective to use off-cuts of denim from the jeans industry. 

While cotton is not fire-retardant, it is soaked in a special solution to make it fire-safe. Cotton insulation is used in several ways within the construction industry, including walls, floors, and water heater tanks.

Foil-Faced Foam

Foil-faced foam is very similar to foil insulation in that it uses reflective insulation to trap heat inside the water heater, just like a Thermos flask keeps your soup warm in the winter. 

It consists of two layers of aluminum foil with a thick layer of polyethylene foam in the middle. And just like foil insulation, you can use this material all over the house. It insulates walls, floors, crawl spaces, and attics. 

Size

Getting the right size water tank blanket is easy. When we talk about size, it refers to the capacity of your water tank. 

Most blankets are sized to fit water tanks between 30 and 60 gallons, but you can get smaller and larger. If you read the label on your blanket, it will state the correct capacity range.

Thickness

The thickness of the insulation directly affects the way the blanket performs. Therefore, you should expect the fiberglass models to have thicker padding and to weigh more than the foil-based products. 

However, if you have a water tank in a tight spot, it might not be possible to wrap a thick layer of insulation because you may not have the correct wall clearance. If that’s the case, you would be better off with foil insulation. 

Insulation Power

We’ve said the thicker the insulation, the better the efficiency of the blanket, but this is not the case when it comes to foil material. Thanks to the reflective qualities of the aluminum foil, it does the same job but without all that extra padding. 

It means that you can use it in tight spots where there is minimal clearance between the wall and the water heater. 

When it comes to measuring heat loss, the industry standard is R-value. The higher the R-rate, the more efficient the insulation. 

R-values can range from 7 or 8 to 20 and 30, but the higher R numbers would be directly related to the thickness of the insulation.

Fire Resistance

Wherever there is an element of heat, there is always the threat of fire. Luckily, fiberglass is extremely fire-retardant, thanks to the high glass content in the mixture. Glass doesn’t contain hydrocarbons or vapors that oxidize to create heat and light.

For this reason, it is an excellent material for insulating your house. When using foil-based insulation, check the fire safety rating. Many are class 1, which is the highest rating you can get, so while they might not have the same retardance as fiberglass, they do resist fire. 

How to Install a Water Heater Blanket

1. Grab The Tape Measure

Measure the distance between the pipes and any other obstacle you need to cut around. Then, using a pair of scissors or a sharp knife, cut out the holes so that they fit snugly around the pipes. Remember that the more accurate the cut, the better the heat retention. 

Make sure the water heater is switched off while you perform this task. Let the water heater cool to make it safer and easier to fit.

2. Keep The Vents Clear

For electric heaters, simply wrap the insulation around the exterior body of the heater. For gas-fired heaters, you need to ensure the flue at the top, and the drain at the bottom are completely clear of insulation. 

Avoid covering these areas because it interrupts the airflow, which could cause a build-up of carbon monoxide. Carbon monoxide is deadly because it is silent and odorless. 

You also need to keep the thermostat free to check the temperature and avoid covering the top of the heater just in case you block any vents.Now finish the seam with vinyl tape to secure the blanket with a neat edge.  

3. Lag The Pipes

You will also need to lag the pipes because just as much heat disappears through this avenue as it does through the water tank. You can buy specialist pipe insulation tubes or just use the existing excess insulation you bought for the tank. 

Use the same vinyl tape to seal the seams and to get a neat finish. 

The Heat Is On

If you have a brand new water heater, you might think an insulating blanket is a waste of money. But for those with older models, keeping your water heater running efficiently is crucial to its performance. 

It keeps the heater working for longer, reduces the burden on the working parts, keeps the water hotter in the off spells, and speeds the water-heating process. It’s all about efficiency and energy savings.

If you can improve these elements, you not only save money, but you help to save the planet in a small way. 

8 Tips To Get Rid Of Mold In Shower Caulk

No one likes to see mold in shower caulk. It is unsightly and makes it look like your shower is unclean. And the bad news is mold thrives in warm and damp environments. So it feels right at home growing on your shower caulk. 

We show you how to get rid of black mold in shower caulk, giving you lots of options ranging from bleach to replacing the caulk entirely. 

Best Shower Cleaners for Mold

Lysol Mold & Mildew Blaster with Bleach


Lysol Mold & Mildew Foamer w. Bleach, Bathroom Cleaner Spray 28 oz

  • Works as both a mold remover and a mildew remover while working hard to whiten surfaces

Lysol Mold and Mildew Blaster is an excellent product for removing black mold spots from your shower caulk. It kills 99 percent of bacteria and viruses, so you can keep your family safe, and it bleaches and whitens to bring your tiles and caulk back to life.

It comes in 5 different scents ranging from ocean-fresh to lavender fields to leave your bathroom smelling fresh and clean, and with repeated use, it can actually prevent new mold growth. 

Puracy Organic Home Care Set

Puracy is a great organic alternative that eats at your black mold, but it is also kind to the environment when you wash it away. 

You can use it on all home surfaces, like kitchen countertops and hardwood floors, plus thanks to the lemongrass scent, it leaves your home smelling fresh. This home care kit is 100 percent safe for kids and pets, so you can use it liberally without fear. 

Complete Mold Killer & Remover DIY Bundle


RMR Brands Complete Mold Killer & Stain Remover Bundle – Mold and Mildew Prevention Kit, Disinfectant Spray, Bathroom Cleaner, Includes 2 – 32 Ounce Bottles

  • TWO FAST-ACTING FORMULAS: The ultimate mold prevention kit, our bundle includes 1 spray bottle of RMR-86 and 1 spray bottle of RMR-141 RTU to kill mold and mildew instantly while lifting difficult stains that are left behind

This mold and stain remover bundle from RMR Brands is fast-acting and includes a mold remover and a disinfectant spray in two separate bottles. 

The RMR-86 solution kills mold instantly and stops it from returning, and the RMR-141 formula is a fungicide and disinfectant, as well as a germicide and virucide. 

ForceField ScumBlaster Bundle


ForceField ScumBlaster: Soap Scum Remover, Tile and Grout Cleaner, Hard Water Stains and Rust, Industrial Strength

  • ✔️ LONG LASTING VALUE BUNDLE SAVES YOUR HARD EARNED $$$ – With ForceField ScumBlaster concentrate you can make 5 Ready to Use spray bottles that last longer than the expensive big brand-named cleaners! You’ll need it too, because once you start cleaning with ScumBlaster, you won’t want to put it down! It’s that easy!

This ForceField product is industrial-strength cleaning at its best. It blasts away soap scum, limescale, mold, and mildew from your tiles and tub, plus the concentrate makes up enough solution for 5 spray bottles.

Like the organic option, this is completely safe for your pets and kids and is kind to the environment.  

What Causes Black Mold?

Mold thrives in hot, humid, and damp conditions. It also loves spaces with low light because sunlight dries the surface, removing the food that mold needs to grow. Every time you shower, moisture enters the atmosphere and circulates. 

Mold is highly resilient and can survive in extreme conditions, so getting rid of it once it has found a home is tricky. It also has a habit of swiftly returning once you think you have eliminated the problem. 

Mold loves cellulose above all other food sources, although it also likes other organic matter. Wood, drywall, grout, and caulk are all common feeding grounds for black mold. Caulk helps to repel water, so it sits on the surface and leaves a feast for mold. 

Also, if you leave the bathroom with dampness in the air, mold will start forming in a few weeks. Plus, wet towels and clothes help trap humidity and moisture, while leaks and humidifiers play their part in allowing it to grow. 

Health Effects of Black Mold

Mold isn’t just unsightly; it is also unhealthy. All those tiny spores circulate in the atmosphere, and when you inhale them, they can cause all sorts of conditions. 

People with asthma and other lung conditions are particularly susceptible to mold, irritating their breathing and causing attacks. 

Those suffering from a weak immune system can often have flare-ups, skin rashes, itchy eyes, and even yeast infections with exposure to mold. You should try to get rid of mold for health reasons alone. 

How to Get Rid of Black Mold In Shower Caulk (8 Tips)

Tools and Protective Gear

Before we get to the nitty-gritty of how to remove black mold from your shower caulk, you are going to need some tools and protective gear. 

First, you will need a face mask because scrubbing at the mold releases spores, and the last thing you want is to breathe them in. 

The second thing you might consider is protective gloves. Nothing smarts more than splashing your skin with a caustic chemical solution. 

You’ll also need a scrubbing brush, and for small regions, a toothbrush is an excellent tool, especially the hard-to-reach places where mold likes to hide. 

The next tool is a microfiber cloth. After you have rinsed down the caulk, it needs to be dried thoroughly, and microfiber cloths are superb at this task. Also, keep a dry towel handy. It’s always worth getting a sponge too.

A spray bottle should be the next thing on your shopping list. It makes the cleaning fluid easier to apply to vertical surfaces. 

And don’t forget a funnel to help you pour the cleaner. You should also invest in a mixing cup and a stirrer. When you create the formulas, they need to be mixed before pouring into the sprayer.

And finally, if you opt to remove the caulk, you will need a fresh tube of sealant and a sealant gun. 

Spray Ammonia

You should avoid breathing in ammonia because it damages your lungs, so don your face mask and gloves. Secondly, open the doors and windows to help the fresh air circulate.  

Given that shower rooms are often the smallest room in the house, getting good airflow could be an issue. 

Mix one part of ammonia to one part of water and pour it into a spray bottle using the funnel. Spray an even coating of the ammonia onto the shower caulk, focusing on the corners and hidden spaces. Leave it to settle for 10 minutes while you get some fresh air. 

Scrub the caulk with a brush or cloth, and the mold should lift out. Use the toothbrush for smaller areas that need more attention. Now dry the caulk with a microfiber cloth.  

Bleach

You should treat using bleach in the same way as ammonia, so caution is the watchword. You will need gloves and a face mask. Never mix bleach with ammonia because it causes a chemical reaction that releases toxic fumes. 

There are three ways you can apply bleach: 

Sponge

This works better for applying bleach to smaller areas.  Soak the sponge in the solution and then press it on the black mold. 

Spray Bottle

The spray bottle is an easier way of coating a larger area in bleach. Pour some of the bleach into the spray bottle and apply to the surface of the caulk. Wait for 20 minutes, and then rinse it off using water. 

Cotton Coils

If the mold still persists, you may need to soak cotton coils in the bleach and place them onto the surface of the caulk. 

Try and line them up side by side and use a pen or pencil to push them into grooves and recesses. Leave them to soak overnight and remove them the next day. Scrub at the caulk with the sponge to remove any lasting residue of black mold. 

Hydrogen Peroxide

Hydrogen peroxide is a great way to remove mold. You should aim for a solution with a 3 percent concentration. Pour it into the spray bottle and apply it evenly onto the caulk. Allow it to sit for 10 minutes and then wipe it away with a sponge or cloth. 

Vinegar

White vinegar works best because it doesn’t leave any discoloration. White vinegar not only removes the mold, but it also kills it as well. You can apply it undiluted, but mixing it with water reduces the smell if it’s too strong. 

You can also mix the vinegar with baking soda for even more impact on the bacteria. If you have natural stone near your shower, you should avoid splashing it with vinegar as it can damage it. 

Mix equal parts of vinegar to water and pour it into a spray bottle. Then apply a liberal coating to the caulk in your shower. Wipe it away after 10 minutes with a microfiber cloth. 

Baking Soda

Baking soda is often referred to as sodium bicarbonate because it contains high levels of natural sodium (salt) in the crystals. You can apply it in two ways. 

Solution

Mix a quarter of a tablespoon of baking soda with water in your spray bottle and shake it thoroughly until all the crystals have dissolved. 

Spray the solution on your caulk and scrub at it with the brush. Then rinse off the cleaner and reapply another coat of the baking soda solution, but this time let it sit and dry. Adding the final layer gives the sealant protection against mold returning. 

Paste

If you have more stubborn mold stains, try mixing a small amount of water with the baking soda crystals until it forms a thick paste. Spread the paste over the caulk and leave it to react for 20 to 30 minutes. 

Grab the brush and scrub hard at the mold until it starts to lift. Then rinse off the paste with water. You can add vinegar to the baking soda for even stronger cleansing action.

Borax

Borax shares many attributes of baking soda, except they are entirely different in the way they work. Borax is a natural ingredient, so it is kind to the planet. 

It works by converting water molecules into hydrogen peroxide, which then lifts the mold from the surface of the sealant. You can apply it as a solution or as a paste, just like baking soda. 

Mix a little water with the Borax until it forms a thick paste. Rub it over the caulk and leave it for 20 to 30 minutes. Then rinse it off with water. 

Replace Caulk

If you have tried some or all of the methods listed above and the mold still remains, it might be better to replace the caulk. Removing it is easy enough. Just run a sharp box knife along one edge of the sealant and repeat the process along the other edge. 

You can apply a caulk removing gel for 20 minutes to soften the caulk if you want to make your life a bit easier. 

Then pull the caulk free from the gap in a string-like way. You will need to get all of the caulk out, including the last remnants that stick to the edges. Use the knife to scrape it away.

When you apply the new sealant, check it is suitable for the bathroom. It will tell you on the label. Bathroom caulks are impregnated with antibacterial solutions that inhibit mold and mildew growth. 

You will need a caulk gun to deploy the sealant. All you need to do is pull the trigger, and a plunger pushes the base of the caulk canister, squeezing a thin line out of the end of the conical tip. 

Drag the caulk behind you as you work along the gap. When you get to the end, press the clip on the gun, and the spring releases the pressure to stop the caulk from flowing. 

Wet your finger and run it along the line of sealant, smoothing it into the gap, ensuring that there are no holes and the caulk has sealed on both sides. Allow it to dry for a few hours. 

EC3 Mold Solution Spray

EC3 Mold Solution is a natural compound consisting of citrus seed extract, plant oils, and distilled water. It works on almost every surface, including fabrics, tiles, wood, concrete, and even soft furnishings. 

Spray an even coating over your sealant and leave it to stand for 10 minutes. Then rinse it off with water and dry thoroughly. Now reapply a new layer to the caulk and leave it to dry naturally. 

You can spray this solution as many times as you like for preventative measures. 

Ideas for Preventing Mold from Forming

Prevention is better than the cure. How many times have you heard that? But it’s true. Stopping the mold from forming in the first place is preferential to battling to remove it. Here are some tips:

Vented bathroom fan

Keeping the bathroom ventilated is the best solution to preventing mold growth. Circulating dry air and removing the damp air keeps surfaces dry and mold-free. You should also open any windows to let the bathroom dry out. 

Remove wet towels

Hanging wet towels in your bathroom is an open invitation for mold to move in. The dampness in the material harbors spores that can form black mold. Plus, a damp towel is going to increase the moisture content of the room. 

And anything the towel touches becomes damp, creating more chances of mold spores.

Dry the shower stall

The simplest and most effective way to prevent mold is to dry the shower stall after use. Wiping the water away kills the main food source for the mold to grow. 

Just don’t then hang the towel in the bathroom to dry because you have created the conditions where mold thrives in the wet towel. 

Clean shower walls weekly

Mixing up a solution of white vinegar and water in a spray bottle and applying it every week will also reduce the chances of mold growth. 

You could even spray it every day. If you don’t like the smell of vinegar, try adding in a few drops of essential oils, like tea tree oil, to improve the fragrance. 

Measure humidity

You can measure the humidity in the room using a digital thermometer that has a humidity feature. The ideal balance should be 30 to 50 percent. Anything lower and the air is too dry and above 50 percent, and the atmosphere is perfect for mold growth. 

The best way to moderate humidity is to buy a dehumidifier. It monitors the moisture in the air and kicks in when the level gets too high. 

Mold-Resistant Caulk

Silicone is the best type of sealant to use because the solution is mold and mildew resistant. Look for the label that tells you it is suitable for use in kitchens and bathrooms. These are the spaces with the highest moisture content. 

There are thousands of mold-resistant caulks on the market, so you shouldn’t be stuck for choice. 

Conclusion

As you have probably gathered by now, moisture is not your friend. Humidity is not your friend, and neither are heat or low-light areas. Beating black mold is a continuous battle that needs dedication if you want to win the war. 

Just remember that the dryer your caulk, the less mold growth you will see. Beating mold is not complicated, but it is relentless. Good luck, and here’s to keeping your caulk in tip-top condition. 

10 Best Shower Extension Arms (Guide & Reviews)

Increasing the reach of your shower is easy with a shower extension arm. They come in all shapes and sizes, and they are easy to install, with many not requiring any tools at all. It means you can increase the reach of the showerhead and even install a rainfall attachment. 

It also means that you can adjust the showerhead to improve the shower experience for tall and short people.

We look at 10 of the best shower extension arms to determine which is the best and why you should buy one. 

10 Best Shower Extension Arms

#1. Hotel Spa 11″ Adjustable Shower Extension Arm with Lock Joints

This Hotel Spa shower extension arm has lockable joints, so you can lock it in place once you find the correct position. 

It has a 2-foot vertical movement range, and you don’t need any tools to perform the installation. It connects in minutes to a standard water outlet, and you don’t even need Teflon tape. It comes with a large rubber washer to seal the connection. 

The arm is made from solid brass, so it is robust and water-resistant. You also get a 10-year warranty against manufacturer defects, so peace of mind is never far away. It’s also a great price, so it certainly ticks a lot of boxes. 

However, some reviews online complain about the design, that it sits crooked in their shower units, and you can only adjust it from side to side rather than left and right.

#2. Adjustable Shower Arm Extension by WaterPoint 

Sale


Adjustable Shower Arm Extension by WaterPoint, Brass Shower Head Extension Arm with High Polished Chrome Finish 11+ Inch

  • TURN ANY SHOWER INTO YOUR SHOWER with the adjustable solid brass flexible shower arm extender with height, distance and angle. Add a rain shower head for the luxurious spa look and feel or adjust the height to meet your specific needs with any standard shower head.

This Waterpoint extension arm is made from brass, and it has a chrome finish to protect it against water damage. 

The arm extends the reach a full 11 inches, which means you can fit a large rainfall showerhead for that luxurious feeling. The kit comes with sealant tape and all the instructions you need to install it successfully.

It has a free-spinning collar lock, which allows for maximum tightness while keeping the extension arm level. Price-wise, this model is a little more expensive than the previous one, but not to the point where it will break the bank. 

However, the company is so confident with their product, they offer it with a limited lifetime warranty, so you can buy with the peace of mind of knowing any manufacturer faults will be rectified. 

 #3. Coeur Designs Extra Long Shower Extension Arm With a Unique Locking Gear


Coeur Designs 16-Inch Extra Long Shower Extension Arm. Solid Brass. Height/Angle Adjustable With a Unique Locking Gear for a Perfect Position Every time. Holds All Showerhead Sizes!!

  • ????NO MORE DUCKING TO GET WET. Stop Putting Up with a Fixed Shower Head Position That was Installed Too Low or Too High. Solve the Problem by Attaching This Universal ½” NPT Extra Long 16-Inch Brass Extender Arm Today. No Matter if you are 6’4″ or 4’6″ This Solid Brass Adjustable Shower Head Adapter Adjusts to Your Desired Shower Height for a Perfectly Relaxing, Enjoyable and Safe Showering Experience!

If you are looking for an extension arm with maximum reach, this Coeur could be the one. It has a 16-inch extension arm with an improved wingnut design that holds the arm tightly but allows the user the freedom to adjust it up to 14 inches without reducing water flow. 

The NPT universal connector means this extension arm will fit almost every shape and model of shower, and because all the components are made from chrome-coated brass, you can expect it to stay looking great and last the distance. 

While this has a slightly longer reach, we are now stepping up the price ladder. This one is double the cost of the first model to feature in the review. 

#4. Razor 15-Inch Arch Design Shower Extension Arm 


Razor 15-inch Arch Design Adjustable Shower Extension Arm With Stainless Steel Profile

  • Longest extension arm on the market for superior rainfall shower and extra mobility, Patent Pending Stainless Steel Design with self-locking joint for extra heavy weight capacity

This Razor extension arm is 15 inches in length. It has a Patent Pending stainless steel design with a self-locking joint for increased weight capacity. 

The arched extension arm provides up to 3 feet of movement, and the chrome-plated end caps give protection against water damage. You also get large wing nuts that are easy to tighten and provide stability to the design. 

If you are limited in your plumbing skills, this extension arm is the one for you. You can install it in minutes and all without the use of tools. You also get a limited 10-year warranty against the manufacturer’s defects. 

There are no plastic elements in the design, with all the extension arms being stainless steel or solid brass. It also scores pretty well for the price, coming in at half the cost of the Coeur model.

#5. Shower Extension Arm, Aisoso Adjustable Height and Angle Shower Head Extension Arm


Shower Extension Arm, Aisoso Adjustable Height and Angle Shower Head Extension Arm, Premium Solid Brass Anti-leak, 11 Inch Universal Connection Chrome Finish

  • Sturdy Construction: Solid heavy-gauge brass with strong bearing capacity to support heavier rain shower head. High polished chrome finish, nice and stylish, perfect for your bathroom

Everything about this extension arm screams quality, and yet the price is so competitive. It has solid brass pipes and joints with easy-to-lock brass wing nuts. It means this 11-inch arm can take more weight compared to other models that employ plastic elements.

This model has 0.5-inch IPS male and female threads that fit all standard showers and pipes. While the construction is heavy-duty brass, the whole thing is chromed to protect it against wear and tear. 

The span of this arm is 11.8 inches, and you can fit it in double-quick time without any hassle. You also get a limited 10-year warranty against defects. 

#6. SparkPod Adjustable Shower Arm Extension


SparkPod 11” Solid Brass Adjustable Shower Arm Extension with Universal Connection to all Shower Heads. Easy to Install, Anti-Leakage with Highly Polished Chrome Finish

  • Great for rain shower heads – Has a rotating elbow which facilitates the positioning of an elevated shower head horizontally overhead to achieve maximum shower coverage

This SparPod extension arm has an adjustable height and angle, so no matter what the height of your family member’s, it can cope. 

Installation is simple: twist it on and tighten. It only takes a matter of minutes, and you don’t need any tools. It comes with the standard 0.5-inch threads, so it is universal, and it has an overall reach of 12 inches. 

The durable metal construction and the chrome-plated exterior mean this shower extension arm will repel water and help to minimize the growth of mold and mildew. 

You get 6 color choices with this model, ranging from antique brass to oil-rubbed bronze. None of the others featured in the review offer such a wide variety.

#7. Delta Faucet 10-inch Adjustable Extension Shower Arm


Delta Faucet 10-inch Adjustable Extension Shower Arm for Shower Heads, Chrome UA902-PK

  • Extend your shower head: Customize your shower experience with this adjustable shower extension arm that extends up to 18 inches

How about a lifetime limited warranty, for starters. Delta is so confident in its product they guarantee it against manufacturer defects for life. 

This 10-inch model enables the user to extend the reach of their showerhead by a maximum of 18 inches. It’s made of durable brass, which ensures you will get years of reliability.

You can adjust the height of the arm at the pivoting joint, and then angle the showerhead to deliver the best possible experience. 

This model installs in minutes and is compatible with most showers, thanks to its 0.5-inch male and female IPS attachments. This shower extension arm is priced on the high side, but not so much that it might put you off.   

#8. Shower Head Extender Arm with Flange, “S” Shaped Shower Head Riser Extension Arm

Sale


Shower Head Extension Arm with Flange,”S” Shaped Shower Head Riser Extension Arm, 10 inch Chrome Shower Pipe Extension

  • High Rise – The shower head riser extension arm raises your shower head 10 inches higher. This product is designed ideally for tall individuals to completely change shower experience with its S shaped shower arm which will create a good space and comfortable spot within your shower area. Great solution if you having low pipe connections.

Now we come to our first S-shaped extension arm. These are also commonly known as gooseneck extensions. It offers a different styling to enhance the look of your shower. 

This model raises the height of your showerhead by 10 inches, making it ideal for taller people. It also gives you greater clearance to fit a rainwater showerhead without the need to attach it to the ceiling. 

The connectors are standard American IPS 0.5 inches, so it is compatible with any shower, and it is chrome-plated to give it that high-shine look. You even get a chrome flange to add that finishing touch of neatness. 

#9. Purelux Shower Extension Extra Long Stainless Steel Shower Arm


Purelux Shower Extension Extra Long Stainless Steel Shower Arm Water Outlet PJ1602 with Flange, Brushed Nickel 16 Inches

  • Made from high quality stainless steel, Brushed Nickel finish is easy for clean and will last for long time.

This Purelux is a right-angle design, so the extension arm protrudes straight out of the wall, with a right angle at the end to attach a rainfall showerhead. 

This model is stainless steel and finished in brushed nickel for that stylish look. It also makes it easier to clean. The straight section of the arm extends by 16 inches, and the right-angle part drops down by 3 inches. 

The extension kit includes a flange and plumbers tape for easy installation. Again, price-wise, we are creeping up the scale, but it isn’t so expensive that you would discount it. 

This is a modern and stylish extension arm that would complement any hotel-chic bathroom decor.

#10. Aqua Elegante Adjustable Shower Head Extension Arm


Adjustable Shower Head Extension Arm – 10 Inch Brass Shower Arm Extender Hardware – Oil-Rubbed Bronze

  • ???? UNLIKE OTHER SHOWER ARMS THAT need bungee cords to keep them in place, our adjustable shower arm SCREWS IN TIGHT and stays how you set it. The DURABLE SWIVEL JOINTS can support up to 3 pounds and come with safe, easy-to-tighten handle grips. The SOLID BRASS construction RESISTS CORROSION and withstands high pressure, heat, salt, acids, minerals, and grit.

This Aqua Elegante lives up to its name. It is super-modern and would fit right in with your sleek bathroom styling. It extends the showerhead by 10 inches, and it not only pivots at the base, but you can also adjust the showerhead angle too. 

It’s constructed from solid metal with durable crack and leak-free joints, and the jointed pivot can support 3 pounds in weight. 

This model is finished in oil-rubbed bronze, and it has universal 0.5-inch threads, so it will fit any shower. 

It can withstand heat, salt, grit, and sand, making it the ideal shower extension arm for outdoor use, like the poolside or in the garden. It’s also rustproof, so it won’t corrode no matter where you install it. 

You can install this shower extension arm in no time at all, and you don’t need any tools. The company boasts that you get a 5-year warranty, but given that every other product we have featured can better this with a minimum of 10 years, it didn’t seem that impressive. 

What is a Shower Extension Arm?

A shower extension arm is an extended pipe that attaches to your existing shower plumbing to increase the reach and angle of your shower head. It should be relatively inexpensive to buy and easy to fit. 

In most cases, they require no tools at all. They have adjustable joints that enable you to lower or lift the showerhead and adjust the angle for the best shower experience. 

Benefits of Adding a Shower Extension Arm

Some people are taller, some shorter, so having a fixed shower height can be frustrating. Nobody wants to stoop to get their head wet, while at the other end of the spectrum, being too small has its challenges.

The advantage of a shower extension arm is it is adjustable. In most cases, you get 2 to 3 feet of height movement, and you can also change the angle of the showerhead. 

It also allows you to fit larger showerheads like rainfall varieties to increase the luxury of your shower experience.  

Considerations for Buying the Best Shower Extension Arm

Cost

While the costs of shower extension arms are relatively affordable, they do vary immensely between different products. In the main, you should expect to pay somewhere between $15 and $30. 

If you feel like splashing the cash, some high-end extension arms will cost $100 or more, but that depends on your decorative tastes.  

Measurements

Extension arms generally come in 8, 10, 12, and 16-inch lengths. The longer the reach, the more you pay. 

The most common length is somewhere between 10 and 12 inches, but for those looking to fit substantial rainfall showerheads, you need the increased clearance from the shower wall.

If you create a shower extension that’s too long, it will strain under the weight and eventually pull away from the wall. However, you can buy one model that extends to 18 inches. 

Material

Most shower extension arms are made from solid brass with a chrome-plated exterior. Brass is a hard-wearing material that stands up well to the rigors of a wet environment, and the chrome helps prevent discoloration and staining. 

Another material commonly used is stainless steel. It is water-resistant, keeps its shine, and withstands rust. 

You might get some plastic and rubber elements in less expensive shower extension arms but look for all-metal construction if you want it to last the distance.  

Durability

Because your extension arm is constructed from either stainless steel or solid brass, it is durable and can withstand whatever you can throw at it. If you can get a model with metal joints, solid brass wing nuts, or stainless steel pipes, it will last the distance.  

Universal Connections

NPT connections are the most commonly available. They typically come in 0.5-inch size, which is a universal size fitting across America. NPT stands for National Pipe Thread/ Tapered Standard and is the accepted US national technical standard for screw threads. 

If you are looking to buy an extension arm and you don’t see these fittings, check with the retailer before committing to a purchase. It could be a non-standard attachment, which might lead to increased costs and greater complications to get it to fit. 

You may also notice the letters IPS (Iron Pipe Straight), which is also a nationally accepted generic name for straight pipe thread. 

The 0.5-inch measurement refers to the internal diameter of the bore rather than the outside edge of the fitting. 

Style (Shape and Finish)

Shower extension arms are available in a variety of shapes and designs. There are three popular designs to choose from:

Standard

This style is the most popular. It includes a small extension arm with the showerhead set at an angle. 

Straight

Straight shower arms are modern in design and suit rainfall showerheads because they are completely straight with a 90-degree angle for the head attachment. 

Gooseneck or S-Shaped

As the name suggests, the gooseneck shower extension arm mimics the shape of a swan or gooseneck. It has a straight part that attaches to the wall and a large curved section to give you the extra height for the showerhead. 

How to Install a Shower Extension Arm

Step 1: Remove The Showerhead

Turn off the shower. Remove the existing showerhead from the socket along with the old Teflon tape. Wrap the extension tube with Teflon tape around the threads so that you get a watertight seal.

Step 2: Insert The New Extension Tube

Now slot the extension arm into the threaded socket and tighten using either your hand or pliers. If you are using pliers, cover the extension tube with a rag to prevent it from getting scratched. 

Step 3: Fix The Showerhead

Grab the showerhead and wrap the threaded end with Teflon tape. Insert it into the exposed end of the extension tube and twist it until it is locked in place. 

Again, if you are using pliers, cover the showerhead with a rag to prevent scratching. Now you can set the showerhead at the desired angle.

Best Shower Extension Arm FAQ

Can I extend the shower arm?

To extend the shower arm, you will need to replace the entire portion with an extension arm. It moves the showerhead away from the wall, enabling you to get more clearance for a rainfall attachment, and it is better for those with mobility issues. 

It allows you to lift and lower the showerhead and gives you a greater choice of angles. 

What is the longest shower extension arm?

The Vida Algeria is the longest extension arm, at 18 inches. The standard size is between 12 and 16 inches. 

How long should the shower arm be?

It depends on your particular circumstances. The showerhead should always be about 10 or 12 inches above head height, so depending on how tall you are, you might need a 10, 12, or 16-inch extension arm. 

How do I choose a shower arm?

The first thing you should decide on is the length of the extension arm. If you have a tall family, you might need the 12 or 16-inch options, and at the other end of the spectrum, 8 inches might be acceptable. 

The second thing to think about is the design. Does it match your bathroom tastes? If you have a modern bathroom, a straight or gooseneck model will fit right in. 

The material is another factor. Solid brass or stainless steel are the two most popular metals because they are durable and less prone to corrosion. 

Typically, they are chrome-plated to give the extension arm a more aesthetically pleasing look. Plus, it helps to preserve the metal underneath. 

You might want to fit an extension arm with a different color. Some manufacturers offer alternatives to chrome. You can get brushed nickel and even oil-rubbed bronze.

Conclusion

Whichever shower extension arm you choose, try and get one that is easy to install, has a minimum of 10 years warranty, and is affordable. The length, material, and style are all subject to your opinion, but nobody wants to make their life more complicated. 

A shower extension arm is a smart investment. It gives better positioning for the tallest and smallest people in your household, and it even helps enhance the shower experience for people with mobility issues.

10 Best Toto Toilets (Guide & Reviews)

Toto has been in the toilet business since 1917. This Japanese company is among the biggest toilet brands in the world. It has been at the forefront of innovation and technological advancement for generations. 

With so many toilet designs to choose from, how do you decide which is the best one for you? We look at 10 Toto toilets and judge them on price, features, and innovations to help you make your choice. 

The 10 Best Toto Toilets

#1. Toto UltraMax II One-Piece Elongated Universal Height Toilet with CEFIONTECT

This elongated CEFIONTECT toilet is more universally comfortable for children, older people, and men who like to sit to pee. It has a universal height seat, which conforms to the Americans with Disabilities Act (ADA), making it easier to stand and sit.

This model is a one-piece, so it should be simpler to plumb in because the tank and bowl are attached. It also means this toilet is better for smaller bathrooms and en-suites. 

It conforms to the Environment Protection Agency’s WaterSense initiative because it only uses 1.28 gallons per flush. When you compare that to older toilets from the 70s and 80s, you get a water-saving of 3 or 4 gallons per flush. 

WaterSense toilets are good for the environment and your wallet. This toilet has a unique CEFIONTECT coating that stops solid matter from adhering to the inside bowl. This prevents dirt build-up, which reduces clogging. 

The only downside with this toilet is you only get one flush level. Other makes and models allow you to choose between a high and low setting. On the plus side, it does come with a soft-close toilet seat.

You also get a double cyclone flushing system that creates a centrifugal force to wash the rim and the bowl. 

This Toto is not a budget toilet option. You can get other makes much cheaper, but Toto are world leaders in toilet technology, so if you want the best, you have to pay for it.  

#2. TOTO Entrada Two-Piece Round Universal Height Toilet

TOTO CST243EF#01 Entrada Two-Piece Round 1.28 GPF Universal Height Toilet, Cotton White

  • Clean, modern two-piece round bowl and tank set | Toilet seat is not included

So, the first thing that hits you when you compare this Entrada to the UltraMax II is the price difference. This Entrada is at the budget end of the spectrum. 

The second difference is this is a two-piece toilet, so you will need a little bit of knowledge attaching the water tank to the bowl. 

It also prolongs the job of fitting it and increases the chances of leaks. But for the money savings, all that extra work might just be worth it. 

The bowl is round, so it might suit some people more than others, and you also get a comfort height seat, so the elderly or those with mobility issues will find it more comfortable to use. 

It has an E-max siphon jet flushing system with a 3-inch flush valve to create a powerful action while still only using 1.28 gallons of water. It means it is WaterSense certified, good for the planet, and good for your bank balance. 

The other thing you need to be aware of is you have to purchase the wax seal and mounting bolts separately, which increases your costs. However, given that the purchase price is so competitive, you might overlook this fact. 

This Entrada is a great entry-level toilet if you are on the hunt for quality and value. 

#3.  Drake Round 2 Piece Toilet with E-Max Flush System Toilet

This Drake sits about mid-way on the price scale, so it is a great choice for those looking for value for money. 

It has the same E-max siphon flushing system as the Entrada, so you get the 3-inch wide flush valve that drives the powerful water jet under the rim and around the bowl. That’s 125 percent bigger than the standard 2-inch valve. 

It also benefits from the CEFIONTECT lubricant glaze to aid your solid matter to slide away, and it reduces debris build-up to help keep the toilet clean. 

This is a two-piece, so it is a little trickier to plumb in because you have to join the tank to the bowl with a seal. It is less frugal with water, using 1.6 gallons per flush, and you only get a single flush option. 

Also, the seat is not ADA-approved comfort height, so elderly relatives might struggle to stand and sit.

#4. TOTO Eco Drake Two-Piece Elongated ADA Compliant Toilet

This Drake toilet is an elongated version with a comfort height seat, which complies with the ADA regulations. Because it’s a Drake, you get the same E-max flushing system, although this one uses 1.28 gallons per flush. 

This model is WaterSense approved, benefits from the CEFIONTECT glaze that lets solid matter slide away easily, reducing clogging and debris build-up. 

The elongated bowl helps make the toilet more comfortable for almost everyone, including elderly relatives and children. Plus, when men sit to pee, they have more wriggle room to aim straight, reducing splashes and stains.

It comes with the standard 12-inch rough-ins and a chrome left-handed flush lever. On the downside, again, we lack the dual flush option, and you only get a 1-year warranty against manufacturer defects. 

Plus, the toilet seat is separate, so you will need to factor in the extra cost when budgeting for the new toilet, but it does give you the option of upgrading to a bidet-style seat. 

#5. TOTO Entrada Two-Piece Elongated Universal Height Toilet

The Entrada elongated model shares all the same attributes as the round model. It has a universal height seat, so it caters to the widest possible audience of people for comfort and ease of use, and it has the same CEFIONTECT coating to keep it clean.

The E-max flushing system utilizes 1.28 gallons of water, earning it WaterSense accreditation, which helps the environment and your water usage. That’s a 20 percent water saving compared to the 1.6-gallon Drake model. 

It comes with the same 12-inch rough-ins, and there’s also the price to consider. This toilet is at the budget end of the scale, so not only will it look good, it will save you precious dollars when you buy it. 

It costs about a quarter of the price of the UltraMax II, but you do still have to pay for the toilet seat separately, which is an inconvenience. 

#6. TOTO Eco Ultramax One-Piece Elongated ADA Compliant Toilet with CEFIONTECT

The first thing you notice about this one-piece UltraMax is the styling. It is sleek with clean lines and curves. It should crown any bathroom space. This model is the elongated version, so it is more universally comfortable. 

One-piece toilets are easier to maintain, easier to install, and generally take up less room. They are less prone to leakage because you don’t have a seal connecting the water tank to the bowl. 

You also tend to find that two-piece toilets are more traditional in the way they are styled, unlike this UltraMax. 

It has the same E-max system that utilizes a 3-inch flush valve to get the most out of the meager 1.28 gallons of water it uses. It also has the famous CEFIONTECT glaze to aid in removing solid matter without any adherence to the bowl. 

So, it’s ADA compliant, and WaterSense certified. What’s not to love? Well, there’s the price for one thing. It costs almost three times to amount of the Entrada, so it is unlikely to be on the shopping list of those working to a tight budget. 

However, you do get a soft-close toilet seat in for the bargain, so you can wave goodbye to slamming lids in the middle of the night. 

#7. TOTO Drake 2-Piece Toilet with Elongated Bowl and Sanagloss

This Drake toilet has an elongated bowl, so it is more comfortable for disabled people, the elderly, and those with mobility issues. 

It conforms to the Americans with Disabilities Act (ADA), thanks to the 16.5-inch seat rim. When you add in the thickness of the seat, which is sold separately, it takes the height to about 17.5 inches, which is well within the accepted range. 

This toilet is a little more greedy when it comes to water use. The single flush uses 1.6 gallons of water. It doesn’t sound like a big difference, but when you compare it to a toilet using 1.28 gallons per flush, that’s a 20 percent saving. 

The upside is that the extra water you use gets put to good use with the siphon flush valve that shoots a powerful jet of water under the rim and across the bowl. 

And the flush valve is 125 percent larger than standard 2-inch valves, at 3 inches. When you add in the CEFIONTECT coating, it stays cleaner for longer. 

As with all two-piece toilets, they are harder to install because you have to seal the water tank to the bowl, which is more of a challenge and creates a weak spot for leaks that one-piece versions don’t have. 

#8.  Drake Two-Piece Elongated Dual Flush DYNAMAX TORNADO FLUSH Toilet

This is our first dual flush toilet to feature in the review. The larger of the two settings uses 1.28 gallons of water to wash away solid matter, and the lighter option uses just 0.8 gallons, making it ideal for liquid waste. 

The beauty of having a dual flush is you can choose how much water you want to use. If you are worried about the flush being too weak, don’t panic. You get Dynamax Tornado flushing action, which ensures the water reaches 100 percent of the toilet bowl.

If you couple the dual flush action with the CEFIONTECT glazing, you can see why such a meager amount of flush can still be effective. The stats speak for themselves:

Toto has slightly shortened the elongated design, trimming about an inch from the length. That is a space-saving measure, but it should still feel as comfortable to sit on for the vast majority of people. 

This Dake two-piece has a more modern styling compared to other two-piece toilets, so it should fit in with a sleek and minimalist look. The pricing is competitive, although you do have to purchase the seat separately, which adds to the cost.

#9. TOTO Eco Ultramax Elongated One Piece Toilet

This is the Toto Eco UltraMax, so it should be great for the environment, but the first thing you notice is this model is as eco as the other UltraMAx models. 

It uses 1.28 gallons per flush, which is still a massive saving compared to the Drake 1.6-gallon model. Still, it feels disingenuous to label something “eco” without a significant difference to the other UltraMax models. 

You do get a siphon jet flushing system to put the 1.28 gallons to the best use, and the lubricant CEFIONTECT coating aids the solids to flush away without any fuss. 

The elongated shape makes it easier for people to use, and the ADA comfort-height seat is ideal for elderly and mobility-challenged people to sit and stand.

You get a soft-close toilet seat, so getting woken in the middle of the night when the seat slams is a thing of the past. 

We are creeping up the price scale with this toilet, so it might be beyond the reach of some budget-conscious people, although being a one-piece, it is easier to install. 

#10.  TOTO AQUIA IV 2PC Connect+

TOTO AQUIA IV 2PC Connect+ W/ SS124 1.28GPF Cotton

  • Toto MS446124CEMG#01 AQUIA IV 2PC CONNECT+ W/ SS124 1.28GPF COTTON

Now we are back in the dual-flush territory with this Aquia IV toilet. It uses 1.28 gallons on the higher flush setting and just 0.8 gallons on the light flush. That’s a massive 40 percent saving compared to the 1.6-gallon Drake model. 

This model is eco-friendly, with WaterSense certification, and you can buy this toilet in standard and universal height to conform with the ADA regulations. 

For a two-piece toilet, this one is super-sleek, which bucks the traditional styling trend of other two-piece toilets. Just remember, it is more challenging to install a two-piece toilet because you need to attach the tank to the bowl.

We’ve talked a lot about the CEFIONTECT glazing, but the ion barrier keeps the surface lubricated, so the solid matter slides away without adhering to the surface. We need to talk about the price. This one is twice the amount of the budget models. 

What Is a Toto Toilet?

Toto is among the world’s best manufacturers of low, mid, and high-priced toilets. They are a Japanese company that started making toilets as far back as 1917. 

The company is famous for innovation and advancements in technology. They developed the SanaGloss lubricating glaze, which changed to CEFIONTECT in 2015. The coating keeps the toilet bowl slick to allow the waste matter to flush away.

They were also instrumental in revolutionizing how the flush system works, introducing the Tornado siphon jet to increase the power of the flush while allowing less water usege. 

Which is the best Toto toilet?

Deciding which is the best Toto toilet comes down to so many factors. Is it price, size, one-piece vs. a two-piece or bowl shape and height?

If you work based of price, you would most likely say that the Entrada or Drake models are the best because they cost a fraction of the price of the UltraMax versions. 

Some prefer one-piece toilets. They are easier to install and have fewer defects because they are molded from one piece of China. 

Two-piece toilets are often more traditional in their style. That suits some people’s more conservative tastes. Two-piece toilets are typically cheaper to buy and slightly more complicated to install. 

The height and shape of the bowl and seat make a considerable difference to the user. Elongated toilets are more universally comfortable, and comfort height toilet seats make it easier for those with mobility issues to sit and stand. 

What is so special about Toto toilets?

Toto toilets are universally respected for their quality, styling, and innovations. Without Toto, you wouldn’t have CEFIONTECT coatings to make flushing and cleaning easier. 

You also wouldn’t have Tornado siphon flushing, which gets every last drop of water to work to the max to flush away your solid waste. 

Toto cleverly straddles the price range, with budget-friendly models at one end and premium models at the other, with their mid-priced range among the best money can buy. 

Considerations for Buying the Best Toto Toilet

So, we need to focus on what factors make a toilet great. Here are a few pointers:

Integrated Toilet Seats

This is an area where a lot of toilet manufacturers trip you up. You would think that all toilets come with an integrated seat, but not so. More than half the toilets in our review have a separate seat at extra cost. 

Read the small print before you buy because a toilet seat can add as much as $100 to your overall bill. 

Flush type

Dual Flush

Dual flush toilets are ideal if you like saving water and money. If you are flushing away solids, choose the higher 1.6 or 1.28-gallon setting. If you are washing away liquid waste, try the 1.0 or 0.8-gallon setting. 

Single Flush

Single flush toilets typically give you the option to flush using 1.6 gallons or 1.28 gallons. The difference between the two amounts to possibly 40 percent water savings, which could equate to 3,500 gallons every year. 

The downside with this type of flush is you don’t get to choose the amount of water you use depending on whether you have solid or liquid matter to flush away. 

Seat Height

Standard seat heights measure about 13 to 15 inches. These are ideal for small children because the toilet is lower and easier to get off and on. The Americans with Disabilities Act dictates that toilet seats should be 17 to 19 inches high. 

This makes it easier for taller, older, and mobility-challenged people to access. You can get universal height toilet seats, and they are almost identical to comfort height seats, although some can be as high as 21 inches. 

Bowl Shape/Overall Design

The shape of the bowl is another crucial comfort factor for toilet users. Most modern toilets are elongated because it has been found that this is a more universally comfortable shape. 

It gives younger children an easier space to sit, while the elderly and mobility-challenged can get off and on with less struggle. When men sit to pee, they need more space in front, so an elongated seat is a perfect antidote to splashes and stains. 

One-Piece

One-piece toilets are molded in one complete shape. The tank and bowl come from a single piece of ceramic. The advantage of this type of toilet is you don’t have to connect the water tank to the bowl, making it easier to install.

One-piece toilets tend to be more modern in design, with sleek lines and contours. They are smaller and take up less room, but they can be more expensive to buy. 

Two-Piece

Two-piece toilets are easier for one person to install because the tank and the bowl are separate, so they weigh less. You need to have some basic plumbing knowledge because the tank joins the bowl via a seal that allows the water tank to supply the flush.

The advantage of two-piece toilets is they are often cheaper, making them a great option for budget-conscious buyers. They are also more traditional in style. The disadvantage is they generally take up more room. 

Elongated

Elongated toilets are more popular than ever. They are typically 2 or 3 inches narrower than round models but 3 or 4 inches longer,  so they take up more floor space. However, if you have a slim gap, an elongated toilet is the perfect candidate. 

It is generally accepted that elongated toilets are better to sit on and more comfortable for most people. This includes the elderly, children, and men when they sit to pee. 

Elongated toilets are more expensive, but they are easier to clean because the scrubbing brush can access all the crevices with ease. These toilets cost the same to install as round models, but the average purchase cost is about 50 to 100 dollars more. 

Round

Round toilets have remained unchanged in shape since they were first invented. They are more akin to the type of toilet your parents and grandparents had. 

The bowl is about 28 inches from the wall, so they take up less floor space, but they do take up more room in the width.  

Round toilets are associated with traditional styling, and they are better for larger people because the shape of the bowl accommodates their size better. They are also cheaper, costing about 50 to 100 dollars less than elongated models. 

Easy Cleaning

Your toilet should be easy to keep clean. It is the single most significant contaminant inside your home, so an easy-clean toilet is a massive bonus. Luckily, Toto, and other manufacturers, have invested in cleaning technology.

You get CEFIONTECT, which is an ion barrier that lubricates the toilet bowl to make the flush more effective when it washes your solid matter down the drain. 

CEFIONTECT reduces the chances of particles sticking to the toilet bowl surface, making them easier to clean. The other thing that aids in keeping the toilet clean is the flush action. 

Toto has developed siphon flush valves that reach 100 percent of the bowl surface to ensure total cleansing. 

Water Consumption

Water consumption is one of the single biggest advancements in toilet technology. Since the early 90s, the law was changed to ban wasteful toilets. Before the law change, older toilets flushed between 3 and 6 gallons per flush. 

When you compare that to the modern equivalents, you can see how much water it saves. The EPA developed the WaterSense program to encourage manufacturers to respect this precious resource. 

Nowadays, typical flush values range between 0.8 gallons to 1.6 gallons, although the most common is 1.28 gallons. Even between 1.28 and 1.6 gallons, you get a saving of 10 gallons a day and up to 20 percent less water use. 

Ease of Installation

Most toilets are pretty simple to install. They attach to the wall or floor with a wax seal and two mounting bolts that hold them in place. Two-piece toilets are more challenging because you need additional plumbing to attach the tank to the bowl. 

One-piece toilets come as a single unit, so they don’t require additional plumbing. This makes them easier to install. 

Another thing you should check is the rough-ins. Most toilets have a standard 12 or 10-inch rough-in, but you need to make sure your plumbing is spaced correctly, especially when you realize that many manufacturers won’t refund you if you get it wrong. 

And those that do refund you will likely charge you a fee to return the item to cover postage costs. 

Wall-Hung

Wall-hung toilets are space-saving designs. They are better for smaller bathrooms and downstairs cloakrooms. However, you do need to ensure you know what you are doing if you want to install one. 

They have a modern design, with sleek lines and contours, and are a favorite with those looking for that hotel-chic bathroom style. Wall-hung toilets are more expensive than other toilet styles, and they are either tankless or have concealed tanks behind the wall. 

Neorest

Neorest toilets are the Rolls Royce of the sanitary world. They are wall-hung and have a toilet bowl coated with a special zirconium glaze that ensures that bacteria is eliminated. 

They have a host of features to make the toilet experience the best possible. You get a UV light to trigger the decomposition process, which eliminates the need for a toilet brush, meaning the toilet is self-cleaning.

You can banish odors with a deodorizer, warm your bottom in winter on a heated seat, and even dry yourself with a dryer. The Neorest Washlet is the nearest thing you will get to a bidet and toilet in one. 

Here’s what else it includes:

If you want one of these toilets, you had better think about a second mortgage because they are not cheap. A bottom-end model will cost you $4,000 plus and at the top-end, you could pay more than $10,000. 

Trapway Style

Some trapways are exposed, so you can see the shape of the drain, while others have molding or a skirt to conceal the trapway. 

You find concealed trapways on modern toilets, especially one-piece models, while exposed trapways are more common on traditional two-piece toilets. 

Price

How much you want to pay varies between designs. Toto caters to all budgets, with the Drake and the Entrada models coming in at the cheapest price tag. If you are working within tight financial margins, these are the best models to buy. 

At the other end of the scale, you could spend many times more on their advanced UltraMax II. It will cost you almost triple the price of the Drake, but you do get a lot of toilet for your money. 

Most people opt for the mid-price range. That way, you’re not paying over the top, and you are still getting a good quality toilet. 

Conclusion

Whichever way you look at it, Toto toilets are a smart choice. They are Japan’s leading manufacturer of sanitary ware and among the world’s most respected toilet makers. From the cost-effective models to the cost-a-lot, each toilet has its merits. 

So, the next time you are thinking about replacing your old toilet, give Toto some attention. It could be a wise move. 

22 Best Garden & Landscaping Design Software (Free & Paid)

When it comes to planning your garden, it is as important as any room inside your house. Get it right, and your outside space becomes an inviting retreat for you, friends, and family. Get it wrong, and your garden could end up neglected.

We look at the best garden design software, comparing free packages and premium options, to see which is the best and what they have to offer.

What is Garden Design Software?

Put simply, garden design software is a virtual way to plan, design, measure, and view all your garden ideas before a turf of grass is even cut.

Many give you bolt-ons like products you can place in the design, while others allow you to view your creation in 3D and take virtual walk-throughs to get the full immersive experience.

How Can Landscape Design Software Help You?

Garden design software enables you to visualize your dream garden without lifting a finger or breaking a sweat. It gives you clear ideas about what you want, so when you are working with professional landscaping companies, you can give clear instructions.

This benefits you and the landscaper because you have a structured and precise design, meaning they can deliver exactly what you have on paper. The second advantage is the cost.

Changing your mind because of cluttered ideas and indecision about the final vision might cause you to change your mind about specific elements. This increases the chances of delays and strain between you and the contractor.

The inevitable outcome will be increased expense as you both work together to determine the final layout.

Benefits of Garden and Landscape Design Software

So, what are the actual benefits to you when using garden design software? Is it worth the effort, time, and in some cases, money?

See Immediate Results

Rather than have some woolly idea that seems hard to pin down in your head, garden design software allows you to see the final design in all its glory. You can get a clear vision of what you want and see it form before your eyes. Your physical garden might take weeks to complete, but your virtual one is almost instant.

Easier Decision Making

We all want an easy life, and some of us are not good at making decisions. The one thing that plagues most building projects is a lack of clarity when it comes to making choices. This adds to your costs and puts a strain on everyone.

When you can see the design and understand how it works, decisions are easy to make.

Inspire Ideas

Once you have something on the screen, often, you get a spark of inspiration that fires your imagination. You may think you have the finished design, but suddenly you get an idea that takes a great plan and makes it extraordinary.

That’s what good design software can do.

Maximize Space

In your head, you think you have it all figured out. You know where everything goes, which configuration gives you the best use of the space available, and then you see it on the screen, and something is glaringly obvious. You haven’t maximized the space at all.

Seeing the finished garden virtually gives you a flavor of the space available and lets you push the limits of what is possible to squeeze every last inch out of the design.

Stay Organized

Organization is crucial if you want a well-managed garden remodel. You can’t have ideas floating around inside your head that you can’t articulate. A 3D design is crystal clear. Everyone understands it, and you can stay organized, keeping everyone on point.

Free Garden Design Software Options

SketchUp Free

Sketch-Up Free is a basic garden design package. You don’t get all the whistles and bells that come with the paid-for software, but you do get 3D modeling, 10 GB of cloud storage space, and a mobile model viewer so that you can take your designs anywhere.

You can draw in 2D and scale it up to 3D to get a more immersive experience, and you are using the same software that designers, engineers, and other professionals swear by in their daily lives.

This software is among the most popular because it supports most web browsers and has a CAD management tool for crisp and precise designs.

The downside is you need some degree of skill to master, which is fine if you like learning new things, but the complex nature of the software might deter some people.

Gardena’s My Garden

If you like simplicity, Gardena’s My Garden is the landscaping app for you. When you sketch with this tool, it looks like hand drawings, making the whole experience fun.

You get a menu with all the tools, and you can even add your house and other elements that make up your design. You can choose from their pre-drawn selection and then enhance, shrink or expand the layout, or stick to your own ideas.

This is the online tool for those that like quick and easy-to-use software that doesn’t involve downloading something to your computer.

The negatives are that you don’t get as many tools or features as other software, and you get a limited item library, which restricts what you can do.

Plan-a-Garden

Plan-a-Garden was created by Better Homes and Gardens to make it easier to plan your outside space with more intuitive software. It has an easy-to-use interface and plenty of items to choose from to fill your design quickly and efficiently.

It all starts with uploading a photo of your home, which Plan-a-Garden then sets up as the application’s main window.

The menu of tools and features is well thought out, and you can add in textures, structures, and plants. This software has a perspective feature that resizes items like trees to give you a realistic view.

You just need to be aware that not everything in the item library is free, and it lacks some key features that you get with the paid service.

Showoff.com the Visualizer

This is an online service that enables you to design your dream garden. You can use photos to build your image and add elements and items from the library to create that perfect look.

Once you have finished, you can share your designs and see other user’s projects for inspiration and design ideas. You can even rate their designs and consult with them for the best shared experience.

This package is a download option, so you need to make sure that your operating system is compatible. It supports windows.

iScape App

If you have an Apple tablet, phone, or Mac, this iScape is an excellent tool to use. The app gives you the facility to visualize your design before presenting it. You get a library of different items, including plant species, and you can take your plans anywhere.

The downsides are that you cannot use this app unless you have an Apple product like an iPhone, and you need to download iScape Partners to access the library.

DreamPlan

DreamPlan is another simple piece of kit, making it ideal if you are a novice getting to grips with the virtual design world for the first time.

No one wants to spend hours learning how to use the software before getting to grips with the design. You can design in 3D, including your home interior, and the layout on the screen is easy to master.

You can choose from various features, including plants and shrubs, paths, furniture, lighting, and pools. Plus, you can scale the perspective up or down depending on where you place each element.

It supports Mac and Windows, so that’s a large chunk of users covered, and it has a blueprint mode to get a technical view of your design.

Home Outside App

Home Outside is an app available for android and Mac systems. You can sketch your designs in 15 colors, add layers, use rulers to set margins in feet and meters, and plot your property using a map tool that gives you a north-facing arrow.

You also get 34 palettes of landscape elements with over 700 items and icons, including patios, plants, furniture, pools, and your own property.

The makers of the app claim it is an easy-to-use alternative to technically difficult CAD systems. This app allows you to find the perfect plant pairings, enabling you to use plant colors like a painter’s palette.

Marshalls Garden Visualizer

Marshalls Garden Planner also includes a paving planner that lets you quantify your paving needs through virtual design. You can mix and match layouts and textures and really experiment with different materials.

The designs are created in 3D, and you can add images of your home to build your layout and get an accurate depiction of what it looks like.

The visualizer extends to driveways. Upload an image of the front of your house, click for options, and your new driveway appears in an instant.

The downside is this app is not supported for mobile or tablet devices, which limits you to desktops and Macs.

Garden Planner (free trial available)

Garden Planner is a subscription service, but they offer a free 7-day trial that gives you all the features of the paid-for software. You get garden layouts to help you if you lack inspiration and priority support to help you yield the most crops.

They even email you to remind you when to sew new crops and when to rotate existing plants. The software is designed to increase your return and build up resistance to pests and soil nutrient depletion.

The downside is garden Planner is better at helping you grow vegetables rather than laying decks, fencing, and matching color schemes. Plus, when your free trial expires in 7 days, you have to start paying for the service.

PRO Landscape Home

PRO Landscape Home allows you to use photo imaging, 3D modeling, and CAD for technical drawing. This mobile app is supported by Android and Apple products.

You get an extensive list of accessories, enabling you to plan for almost every eventuality, and a feature called “Find a Professional,” which allows you to connect with professionals to ask planning and design questions.

The free version won’t allow you to create 3D files, edit hardscapes or create customer proposals. The other thing to note is that PRO Landscape Home is only free if you subscribe to Landscape Home software.

Kerkythea

Kerkythea started out as an add-on for SketchUp software, but today it is a stand-alone package. It uses a single interface for all your design needs and is compatible with Linux, MacOSX, and Windows.

If you have SketchUp, you can still download Kerkythea and use it in conjunction with the software to improve your design experience.

The great thing about this package is the quality of the rendered image. It rivals premium products, which is why so many people like what it has to offer.

Designor Buddy

Designor Buddy is an “OpenOffice Draw File,” which is one of several products as part of the OpenOffice suite.

This software allows you to create animations, render photo imaging, and adjust the lighting to get the best possible images. You even get mood lighting.

It’s compatible with CAD tools; you get a plant library, 3D graphics, and an object library full of garden furniture, pools, fencing, paving, and many more to help you create that perfect design.

Once you have completed your design, you can even seek quotes and estimates from industry professionals.

Paid Garden Design Software Options

VizTerra

This premium software is an outdoor 3D design tool, appealing to new designers and AutoCAD experts. It has an intuitive interface, 3 smart drawing tools, and 5 editing tools. You can create stunning videos, immersive tours, and even sound.

You can create tiers with topographic data, so if your landscape is sloped, this software can cope. It allows you to draw in AutoCAD and then import it directly into your design. You can share the drawings with others to gauge design ideas.

VisTerra makes complicated pool and deck designs pop off the screen in stunning 3D imaging. You can even load an image of your home to get a feel for how the new landscaping will look.

And it doesn’t stop there; you can create walls, fencing, railings, pergolas, and much more. The design library is packed full of plants and objects, which can be imported by clicking and dragging them into your design.

You can also import SketchUp to create 3D designs in double-quick time.

Structure Studios

This is an extension of the VizTerra software package. You can choose Pool Studio for $125 every year or VIP3D for $167 a year.

You get virtual reality and 360-degree imaging, and you can import from SketchUp, extending your flexibility and variety and True Shadows to give your render a realistic feel.

One of the great things about this software is you get tuition to get the most out of the package. Structure Studios also has 1,733 trees and plants in an extensive library of  objects.

You need Windows 7,8 or 10, have a minimum of 11 GB of free disk space, but the downside is this system does not operate on Mac systems, which is a large number of potential users alienated.

Chief Architect’s Home Designer

This is the perfect design software for professionals, landscapers, architects, and builders. You can imagine the exterior of your home in sharp 3D imaging.

You only get the garden design tool if you buy the premium version, which increases your costs, but you do get 2D and 3D imaging. This package is not cheap. It costs $199 per month, or if you choose to pay for the year, over $2,500.

It does have a free trial available, so if you are unsure about subscribing to this software, at least you can try it before you buy.

Landscape Deck & Patio by Punch!

If you want Landscape Deck and Patio for Mac and Apple products, you might have to wait. At the moment, it is only available for Windows 7, 8, 8.1, 10, and Vista.

The interface is easy to use. Just drag and drop, and you can build garden designs quickly and easily. You don’t need any design experience to get the most from this software.

You can work from set designs or insert a photo of your home and start building around the image.

Visualize your images in 2D and 3D and even estimate costs before you get started. If you get stuck and need advice, there are free online tutorials and an integrated help system.

The item library contains over 10,000 plants in 10 different climate zones, and you can plan what your garden will look like in years to come to take advantage of light and shade.

Like most premium design options, this software is compatible with SketchUp for increased design capabilities and flexibility.

HGTV Ultimate Home Design

HGTV has designed its software with the beginner in mind. You need no experience at all to operate this system. The wizard-driven interface delivers fast results, and you can upload images to get a feel for how your home will look with each design.

Take a stroll through your design with 3D imaging and virtual tours,  and if you need inspiration, you can speak to someone in the technical support or watch free tutorial videos on home and garden design.

With over 7,500 elements in the library, you have plenty of items to choose from, plus you get climate, water, and light requirements.

HGTV is also one of the more affordable paid-for services, so it might be a great bet for students studying architecture and garden design.

SketchUp Paid

SketchUp is easily head and shoulders above all other software packages. You can customize your 3D workspace to account for landscape changes like sloped and uneven surfaces.

You can design in 3D and then document it in 2D for easier file storage, and if you opt for the Pro package, you can go one stage further when trying out a virtual 3D tour by using XR reality headset viewing to place you in the middle of the design.

Even the lowest-priced package allows you to view your design in augmented reality mobile viewing. The other advantage of SketchUp is it is compatible with so many different design software packages,

Garden Planner

Design your outdoor space by placing trees, decking, plants, fencing, railings, and buildings by dragging and dropping them into place.

You can even design and plant a vegetable garden to help maximize your available space. You get a free trial if you want to try before you buy, and if you like it, it is reasonably priced, with regular updates to keep the content fresh.

Garden Planner is available for Mac and PC, and the plant library has over 1,200 varieties of plants and shrubs.

Smartdraw

Smartdraw is primarily a software package to create flowcharts, plans, and diagrams, but they also have a garden planner.

While it may lack some of the sophistication of other software, it does create clear and easy-to-understand plans. You can upload your design or use one of the templates from the library.

Once your design is completed, you can share ideas with friends, family, and colleagues. This package is compatible with Windows but not Mac or other Apple products.

Lands Design

Lands Design has the feel of a professional design tool. It can create terrain modeling tools that mimic slopes, dips, and the contours of your garden’s natural terrain.

The database includes 1,800 plants, trees, and shrubs, and you can filter each variety according to plant type, soil, and climate.

You also get labels, tags, and other annotations to help you organize your design and document everything in minute detail. This helps when you want specific plants to match your design and need to know what to order.

It even turns your project into animated and realistic videos, to give you an accurate impression of your creation.

Terragen

Terragen is available for Mac and Windows and is the most realistic photo rendering technology. You can create lighting, terrain and even cloud patterns and the effects of ozone.

You can have some real fun with this package, rendering trees, rocks, and almost anything you can think of to incorporate into your design.

Maybe you want to add thousands and even millions of trees, birds, and grass blades? Anything is possible with Terragen.

Terragen comes into its own when you want to create different climates to see where the sunny spots and shaded parts of the garden are to adjust the design to compensate.

Tips for Using  Garden Design Software

Design Your Garden

It’s always a great idea to write down individual elements of your garden before you start designing. This helps you establish a budget because designing a garden is expensive.

Make a list of features you want to keep and new ones you want to add, and research other gardens to get ideas.

Things you might want to include:

Keep in mind the weather patterns and which way the garden faces. You wouldn’t want to place a patio in a north-facing spot unless you were looking to get shade from the sun.

Visualize Before You Plant

Try and have an idea of what you want before you start. This links to the previous point about having a list of wants and needs to help you focus your attention.

The bulk of this work comes from planning. The more you do your homework, the smoother the design will flow. Look for inspiration in color, texture, and structures.

Also, if you live in a specific climate like California, you might want to use native plant species that can withstand the rigors of the weather patterns. Some plants fare better in heat and sun, while others prefer rain.

Provide Structure

Structure features in everything, from buildings to plant beds. Try and place taller plants at the rear to give some height and use trees to frame particular parts of the garden. Break up the garden into sections and decide if you are redesigning the entire space or areas.

Garden Design Software FAQ

What is the best garden design software?

It depends on what you want from the software and your budget. Some are aimed at professionals and are extremely complicated to use, while others are a simple app that creates designs in minutes.

The most popular design software is SketchUp. This is evident because most of the other packages make a point of their compatibility.

What is the best free landscape design software?

It comes down to personal preference, but SketchUp Free ranks pretty highly among users. It is easy to use, gives you many options, and if you like it, you can upgrade to the paid service, which is compatible with many other packages.

What software do garden designers use?

Lands design and SketchUp feature pretty highly in the popularity stakes. Professionals like design features, 3D imaging, virtual tours, and completely immersive experiences because their designs have to translate to their clients.

The more detailed and precise the design, the easier it is to understand.

What is the Best Vegetable Garden Planner software?

Garden Planner comes highly rated for vegetable and crop planting. They show you how to reduce pests, preserve your soil’s nutritional values and even email you reminders about rotating crops and when to plant the new season’s green beans.

It’s like having a virtual garden expert in your corner 24/7 and 365 days of the year. The idea is you yield as much as possible in a sustainable way that doesn’t strip your soil of goodness.

There Is No Substitute for Good Design

Whether you want a space to hang out with friends and family or a productive garden that yields fresh fruit and vegetables, the best garden design software has it all.

Seeing your design in full color, walking through your garden in a virtual video, and checking out the lighting, shadows, and sun direction are all possible with garden design software.

It’s time to ditch the pencil and scrap of paper and step into the 21st century.

Painted Concrete Floors & How-To

Concrete floors are a durable, sturdy surface that’s ideal for heavy foot traffic. But leaving concrete in its natural gray state is dull and unattractive. 

Not to worry, because a coat of paint can spruce up concrete floors and give them new life. This how-to guide will walk you through painting your concrete floors, from materials and tools to picking the suitable paints and breaking down the entire step-by-step process. 

Table of Contents

Materials and Tools to Paint Your Concrete Floors

When getting ready to paint your concrete floors, the first thing to do is ensure you all have all the right tools and materials handy. Having to stop in the middle of your process can result in time delays and a poor paint job. Read through this list carefully and mark off the boxes once you’ve checked that you have each piece.

Equipment

Materials

Cleaning Products

Selecting Concrete Paint Type

When choosing paint for your concrete floors, there are two suitable options. You can choose acrylic latex or epoxy paint. 

Acrylic latex

Acrylic latex is a water-based paint that spreads quickly over concrete and other masonry surfaces. This paint is excellent for DIY due to the ease of application. 

This type of paint is also budget-friendly. But it’s not as durable as epoxy, requiring touch-ups and reapplication more frequently (every two to three years). Some options have mixed-in particles that create a non-slip surface.

Epoxy Paint

Another suitable choice for concrete floors is epoxy paint. This material is more durable and lasts longer compared to acrylic paints. This paint will give your floors a glossy shine with tiny flakes for color while being rock hard to resist impacts, water, and stains.

Epoxy paint is more expensive and more time-consuming to use. The application requires mixing the epoxy resin with a hardener and then spreading it over the floor. It can be challenging to apply, especially when in a thicker concentration. 

Considerations for Choosing the Best Paint for Concrete

To help you decide which paint is best for your area, consider the following factors. These criteria will help you pick a paint that lasts.

Location

First, consider where you’ll be painting your concrete floors. If you are painting an outdoor concrete floor, such as patios or parking pads, you’ll want to be sure to pick a paint specifically designed for outdoor or exterior use.

Color tone

You’ll also want to consider what colors you want. Epoxy paints give you a better range of colors and effects due to color flakes that enhance the base color. 

Shine

You’ll also want to decide if you want a floor that will have a glossy, shiny appearance or if you prefer a more dull look that blends rather than shines. Polished surfaces are great for reflecting light, making your space look brighter and bigger. The smooth surface will also be easier to clean while hiding scuffs and scratches. 

Epoxy paints will have a natural gloss that you can quickly repair with a buffer once they start looking dull. However, glossy floors can be slippery as they don’t absorb moisture. If you’re going with a shiny look, make sure the paint has non-slip properties.

Cleanability

Another critical point is how easy the material will be to clean up during and after applying. Cleanup is easier with latex paints compared to epoxy. 

Latex is a water-based paint, making it simple to clean your tools and hands with soap and water. To clean up after painting with epoxy, you’ll need to use harsh chemicals. 

Soap and water work for cleaning painted surfaces for latex and epoxy floors. Epoxy’s more durable resistance against mild cleaning makes it stand up better against regular cleanings. In contrast, latex paints will start to break down over multiple washes.

Lifespan

A huge factor of your paint should be the lifespan. Due to the degree of difficulty of painting concrete floors (having to remove furniture and prep the area), many people prefer paint that will last a long time. 

Latex paints typically last two to three years before needing a new coat applied. On the other hand, epoxy paints last a long time before needing recoating.

Design Options for Painted Concrete Floors

There are many design options available when painting concrete floors. Many people have the disillusion that you’re stuck with one solid plain color. But as this section will show, you have many different options for painting concrete floors.

Solid

If you want to have a simple floor that’s quick to paint, will last for years, and doesn’t require a lot of effort, your best bet is to stick with a solid-colored floor. There are plenty of color choices available, allowing you to pick what goes best with your home design and tastes.

A solid-colored floor does not need any extra steps past what we explain in our step-by-step guide for painting the concrete floor below. Once painted, you can leave the floors bare or add some flair to your room using area rugs or other accent pieces. 

Solid color floors are a great choice if you don’t want to individualize your space with unique patterns, making it more beneficial during reselling. Some buyers may turn away from homes with wild floor patterns.

And you don’t have to worry about your floor design clashing if you remodel the area, allowing you to change your design as often as you want. 

Border

Borders are a great way to give your floors separation while providing a dramatic design element. You can create a 6″ to 10″ wide border around your entire room or go smaller to create dimensional effects to break up the expanded space.

You can use borders to create the look of rugs or to make your area look more prominent. Borders can be straight lines or with intricate twists or overlaps. 

To create a border, you use painter’s tape to mark off the desired area – a tape measure and chalk reel are your friends. And then paint and seal the space to ensure your design lasts.

Stencils/Patterns

Using stencils or patterns is a great way to give concrete floors dimension and presence. Your only limits are your imagination and patience. Since this project is so easy, a DIY beginner could do it. Stencils are affordable and can hide imperfections in your floor better than solid-colored paint

When choosing the type of pattern you want on your floor, there’s a wide range of stencils to consider. Pick the appropriate size and design to suit your area.

Like any surface you’ll be painting, the first step is to clean your concrete and paint it your chosen base color. Once you’ve got the floors ready, use a tape measure and chalk reel to mark the center of the area (length and width-wise). 

Place your stencil in your start point and secure it with painter’s tape to ensure a solid hold. Using a paint roller, roll over the stencil until the holes are full of paint. Once the paint dries, you can remove your stencil and move it to the next section. Some stencils have marks that help you line up your design better.

Once you reach the corners of your area, you may have to bend the stencil to finish the last part of the design. Be sure you cover your walls if you don’t want to get any paint splatter. You may have to tape your stencil to the wall to finish the job. Finish the job with a sealant once the paint is dry.

Pro tip: Check out this helpful video on how to stencil concrete floors in 10 easy steps.

Concrete Painted Floor Rug

If you want to jazz up your concrete floors, consider a painted floor rug. The great thing about this option is you can get as creative as you want with patterns, size, and location. Common examples of designs include checkers, stripes, freehand, words, and stenciled floral motifs. 

This option is a favorite for bathrooms, kitchens, and dining areas where having a fabric rug might be detrimental. You can use a painted floor rug to give your concrete floor style without painting the entire floor. 

To paint a floor rug on your concrete surface, you’ll need stencils, stencil brushes, painter’s tape, a large paintbrush, small bottles of colored acrylic paints, and a gallon of clear concrete sealer.

Clean your concrete surface by scrubbing with a stainless steel brush and washing with a degreaser. After your surface is clean, use painter’s tape to create the border of your rug. It’s a bright idea to use a tape measure to ensure your measurements are even. 

Pro tip: Using a contractor’s L-square will help you get straight sides and square corners. 

Once your perimeter is down, cover the inside area with two coats of primer or white paint. You can use a brush or roller to apply the paint. Allow for adequate drying time as listed by the manufacturer. 

Next comes the fun part. Now, you create your pattern using painter’s tape, starting at the edges and working your way to the center. Once you have your design finished, start painting. Be sure to let the paint dry completely before adding tape to create new patterns. Once you’re through painting your area rug and it’s dry, add two coats of sealant.

How to Paint Your Concrete Floors (Step by Step)

This section will provide a step-by-step guide for how to paint your concrete floors. The process is simple if you’re only adding a solid color. You’ll spend the most effort on getting your floors prepped. 

Before you can begin prepping your floors, you’ll need to remove everything out of the way. Take out all furniture and pull up any old carpets or flooring. It’s a good idea to wear a mask and gloves while working with old materials, which often have harmful chemicals. 
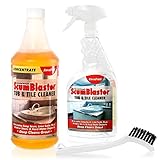
Next, place masking tape along any baseboards or walls where you don’t want paint. Keep this tape handy if you’re going to create elaborate designs on your floor. 

Prep the Surface

Before you can paint your concrete floors, you have to prep them. There are multiple steps to prepping your work area. You can’t be in a hurry when painting your floors if you want the best results. Any imperfections on your floor will show through the paint. 

Sand

The first thing you’ll need to do is remove any gunk or mess stuck to the surface. You can use an extension scraper for small areas. But you’ll see the best results if you use a sander over the entire surface of your floor. 

Pro tip: Hydrochloric acid mixed with 4 parts water or Rust-Oleum EPOXYShield Concrete Etch are great for treating stubborn carpet glue or dirt patches.

After you’ve scraped and sanded the entire surface, use a wet/dry vacuum to remove any litter. Then wash the cleaned surface with a degreaser and rinse several times until you can mop the floor and the mop stays clean. 

Vacuum up any water and allow the floor to dry for a few days before painting. Wipe the surface with a tack cloth on the day you’ll be painting to remove any collected dust or dirt. 

Fill Cracks and Holes

Before you paint your floors, you’ll need to repair any holes or cracks. If left untreated, these flaws will display prominently once you’ve added a layer of paint. You’ll need a concrete patch compound found at most hardware stores, following the manufacturer’s directions for mixing. 

Use a trowel to push the compound into any holes to fill them. Once dry, smooth the areas using a sander. Remember to clean the area thoroughly before moving to the next step. 

Pro tip: If there’s a lot of humidity in your area, let a humidifier run for 1-5 days to pull out the excess moisture so the paint sticks better to your surface. 

Prime

Once you finish prepping your floor, it’s time to apply a layer of primer. You’ll need to add two coats, allowing each layer to dry. A paint roller with an extension handle makes the job faster and more comfortable. Use a paintbrush for corners and edges. 

Pro tip: Let the primer dry for a full 24-hours before applying paint. 

Apply Epoxy Paint

After both layers of primer have dried, it’s time to paint. You can use the same extension and roller brush, making sure to use a new, clean paint roller. Or you can use a paint compressor and a spray gun.

Like the primer, you’ll need to apply two coats of epoxy paint, drying between each layer. The first layer will take at least 12 hours to dry. Depending on the color and design you hope to achieve, you may need to use more than two coats.

Pro tip: Start painting around the edges of the room, working on the area furthest away from the entrance.

Apply a Sealant

Once you’ve achieved the desired color, you’ll need to seal your floor using a masonry sealer. You’ll want to apply multiple coats, letting each coat dry before adding another.

Pro tip: Sealants and finishes are great ways to add character to your painted floors. Acid etching products can create patterns in your painted floors, but they can be challenging to use.

Concrete Floor Cleaning Tips

Having beautiful painted concrete floors won’t matter much if you don’t know how to clean them properly. When left uncleaned, glossy paints can start to turn dull, reducing the look of your floor’s design.

For indoor concrete floors painted, stamped, or stained, cleaning is as simple as mopping using a mild floor cleaner. Avoid using bleach, ammonia, and other acidic cleaners, as these materials can damage your surface. 

Cleaning products that are safe for use on concrete floors include liquid dish soap, Castile soap, PineSol, other floor cleaning products, or stone cleaners. Mix your solution correctly and spread it out using a wet mop. Rinse the residue-free with the mop and clean water.

Pro tip: Before mopping your floors, it’s crucial to sweep the area with a soft-bristle broom to remove any debris. Next, wipe the surface with a microfiber cloth to capture any loose hair or dust. Some people also prefer to finish the cleaning using a vacuum. Any small particles left can scratch your concrete surface.

Painted Concrete Floors FAQ

We’ll conclude this how-to guide on painting concrete floors by answering a few frequently asked questions customers have about the topic.

Can I just paint my concrete floor?

Most paints that you can use for concrete floors require a sealant overlay to protect the paint from damage. A few paints do not require sealant, but these are only for indoor use and would not last well outdoors.

Is it a good idea to paint concrete?

Painting concrete is a great way to give your room more personality and design than plain gray floors. Since it’s possible to create any design to resemble other flooring types, there’s no reason not to paint concrete floors. The sealant added over paint can even help protect your concrete from damage, making it last longer and stay looking great.

Are painted concrete floors durable?

With the correct products and processes, painted concrete floors are incredibly durable. Acrylic paints will not last as long, requiring a new coat every two to three years. But epoxy paint can handle heavy abuse (when appropriately sealed) for years to come, reducing the need for repainting. You may have to reapply a coat of sealant every few years. But if the color gets dingy, you can buff it back to brightness.

Can you paint over old paint on concrete?

To get the best results when painting concrete, you’ll want a clean, smooth surface. It’s best to remove any old paint using a sander and fine sandpaper (at least 120 grit). You can also use a scraper or treat the clumped paint with chemicals for easier removal.

Conclusion

Nothing gives your home character and appeal like great floors. If you have the advantage of concrete floors in your home, follow our instructions for painting your concrete floors to give them new life. Painting your concrete floors is a cheap, easy way to help your floors serve a higher purpose – improving your room’s aesthetic. 

How To Fix a Leaky Shower (7 Easy Steps)

That dreaded dripping sound is an indicator that your shower is leaking. Today it’s an innocent trickle of water, but it could lead to more serious issues if left unchecked. Mold and mildew start to grow, and water damage leaves unsightly stains on your tiles and shower tray. 

It could even lead to water seeping beneath seals or tiles, causing expensive repairs. We show you what signs to look for, the possible causes, and how to fix a leaky shower in easy-to-follow steps. 

Table of Contents

Why Do Showerheads and Faucets Leak?

Everything wears out eventually. Seals and gaskets fail, washers perish with age and use. These are all simple reasons why you have a leaky shower. Let’s look at the most basic fixes for dealing with your leaky shower. 

Common Tools Required

Before we get into the details, what tools do you need?

How to Fix a Leaky Shower: Showerhead

Fixing a shower head leak is the easiest of all the fixes. At the worst, you have to replace the showerhead and, at best, it will need cleaning. 

1. Unclogging Showerhead Holes

Luckily, unclogging your holes in the shower head is an easy fix. Here’s how it’s done:

Turn Off Water Supply to Showerhead

Locate the water isolation valve nearest to the shower or turn the water off at the mains. Most modern installations have small taps that you turn to stop the water flow to a particular fixture in the bathroom. Your toilet and washbasin should have one too. 

Remove Shower Head Faceplate OR Entire Shower Head

Check what type of shower head you have. Most modern shower heads come as a completely sealed unit that unscrews from the shower hose. 

Immerse Faceplate or Shower Head in White Vinegar for 8 hours

Fill the bucket with water, so there is just enough to immerse the entire shower head and pour in a cup of white vinegar. Give it a stir and pop the showerhead into the solution. Leave it for a minimum of 8 hours, frequently checking to see if any of the grime has lifted. 

You should see the water start to discolor, as the debris falls away. 

Manually Remove Leftover Deposits

Lift out the showerhead and check that all the dirt is gone. Sometimes, small pockets of grime resist the vinegar solution, so you need to employ a bit of elbow grease to get the job done. 

Grab the scrubbing brush and run it over the surface of the showerhead. This should remove the last stubborn remnants of the dirt. 

When you are satisfied the shower is clean, lift it out and dry thoroughly with the towel. Screw it back in place and turn on the water supply. 

Top Tip: If the showerhead is still blocked, grab a pin and insert it into each hole to clear the blockage. 

2. Replace Worn Out Rubber Washer

Washers frequently wear out. They perish with use and age but are cheap and easy to replace. 

Turn Off Water Supply to Shower

Isolate the water supply to the shower, either by using the isolation valve in the bathroom or turning it off at the mains.

Determine Which Washer Needs Replacing

Your shower has washers in several places. The most common cause of an issue is likely to be the showerhead or where the hose connects at either end to the mixer and showerhead. These washers are rubber and wear out. 

Typically, you can pick these up from any hardware store for pennies. Most washers are universal at 0.5 inches. If you are considering replacing the shower hose, they come with washers installed, so you don’t need to worry. 

Replace Rubber Washer in Shower Head

Assuming it is the showerhead washer that is the culprit, remove the old washer with a screwdriver. You’ll find it attached to the female thread inside the hose, and it should lift out easily. 

Pop the new washer in, and you’re ready to reassemble.

Reassemble

Once you’ve replaced the old washer with a new one, screw the female thread of the hose to the male thread of the showerhead. Make sure it is tight. Turn the water back on and test the shower head for leaks. No drips? No problem!

3. Replace Showerhead

Replacing the showerhead is a simple fix. It will cost you more than the price of a washer, but even those with the most basic DIY skills should be able to handle it. 

All you need to do is pop to your nearest DIY store and select the new shower head. The threads are universal, so you get the option to upgrade your showerhead. 

Simply unscrew the old one and replace it with the new model. 

How to Fix a Leaky Shower: Shower Faucet

Things get a little more complex when dealing with the shower faucet. 

4. One and Two Handle Faucet

You will have to turn off the water before attempting any repairs to the shower faucet. As before, you can do this by using the isolation valve in the bathroom or the mains valve. 

Extract the Cover Cap

Find the cover cap and lift it off with your flat head screwdriver. It reveals the screw that holds the handle in position.

Remove the Screw and Handle

Using a cross-head screwdriver, twist the screw counterclockwise to loosen it. Now remove the screw and the shower faucet handle. You’ll also have to remove the decorative faceplate that sits beneath the handle. 

Remove Trim and Sleeve

You should see a metal sleeve over the shower valve. Pull it and unscrew it. Look for the valve locking clip. Not all have one, but most do. Grab the long-nose pliers and remove the clip, placing safely to one side. 

Using the wrench, loosen the cartridge. It may slide out when you take the wrench away, or you can apply gentle force using the pliers. 

Replace the cartridge with a new one. If you don’t have a new one to hand, take the old cartridge so you can match them up at the hardware store. Assuming you have a replacement, put it back and tighten. 

Return Vital Parts

Replace the locking clip and the valve sleeve, then reassemble the handle in the reverse order that you dismantled it. 

Turn on the water and test the system for leaks.

Return Faucet Stem

If you have a two-handle faucet, you need to follow the first two steps, but here’s where it is different: you might need to replace the stem for each handle. Using a wrench, grip the locking base nut at the end of the faucet that’s leaking. 

Unscrew the valve and set it aside. Now the stem is loose, pull it out using your fingers. If it is stubborn, use the pliers for extra grip. 

Replace the worn washer with a new one. To get a better seal, use a small amount of silicone grease. Now return the faucet stem and tighten the locking nut. Replace all the vital parts and switch on the water. 

Top Tip: It might need a new faucet stem, so while you have the taps stripped, it may be wise to replace old with new. That way, you get the peace of mind that it will be leak-free for years to come. 

5. Pfister Shower Faucet

The procedure is the same as before. Ensure the water is isolated by turning it off at the mains or using the isolation valve in the bathroom. 

Take Out Screw

Lift the cap and remove the screw using the cross-head screwdriver. Remove the handle and plate by twisting them counterclockwise and place to one side for safekeeping. 

Loosen the Threaded Sleeve

To get the cartridge out, first, you have to loosen the threaded sleeve. Use the adjustable wrench and turn counterclockwise until it works loose. Use the pliers to lift it free.

Extract Cartridge

Sticking with the pliers, work the locking nut that holds the cartridge in place, twisting it counterclockwise. These nuts can be hard to remove because the valve might be old, so use penetrating oil to help loosen it. 

Once the nut is free, you can pull out the cartridge using the pliers. 

Wipe Interior and Bring a New Cartridge

Replacing the cartridge is the reverse of removing it. You could try lubricating the existing cartridge to fix the leak, but swap it for a new one if that doesn’t work. 

Push the new cartridge in place, tighten the locking nut and replace the valve sleeve.

Add Finishing Touches

Now replace all the fixtures like the plate and the handle, tightening the screw and clipping the cover back. Turn on the water and test the faucet for leaks. 

6. Cleaning/Replacing Malfunctioning Diverter Valve

When water flows from the faucet, even though you’ve engaged the shower diverter, you have a problem that needs fixing. As with all these repairs, you will need to cut the water off using the methods above. 

Turn Off Water Supply to Shower

The water supply can be isolated using the water valve in the bathroom or at the main valve. 

Unscrew and Remove Faucet Handle to Expose Diverter Valve

Pop the cap off the faucet handle and unscrew it using the cross-head screwdriver. Once the handle is removed, you can expose the diverter valve. 

Remove Diverter Valve

The diverter valve is removed using the wrench and a screwdriver. You will need to slide out the sleeve first. Next, loosen the setscrew, and then unscrew the diverter valve by removing the spigot. 

Clean or Replace Diverter Valve

Examine the valve for damage and grime build-up. If it all looks in good working order, give it a clean with a toothbrush and some water and vinegar. You could pop in the bucket to soak.

If the diverter valve looks worn and damaged, it’s time to change it for a new one. It might be an idea to take the old valve to the DIY store to match it to the exact same model. 

Reassemble

If you are happy that you have the correct diverter valve, slide it into place and perform the same procedure you used to remove it, but in reverse order. 

Once all the components have been reassembled, switch on the water and give it a test run. 

7. Replacing Malfunctioning Cartridge Valve

If you need to replace the cartridge valve, it’s always a great idea to either read up on the specifications of your shower faucet or remove the old part and take it to the hardware store for an exact match. 

Turn Off Water Supply to Shower

Switch the water off using the isolating valves located near the shower or by using the main valve. 

Remove Faucet Handle and Expose Cartridge Stem

Locate the cap on top of the faucet handle and pop it free using the flat-head screwdriver. Loose the screw, turning counterclockwise, and pull the handle free. Next, twist off the sleeve, exposing the cartridge stem. 

Remove and Replace Cartridge Stem

Grab the adjustable wrench and start turning the locking nut at the base of the stem. If you struggle, try using some penetrating oil to help free it. 

Once the nut is loose, you can extract the stem cartridge using the long-nosed pliers. Now grab the replacement valve and slide it in place, tightening the locking nut with the pliers. 

Reassemble

Once the cartridge stem is in situ, replace the sleeve and then start the process of reassembly. 

Conclusion

Plumbing is something not many of us are confident about when it comes to making repairs. We worry that we will end up flooding everything or making the problem worse. However, most plumbing tasks are simple to perform and cheap to fix. 

All it takes is patience, the right tools, and a little logic to arrive at the solution. And just think of the money you will save on plumber’s fees.