No one likes to see mold in shower caulk. It is unsightly and makes it look like your shower is unclean. And the bad news is mold thrives in warm and damp environments. So it feels right at home growing on your shower caulk.
We show you how to get rid of black mold in shower caulk, giving you lots of options ranging from bleach to replacing the caulk entirely.
Best Shower Cleaners for Mold
Lysol Mold & Mildew Blaster with Bleach
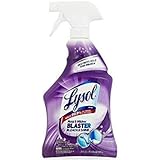
Lysol Mold & Mildew Foamer w. Bleach, Bathroom Cleaner Spray 28 oz
- Works as both a mold remover and a mildew remover while working hard to whiten surfaces
Lysol Mold and Mildew Blaster is an excellent product for removing black mold spots from your shower caulk. It kills 99 percent of bacteria and viruses, so you can keep your family safe, and it bleaches and whitens to bring your tiles and caulk back to life.
It comes in 5 different scents ranging from ocean-fresh to lavender fields to leave your bathroom smelling fresh and clean, and with repeated use, it can actually prevent new mold growth.
Puracy Organic Home Care Set
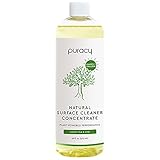
Puracy Multi-Surface Cleaner Concentrate, Makes 1 Gallon, Green Tea & Lime, Household Natural All Purpose Cleaning Solution
- “The Best All-Purpose Cleaner” – The New York Times
Puracy is a great organic alternative that eats at your black mold, but it is also kind to the environment when you wash it away.
You can use it on all home surfaces, like kitchen countertops and hardwood floors, plus thanks to the lemongrass scent, it leaves your home smelling fresh. This home care kit is 100 percent safe for kids and pets, so you can use it liberally without fear.
Complete Mold Killer & Remover DIY Bundle

RMR Brands Complete Mold Killer & Stain Remover Bundle – Mold and Mildew Prevention Kit, Disinfectant Spray, Bathroom Cleaner, Includes 2 – 32 Ounce Bottles
- TWO FAST-ACTING FORMULAS: The ultimate mold prevention kit, our bundle includes 1 spray bottle of RMR-86 and 1 spray bottle of RMR-141 RTU to kill mold and mildew instantly while lifting difficult stains that are left behind
This mold and stain remover bundle from RMR Brands is fast-acting and includes a mold remover and a disinfectant spray in two separate bottles.
The RMR-86 solution kills mold instantly and stops it from returning, and the RMR-141 formula is a fungicide and disinfectant, as well as a germicide and virucide.
ForceField ScumBlaster Bundle
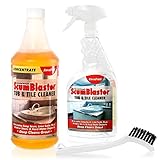
ForceField ScumBlaster: Soap Scum Remover, Tile and Grout Cleaner, Hard Water Stains and Rust, Industrial Strength
- ✔️ LONG LASTING VALUE BUNDLE SAVES YOUR HARD EARNED $$$ – With ForceField ScumBlaster concentrate you can make 5 Ready to Use spray bottles that last longer than the expensive big brand-named cleaners! You’ll need it too, because once you start cleaning with ScumBlaster, you won’t want to put it down! It’s that easy!
This ForceField product is industrial-strength cleaning at its best. It blasts away soap scum, limescale, mold, and mildew from your tiles and tub, plus the concentrate makes up enough solution for 5 spray bottles.
Like the organic option, this is completely safe for your pets and kids and is kind to the environment.
What Causes Black Mold?
Mold thrives in hot, humid, and damp conditions. It also loves spaces with low light because sunlight dries the surface, removing the food that mold needs to grow. Every time you shower, moisture enters the atmosphere and circulates.
Mold is highly resilient and can survive in extreme conditions, so getting rid of it once it has found a home is tricky. It also has a habit of swiftly returning once you think you have eliminated the problem.
Mold loves cellulose above all other food sources, although it also likes other organic matter. Wood, drywall, grout, and caulk are all common feeding grounds for black mold. Caulk helps to repel water, so it sits on the surface and leaves a feast for mold.
Also, if you leave the bathroom with dampness in the air, mold will start forming in a few weeks. Plus, wet towels and clothes help trap humidity and moisture, while leaks and humidifiers play their part in allowing it to grow.
Health Effects of Black Mold
Mold isn’t just unsightly; it is also unhealthy. All those tiny spores circulate in the atmosphere, and when you inhale them, they can cause all sorts of conditions.
People with asthma and other lung conditions are particularly susceptible to mold, irritating their breathing and causing attacks.
Those suffering from a weak immune system can often have flare-ups, skin rashes, itchy eyes, and even yeast infections with exposure to mold. You should try to get rid of mold for health reasons alone.
How to Get Rid of Black Mold In Shower Caulk (8 Tips)
Tools and Protective Gear
Before we get to the nitty-gritty of how to remove black mold from your shower caulk, you are going to need some tools and protective gear.
First, you will need a face mask because scrubbing at the mold releases spores, and the last thing you want is to breathe them in.
The second thing you might consider is protective gloves. Nothing smarts more than splashing your skin with a caustic chemical solution.
You’ll also need a scrubbing brush, and for small regions, a toothbrush is an excellent tool, especially the hard-to-reach places where mold likes to hide.
The next tool is a microfiber cloth. After you have rinsed down the caulk, it needs to be dried thoroughly, and microfiber cloths are superb at this task. Also, keep a dry towel handy. It’s always worth getting a sponge too.
A spray bottle should be the next thing on your shopping list. It makes the cleaning fluid easier to apply to vertical surfaces.
And don’t forget a funnel to help you pour the cleaner. You should also invest in a mixing cup and a stirrer. When you create the formulas, they need to be mixed before pouring into the sprayer.
And finally, if you opt to remove the caulk, you will need a fresh tube of sealant and a sealant gun.
Spray Ammonia
You should avoid breathing in ammonia because it damages your lungs, so don your face mask and gloves. Secondly, open the doors and windows to help the fresh air circulate.
Given that shower rooms are often the smallest room in the house, getting good airflow could be an issue.
Mix one part of ammonia to one part of water and pour it into a spray bottle using the funnel. Spray an even coating of the ammonia onto the shower caulk, focusing on the corners and hidden spaces. Leave it to settle for 10 minutes while you get some fresh air.
Scrub the caulk with a brush or cloth, and the mold should lift out. Use the toothbrush for smaller areas that need more attention. Now dry the caulk with a microfiber cloth.
Bleach
You should treat using bleach in the same way as ammonia, so caution is the watchword. You will need gloves and a face mask. Never mix bleach with ammonia because it causes a chemical reaction that releases toxic fumes.
There are three ways you can apply bleach:
Sponge
This works better for applying bleach to smaller areas. Soak the sponge in the solution and then press it on the black mold.
Spray Bottle
The spray bottle is an easier way of coating a larger area in bleach. Pour some of the bleach into the spray bottle and apply to the surface of the caulk. Wait for 20 minutes, and then rinse it off using water.
Cotton Coils
If the mold still persists, you may need to soak cotton coils in the bleach and place them onto the surface of the caulk.
Try and line them up side by side and use a pen or pencil to push them into grooves and recesses. Leave them to soak overnight and remove them the next day. Scrub at the caulk with the sponge to remove any lasting residue of black mold.
Hydrogen Peroxide
Hydrogen peroxide is a great way to remove mold. You should aim for a solution with a 3 percent concentration. Pour it into the spray bottle and apply it evenly onto the caulk. Allow it to sit for 10 minutes and then wipe it away with a sponge or cloth.
Vinegar
White vinegar works best because it doesn’t leave any discoloration. White vinegar not only removes the mold, but it also kills it as well. You can apply it undiluted, but mixing it with water reduces the smell if it’s too strong.
You can also mix the vinegar with baking soda for even more impact on the bacteria. If you have natural stone near your shower, you should avoid splashing it with vinegar as it can damage it.
Mix equal parts of vinegar to water and pour it into a spray bottle. Then apply a liberal coating to the caulk in your shower. Wipe it away after 10 minutes with a microfiber cloth.
Baking Soda
Baking soda is often referred to as sodium bicarbonate because it contains high levels of natural sodium (salt) in the crystals. You can apply it in two ways.
Solution
Mix a quarter of a tablespoon of baking soda with water in your spray bottle and shake it thoroughly until all the crystals have dissolved.
Spray the solution on your caulk and scrub at it with the brush. Then rinse off the cleaner and reapply another coat of the baking soda solution, but this time let it sit and dry. Adding the final layer gives the sealant protection against mold returning.
Paste
If you have more stubborn mold stains, try mixing a small amount of water with the baking soda crystals until it forms a thick paste. Spread the paste over the caulk and leave it to react for 20 to 30 minutes.
Grab the brush and scrub hard at the mold until it starts to lift. Then rinse off the paste with water. You can add vinegar to the baking soda for even stronger cleansing action.
Borax
Borax shares many attributes of baking soda, except they are entirely different in the way they work. Borax is a natural ingredient, so it is kind to the planet.
It works by converting water molecules into hydrogen peroxide, which then lifts the mold from the surface of the sealant. You can apply it as a solution or as a paste, just like baking soda.
Mix a little water with the Borax until it forms a thick paste. Rub it over the caulk and leave it for 20 to 30 minutes. Then rinse it off with water.
Replace Caulk
If you have tried some or all of the methods listed above and the mold still remains, it might be better to replace the caulk. Removing it is easy enough. Just run a sharp box knife along one edge of the sealant and repeat the process along the other edge.
You can apply a caulk removing gel for 20 minutes to soften the caulk if you want to make your life a bit easier.
Then pull the caulk free from the gap in a string-like way. You will need to get all of the caulk out, including the last remnants that stick to the edges. Use the knife to scrape it away.
When you apply the new sealant, check it is suitable for the bathroom. It will tell you on the label. Bathroom caulks are impregnated with antibacterial solutions that inhibit mold and mildew growth.
You will need a caulk gun to deploy the sealant. All you need to do is pull the trigger, and a plunger pushes the base of the caulk canister, squeezing a thin line out of the end of the conical tip.
Drag the caulk behind you as you work along the gap. When you get to the end, press the clip on the gun, and the spring releases the pressure to stop the caulk from flowing.
Wet your finger and run it along the line of sealant, smoothing it into the gap, ensuring that there are no holes and the caulk has sealed on both sides. Allow it to dry for a few hours.
EC3 Mold Solution Spray
EC3 Mold Solution is a natural compound consisting of citrus seed extract, plant oils, and distilled water. It works on almost every surface, including fabrics, tiles, wood, concrete, and even soft furnishings.
Spray an even coating over your sealant and leave it to stand for 10 minutes. Then rinse it off with water and dry thoroughly. Now reapply a new layer to the caulk and leave it to dry naturally.
You can spray this solution as many times as you like for preventative measures.
Ideas for Preventing Mold from Forming
Prevention is better than the cure. How many times have you heard that? But it’s true. Stopping the mold from forming in the first place is preferential to battling to remove it. Here are some tips:
Vented bathroom fan
Keeping the bathroom ventilated is the best solution to preventing mold growth. Circulating dry air and removing the damp air keeps surfaces dry and mold-free. You should also open any windows to let the bathroom dry out.
Remove wet towels
Hanging wet towels in your bathroom is an open invitation for mold to move in. The dampness in the material harbors spores that can form black mold. Plus, a damp towel is going to increase the moisture content of the room.
And anything the towel touches becomes damp, creating more chances of mold spores.
Dry the shower stall
The simplest and most effective way to prevent mold is to dry the shower stall after use. Wiping the water away kills the main food source for the mold to grow.
Just don’t then hang the towel in the bathroom to dry because you have created the conditions where mold thrives in the wet towel.
Clean shower walls weekly
Mixing up a solution of white vinegar and water in a spray bottle and applying it every week will also reduce the chances of mold growth.
You could even spray it every day. If you don’t like the smell of vinegar, try adding in a few drops of essential oils, like tea tree oil, to improve the fragrance.
Measure humidity
You can measure the humidity in the room using a digital thermometer that has a humidity feature. The ideal balance should be 30 to 50 percent. Anything lower and the air is too dry and above 50 percent, and the atmosphere is perfect for mold growth.
The best way to moderate humidity is to buy a dehumidifier. It monitors the moisture in the air and kicks in when the level gets too high.
Mold-Resistant Caulk
Silicone is the best type of sealant to use because the solution is mold and mildew resistant. Look for the label that tells you it is suitable for use in kitchens and bathrooms. These are the spaces with the highest moisture content.
There are thousands of mold-resistant caulks on the market, so you shouldn’t be stuck for choice.
Conclusion
As you have probably gathered by now, moisture is not your friend. Humidity is not your friend, and neither are heat or low-light areas. Beating black mold is a continuous battle that needs dedication if you want to win the war.
Just remember that the dryer your caulk, the less mold growth you will see. Beating mold is not complicated, but it is relentless. Good luck, and here’s to keeping your caulk in tip-top condition.