If your home is feeling drafty and your energy bills are through the roof, it may be time to insulate your house.
Spray foam kits are an easy and effective way to apply spray foam insulation to gaps, cracks, ceiling and wall cavities, attics, basements, and some crawl spaces. Insulating your home can reduce your home’s energy bills, reduce chills and hot spots, and keep your home safe.
The 5 Best Spray Foam Kit Options
1. Loctite Insulating Foam Sealant
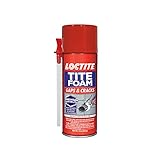
- EXPANDS TO FILL: Loctite TITE FOAM Gaps & Cracks fills, seals, and insulates effectively around gaps and cracks up to 1 inches in size
This insulating foam sealant from Loctite comes in a 12 ounce can with a straw applicator that connects to the nozzle to emit a spray of foam on cracks up to 1″ in size on various types of materials, including wood, PVC, brick, metal, stone, or more.
In terms of application, this polyurethane sealant is simple to prep and apply. It is best to wear safety gear like gloves, as the foam can cause skin irritation. Shake the can for thirty seconds and spray the foam into the desired area (hold the can upside down to spray).
You can use this product indoors or outside (UV-resistant) to block pests, moisture, and air. Once dried, you can sand and paint over the white foam to hide its presence.
| Best for: This aerosol can of spray foam is an ideal product for repairing small cracks and gaps around the home to prevent air and pests. But it would not be suitable for insulating an entire house. Nor to use for fireproofing or outdoor settings where there will not be proper coverage to block UV rays. |
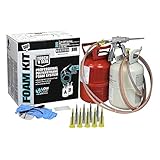
2. Touch N Seal Spray Foam Insulation Kit

- R-Value: 5.48 per inch
The Touch N Seal spray foam insulation kit helps protect your home from outdoor conditions (heat and cold) for lower energy bills. One kit covers up to 200 feet with low odor foam and 5.48 R-value per inch.
You can use this two-piece kit to apply a 1″ thick layer of spray foam using the 15-foot gun hose. Ten spray nozzles, two cones, and two fans ensure you have all the materials to complete your job in one session.
| Best for: This two-part product is ideal for crawl spaces, attics, and insulating walls before hanging sheetrock or other walling. Because there are two containers, this product requires both hands to move around and might be too heavy for some users. If you need to insulate more than 200 feet or need more than 1″ thick foam, you’ll need to choose a more extensive kit. |
3. DAP Touch’ n Seal Spray Foam Insulation Kit
- Airseals and saves energy, Closed cell structure, Class A fire rated, Does not shrink or settle, High R-value 6.6 @ 1″ (25mm)
Another great product from Touch n’ Seal is this DAP spray foam insulation kit. You get two 41 pound tanks, pre-attached hoses, and multiple tips.
This kit sprays closed-cell, Class A fire-rated 1.75 PCF ICC foam that offers soundproofing and thermal insulation without settling or shrinking over time.
One kit covers 200 bf (board feet = 12″ x12″ x1″ thick) with a dry time of 30 to 60 seconds and a 1 hour cure time and an R-value of 6.6, and a density of 1.75+/-.25pcf.
| Best for: The DAP kit by Touch n’ Seal is an ideal spray foam that sound proofs, insulates, and quick dries with low fume production. Enjoy lower energy bills from this fire retardant low GWP foam. |
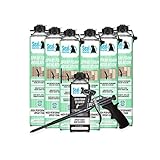
4. Great Stuff Pro Gaps and Cracks Spray Foam

- THE GAP AND CRACK ATTACKER! According to the US DoE, the average US home has a 1/2 mile of gaps and cracks. Air leaks account for 25-40% of the energy used for heating and cooling a typical home, resulting in higher utility bills. Fill the gaps and crack down on energy loss with GREAT STUFF PRO GAPS AND CRACKS INSULATING FOAM SEALANT!
The AWF Pro Foam kit by Great Stuff features 12 (24oz) cans of gaps and cracks foam, two cans of gun cleaner, two plastic nozzles, two straws, and one AWF Pro gun (required for using cans).
With this kit, you can tackle any significant cracks or gaps throughout your house to provide better insulation for blocking wind, reducing energy loss, and fire block. One container will cover 970 linear feet (using a ⅜” bead).
The gun sprays the orange sealant to seal gaps up to 3″ wide on metal, glass, plastics (not all types are applicable), wood, or masonry. The foam seal will be water-resistant, fire-blocking, and airtight.
| Best for: This kit is for sealing all the significant gaps inside your house with a water-resistant, airtight expanding foam. However, this product would not be suitable for all-over coverage for walls, ceilings, or crawl spaces. |
5. Seal Spray Insulating Foam
- Two component foam performance in one easy-to-use can. Each can is 27.4oz and covers approximately 25 Board Feet (1 Board Feet = 12″ X 12″ x 1″ Thick)
This spray foam kit by Industrial Products comes with the gun, and your choice of spray foam closed cell insulating foam cans and a can of spray gun cleaner. Options are two (50 BF), six (150 BF), eight (200 BF), twelve (300 BF), or 24 cans (600 BF).
Every 27.4-ounce container has two components that mix to cover 25 board feet, allowing you to seal gaps, cracks or apply a whole layer of insulation for wall coverage.
An excellent advantage of this kit is that you can take this spray foam kit anywhere, including tight spots, because the cans attach to the gun for application.
| Best for: This Industrial Products spray foam kit allows you to apply spray foam in tight locations with no heavy equipment to carry. |
What Are Spray Foam Kits?
Spray foam kits, also called froth packs, is low-pressure polyurethane spray foam typically consisting of two components (open or closed cell) with quick set abilities to create an airlock seal.
A kit should include the spray foam, accessories needed (nozzles, hoses), and an applicator, typically a spray nozzle gun that allows you to cover more service areas. Smaller applicators that come in an aerosol can require a plastic straw for the distribution of the foam.
Many people choose to use spray foam kits to seal their homes rather than paying the costs to hire a professional to use a truck sprayer.
How Does a Spray Foam Kit Work (And Does It Really)?
With two-component kits, the A and B solutions combine to create a frothy mixture that rapidly expands and chemically cures into a stiff foam. These kits come with two separate cylinders which attach to the spray gun via hoses.
Other kits, which are better for tight spaces and small jobs, come in both components inside one container. Shaking causes the mixture to combine inside the canister.
Spray foam kits are a great way to avoid the fees of having a professional seal small areas of your home. However, if you’re inexperienced, you could run into some typical troubles.
Foam insulation in your home can reduce up to 50% of energy loss (most energy loss is due to air leaks). Not only does that save you money, but it’s also better for the environment.
The most important thing to remember is that timing matters if you’re tackling a spray foam job yourself. Once you start spraying, you can’t stop for longer than thirty seconds. The quick-drying time of the foam will cause the nozzle to clog, which can ruin the product inside the tank.
If you wait longer than 30 seconds between sprays, you’ll have to swap out the nozzle. Many kits come with additional nozzles. If your equipment doesn’t, it’s a bright idea to pick up some spares before beginning your project.
Another issue that is more common with DIY spray foam kits versus professionals is the mess. You have to be careful where the spray lands because it will stick to any surface and can be problematic to get off.
| Pro tip: Cover any surfaces with a protective layer and tape to reduce the foam getting everywhere. And wear old clothing you don’t mind getting damaged. You’ll also need a face mask, gloves, and eye coverage. |
Ways to Use Spray Foam
Spray foam is a product that has many versatile uses. While the primary use is to seal cracks and gaps so that air can’t get in, spray foam can also be a deterrent to insects, pests, and rodents.
Filling any small holes with foam can provide an impenetrable barrier against unwanted houseguests. Although mice can and will chew through the foam, so it’s not a 100% guarantee for these pests. Look for formulas with rodent and pest repellants for extra protection. Look for holes around outside vents, faucets, and pipes.
Adding sealant to the underside of your roof can prevent air and moisture from getting inside your house. Excess moisture in the attic can lead to mildew, mold, or wood rot.
If your foundation has cracks that allow water to seep through, settling under your house, you can use spray foam to seal the cracks. Closed-cell spray foam would work better because it can resist moisture and create a block so water can’t get through.
Some people also use spray foam to insulate crawl spaces and basements. Again, closed-cell foams work better in these conditions.
Spray foam can also go in wall cavities – the space between the studs. Adding foam insulation behind your walls can reduce sound travels, keep the temperature-controlled in the room, and save you money on electric bills. If your plumbing does a lot of rattling, open-cell foam can reduce the noises that come from the wall.
Applying spray foam around windows and exterior doors is crucial for energy efficiency. Even a slight gap or crack can let enough outside temperature inside that your ac/heating system has to operate more frequently.
Got a wobbly fixture in the shower? Adding a small amount of expanding foam around the loose piece can create a firm hold. Once the foam cures, you can use a knife to remove the excess foam that’s sticking out around the space. Then affix the cover back in place. No one will be the wiser. You can also do this for loose pipes.
But outside the home, spray foam can also work for insulating boats (or yachts), container carriers, garages, vehicles, and trailers.
Types of Spray Foam Kits
Spray foam comes in two types: closed-cell or open-cell. The main difference between the two types is different R-values and performance needs.
Open-Cell
The open-cell foam contains air bubbles within the polyurethane that create a less dense, softer foam with an R-value ranging from 3.6 to 3.8 per inch. This type is cheaper and works excellent for soundproofing but falls short on performance for thermal insulation. You can use it to keep structures cool in hot climates, but it won’t protect against the cold outside.
| Best for: Open-cell foam is best for sealing cracks and gaps in homes where you want to have silence and have less need for thermal insulation. |
Closed-Cell
Because closed-cell foam is denser, it has an R-value between 6 and 7.14 per inch. This type of foam also contains trapped air bubbles inside the polyurethane. But a blowing agent (hydrofluoroolefin or hydrofluorocarbon) forms these air bubbles, giving the foam more density and rigidness.
CC (closed-cell) foam is better for thermal insulation since the density blocks air movement. This foam also has the advantages of being water-resistant, which can stop the build-up of moisture which can cause mold and mildew.
High density closed cell expands less than a medium-density CC, providing more strength to the structure. This type of spray foam is excellent for coating flat roof surfaces when covered with silicone spray to prevent UV damage. It’s also used for insulating storage tanks.
| Best for: You should choose closed-cell spray foam insulation for structures in colder climates where you need a water-resistant airlock barrier that will provide thermal insulate. |
Spray foam kits can come in multiple styles. They range from a two-component system in separate containers (large tanks that resemble propane tanks for grills) – challenging to move around for a solo job. You can also find some smaller, in a can no bigger than hairspray that contains both ingredients.
While the can and straw are great for one or two spots, you’ll save time and energy by investing in a gun if you’ll be doing multiple areas. This style is better when you’re handling small jobs in areas where there’s not a lot of space or when you’re doing the job solo.
A spray gun features a knob that allows for flow rate adjustments that change the size of the bead, allowing for better versatility among projects. The extended tip also allows for better control. And best of all, once you’re done spraying, all you have to do is wipe the end clean. The ball inside the tip prevents the foam from curing by blocking air. Like this, foam can last up to a month. And you can attach a can of cleaner anytime your gun needs a good cleaning.
| Pro Tip: If you’re trying to get the foam into a tight space where the straw won’t reach when using a can, attach a piece of ¼” tube to the end of the straw. You’ll have extra length and flexibility to get into any space. Remember to clean the line to prevent clogs. |
However, the two-component cans might be tricky to use for full coverage of ceiling or wall cavities. These types usually have a lower quantity, meaning you’ll need to buy many refills, and you’ll spend more time swapping the tanks out.
Pros and Cons of Using Spray Foam As Insulation
As with any product, there are advantages and disadvantages to using spray foam as an insulation source.
Most professionals consider spray foam to be high-performance – short and long-term. Once the foam hardens, it becomes airtight.
Another significant benefit is the broader range of use. Tighter spots and hard-to-reach areas are a lot easier when using spray foam over traditional sheet insulation.
And besides creating an airtight seal, spray foam insulation also has a higher R-value, adds strength to the structure, and can reduce energy bills. Spray foam is a vapor, insulation, and air barrier combined into one. Benefits of spray foam insulation include:
- Prevents heat loss
- Improves energy efficiency
- Lowers seasonal bills (heating and cooling)
- Reduces moisture accumulation
- It eliminates the need for a vapor barrier
- Seals up all places, even odd areas
- Eliminates air drafts
Now, onto the downsides of spray foam insulation. The most significant drawback of spray foam is that it has a premium (more expensive) price as a premium product compared to other insulation types like fiberglass.
Spray foam can also be messy, both to the surroundings and the installer. To get a pro look, be sure to follow all manufacturer instructions to the letter. And prep any surfaces that you don’t want to be sprayed.
| Pro tip: If you’ve never used a spray foam gun before, it’s a good idea to practice on some scrap, either using a piece of old wood, a cardboard box, or anything else you can throw away. Take the time to practice the exact pressure you need to get a completely even layer. |
Considerations for Buying the Best Spray Foam Kit
When shopping for a spray foam kit, the best choice comes down to your individual needs. The wide variety of styles, types, and features allow you to find an option that gives you all you need. Consider these factors to ensure you get a kit that is right for you.
Size
Regardless of what anyone says, size does matter. There’s no need to spend the money on a sizeable two-component froth pack if you need to seal one hole. Likewise, you might save money by picking a large unit if you’re doing a large job that would take more mixed foam.
Type
You’ll also want to consider your experience level when choosing which type of spray foam kit works best for you. If you have zero knowledge, you will do better with a product that doesn’t require mixing and connecting many hoses. Instead, a can that secures into a gun spray might be the better choice.
Price
You’ll also want to consider your budget. Closed-cell spray foam costs more, but it adds structural support and other benefits that make the extra cost worthwhile.
The equipment pricing also varies, with two-component froth packs being higher due to the larger, more professional-grade equipment. You’ll also need to consider the price of refills for the tanks.
Spray foam in a can is more cost-friendly, but it’s not eco-friendly since the cans cannot be refilled. There may be recycling centers or facilities that will take the empty containers.
R-Value
You’ll also want to consider a foam’s R-value (resistance value), which defines how well the foam will insulate. The higher the value, the more insulation the foam will provide. Higher R-values are best for locations with extremely cold winters or hot summers.
Fire resistance
You’ll also want a fire-resistant spray foam. Products come with different fire ratings, which define the degree of fire resistance. Class A fire rating is the best possible rating.
Density
As we mentioned, the density of spray foam will affect the spray’s insulation abilities. The higher the density, the more benefits you’ll get, such as an airlock, soundproofing, fireproofing, and a water barrier. Spray foams can be low, medium, or high-density. Open-cell foams are low density. Closed-cell can be medium or high.
Open vs. Closed-Cell
Your final consideration should be if the spray foam is closed or open-cell. Open-celled foams are ideal for indoor locations and are more affordable. Some open-cell foams provide sound dampening. But closed-cell foams have better benefits. Closed-cell foams are flood-resistant, work in low temps, have extended longevity (lifespan), and add strength to your structure.
| Pro tip: Always check the expiration date of foam sprays before using. Expired foams will not expand properly. |
How to Use Spray Foam Kits (Step-by-Step)
Each system may have different directions on how to assemble and set up. It’s a brilliant idea to read through all of the instructions before attempting to set up or using a spray foam kit, primarily if you’ve never used one before. Despite the variations, it’s roughly the same steps.
- Connect hoses (if your kit doesn’t have hoses, you may have to attach a gun or straw)
- Rock the tank (or shake) and open valves.
- Clear the tank by spraying the foam into a scrap pile or a trash can. Ensure that the mixture looks and expands appropriately.
- Check the temperatures. The room and the tank both need to be within optimal conditions for the foam to cure correctly.
- Apply spray from 6″ to 24″ away from the surface, in layers no thicker than 2″. You’ll need to use multiple applications, allowing for adequate drying time between layers. Clean or change the nozzles between layers. Every time you change your tip (and when you add the first tip), you’ll need to lube it first. Your kit should come with some lubrication, but you can also use petroleum jelly if you run out.
- Allow to cure. Some spray foams may require 24 hours to pass before it’s safe, while others have a quicker cure time of minutes to hours.
| Pro tip: You can speed up the curing time by applying foam to damp surfaces (if it’s too wet, the foam won’t stick). Use a spray bottle to mist the area and then mist the foam once applied to speed up expansion and curing. |
If the foam gets on a surface that you don’t want it to stick to, a quick response with acetone (most nail polish contains this ingredient) can remove the foam before it cures. Once the foam cures, you’ll have to use a scraper, knife, or sander to remove the unwanted material.
Best Spray Foam Kit FAQ
Before we conclude this buyer’s guide, here’s a short, frequently asked questions section that will cover some information we might not have already covered.
What is the best spray foam kit?
Any of the options we’ve listed in our product reviews will suit your needs as a spray foam kit. The best spray foam kit will come with all the gear you need to complete your job.
How do do-it-yourself spray foam kits work?
We provided a step-by-step guide on using a DIY spray foam kit to repair holes, cracks, and gaps in your structure. It’s always best to follow the manufacturer’s directions to ensure you’re using your device correctly.
Can I spray foam my house myself?
You can use a spray foam kit to spray problem areas in your home. Sprayers that keep the components separated until they mix in the gun are best for large areas. But these systems may require more expertise to set up and use. Using the proper nozzle will help you cover more surface area. If you have a big job that needs insulating, it’s usually best left to a professional.
What is the highest R-value for spray foam insulation?
The R-value of spray foam varies based on whether it’s open-cell or closed-cell. Each layer of spray foam increases the R-value. One layer of open-cell foam is 3.7 R-value per inch, while a closed-cell foam is 6.5 R-value per inch.
Conclusion
Spray foam kits make it easy for you to sell your house from the air intake and loss, floods, pests and rodents, fire, mold and mildew, and high energy bills. We’ve provided five options for the best spray foam kits for DIY spray insulation applications. We also gave a detailed buyer’s guide giving you all the information you may need to decide on the right spray foam kit for your needs.