With the rising popularity of home improvement homes and DIY hobbyists, more people are starting to want something other than smooth walls and the outdated look of popcorn ceilings.
Texturing your drywall helps breathe new life into your room while helping to brighten up space. We’ve put together a list of twenty different drywall texture types you can use for your walls and ceilings. Whether you’re remodeling or just wanting to identify a texture when you see it, you’ll find this guide helpful.

1. Comb

Comb wall texture is a neat visual effect used to give walls or ceilings a detailed, unique texture style of swirls, half fans, arches, or rainbows.
Producing a combed texture is simple; using a small-toothed trowel that resembles a comb. However, you will need two people so you can get the job done before the mud dries.
2. Popcorn

One of the most common – and disliked – textures are popcorn, also called cottage cheese. This styrofoam and mud texture consists of many round, slightly extruding hardened plaster pieces that resemble popcorn kernels.
Popcorn is most often applied to ceilings using a sprayer to cover repairs and provide slight dampening. However, many people attempt to scrape this off to get a smooth surface. You can also cover it with new drywall for a faster, easier fix.
3. Orange Peel


Orange peel is a wall texture that comes in various forms – fine, medium, or heavy. This texture has a wrinkled, cracked surface, similar to orange skin, including dimples and mounds.
This texture has become one of the most common wall surfaces for interior walls in living rooms, studies, and dining rooms. The application requires spraying the wall with a thin mixture of water and drywall mud then going back over the surface with a roller brush.
4. Sand Swirl
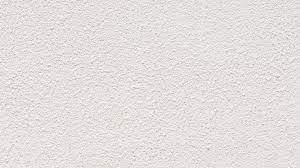

Sand swirl is a neat wall texture that gives your walls a unique character. This texture combines sand spray and comb techniques to give your walls depth and individuality. You can create spirals, Cs, half fans, or any design you imagine.
To create a sand swirl, you have to mix sand into the mud to produce a bumpy texture. You have the option of premixing this together in a bucket and then applying it to your wall. Or you can dip a medium to thick bristle brush into a bucket of sand, which you then apply to the wall like paint.
5. Mud Swirl
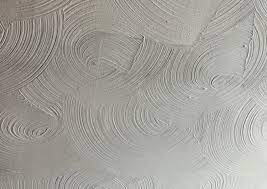

Mud swirl is a technique that’s been around for decades. While primarily used for ceilings, you may see some homes with mud swirl walls, too (typically in apartments). This design features a pattern of half-circle swirls.
To create a mud swirl, first prep your walls by sanding away any imperfections, which will show through the texture. Then, after applying a layer of very thinned out mud, use a medium bristle brush to create your swirls. Be careful to overlap each circle so that there are no empty areas.
6. Knockdown
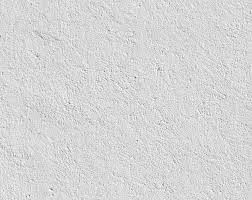

If you like the rough-textured look of stucco, you may enjoy knockdown textured walls. This texture design gives your room dimension and warmth. It can also help hide repairs or flaws.
But the installation process can be time-consuming. To produce a knockdown pattern, you’ll need to start with two layers of primer. Then spray a layer of thinned drywall mud onto the surface. Finally, use a finishing drywall trowel, knife, or specialized knockdown tool to smooth the bumps before the mud hardens.
7. Skip-Trowel
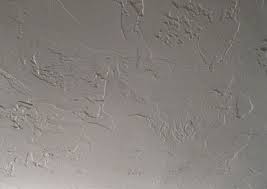

Skip trowel texture forms a textured pattern on your walls full of ridges and crevices. This design is more of an artsy type that won’t appeal to everyone.
DIY’ing a skip trowel texture is a simple process. You start by applying a layer of drywall mud over the surface. Then while it’s still wet, go over it with a clean trowel or drywall knife, held at an angle. This process removes chunks of mud to form a unique raised texture. For a more dramatic look, use a thicker layer of mud.
8. Hawk and Trowel
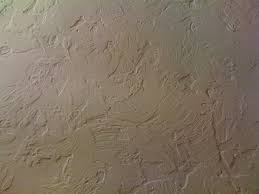

The hawk and trowel texture is a popular choice for sprucing up bedroom walls. It creates an exposed or rock-looking design. The name comes from the tools you need to make the unique look – a hawk – a flat plate with a handle attached – and a trowel – flat metal rectangle.
It is possible to DIY this, but we recommend practicing on a scrap before attempting on walls, as it takes practice to do it right. To apply this texture, start by adding mud to the hawk’s center, which you then transfer to the trowel to apply to the wall in quick movements. Here’s a helpful video to demonstrate the process.
9. Santa-Fe
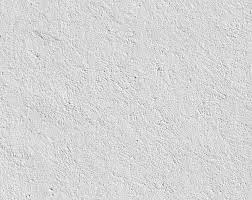

Another familiar wall texture is the Santa Fe, which resembles an aged, double layer wall with random grooves, holes, and swirls. This textured style was one of the most applied in 2019 for balconies and mudrooms. But it’s rarely chosen for the main living spaces due to its unfinished look.
To apply Santa Fe to your walls, use an 18″ wide curved drywall knife to apply a flat thin layer of mud over your smoothed, prepped sheetrock. You want between 60% to 90% of the wall covered with mud but not the entire surface. Do not touch up areas where the knife skipped.
10. Double Skip
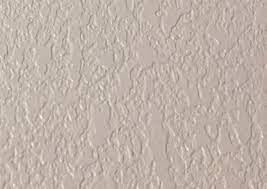

The Double Skip wall texture is a thicker version of the Skip Trowel, which we covered in number seven. Due to its thick, rough look of irregular circles forming uneven lines, the Double Skip texture is mostly used on ceilings in the living room or bedroom.
This style is ideal for providing better insulation, but it collects cobwebs and dust more than other textures. To create a double skip, you do the same process as you would for a skip trowel texture twice, hence the name.
11. Slap Brush
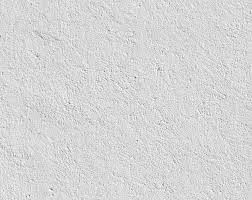

Slap brush is a rough-finished texture commonly used to hide imperfections or wall defects. You typically see this texture used in bathrooms, where it resembles peeling paint, with pits, rough ridges, and cracks.
This application is a moderate DIY job that starts by applying a smooth layer of drywall compound, such as mud, over the entire wall using a roller. Then, use a stomp brush or panda claw to slap the wall, producing textured ridges. You can make a random or organized pattern.
It may take some practice to get used to the proper technique, but you can learn different patterns and designs while learning.
12. Rosebud
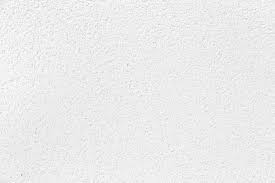

The Rosebud texture is a fancy form of the brush stomp method, which we cover in number 14. This design creates a floral pattern on your walls, with a center bud and flowing petals.
To create a rosebud texture, dip a rounded stipple brush into drywall mud and then stamp it onto the wall. You can twirl it to create swirling petals or press hard enough to make the bristles flatten for a broader look. Continue the pattern evenly without overlapping the stomps.
13. Crows Feet
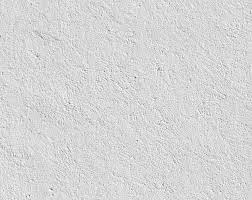

Crows feet are another stomp brush technique, but it requires a crows foot brush, which gives this texture its name. A crows foot brush consists of two oval stomp brushes mounted side by side.
To create crow’s feet, dip the brush into the mud and then stamp the surface. It’s the same process as slap brushing and rose bud. The difference is the look, which produces larger stomps. Many people apply crow’s feet to the ceiling because it takes less time due to the larger swirls.
14. Stomp Brush
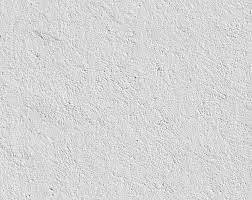

Many people find it fun to create a stomp brush texture. And it’s a great technique to use to create a random design and be creative. But you can stick to an orderly pattern if that’s your style.
Creating a stomp brush texture is crazy-easy. All you do is dip your brush into drywall mud and press it against the wall, hence stomping. Then sharply pull it back down to create ridges.
15. Spray Sand
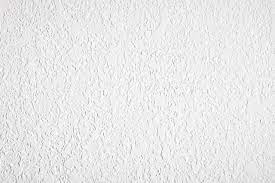

Spray sand is a subtle accent texture that won’t crack or peel. It’s more common for ceilings, but some people may also enjoy the look on their walls.
You combine sand with thinned drywall mud, primer, or water inside a hopper gun to apply spray sand. Then you spray the mixture on your surface. While a hopper gun can make the job faster, it may take some practice before you’re ready to use it on a permanent structure.
16. Lace
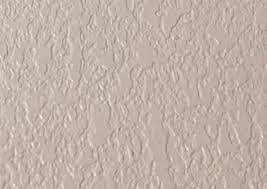

Lace texture produces a multi-layered pattern with a stucco-like feel that resembles antique or Spanish lace, prompting the name. Many people use this textured pattern to hide cracks and blemishes in the wall.
You can DIY this technique, but it’s very time consuming to produce intricate lace designs. Start by spraying a layer of mixed water and drywall mud onto the surface. Then use a finishing knife to knockdown, or flatten the spatter lines to form a lace pattern.
17. Smooth Wall
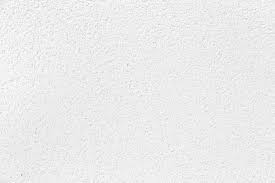

Smooth finishes are the most basic and standard wall texture seen in homes. This style is often referred to as a Level 5 finish.
Now, despite how simple a smooth wall looks, a lot of work goes into the process, which is why textured walls are more common. To get a smooth wall, apply a skim coat of mud along the entire wall, being sure to smooth out any raised areas. It’s harder than it sounds!
18. Multi-Colored Lace
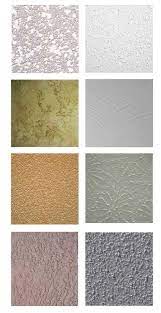

Many designs rely on multi-colored lace for dramatic color contrast. You use two different colors to form a two-toned textured lace pattern (#16). This texture can go on ceilings or walls.
Again, you will need a lot of practice to master this technique. But it’s not too tricky once you get the hang of it. You start with a layer of paint or drywall mud. If using mud, mix it with a color or paint it beforehand.
After the layer is dry, apply a different colored coat using a thick-nap roller or spray. Then, use a knockdown knife to create your lace patterns.
19. Venetian Drywall Finish
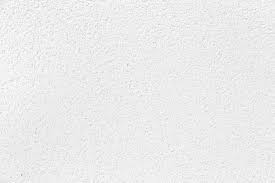

Venetian drywall gets inspiration from ancient Venetian plaster, which used marble dust to produce polished, shiny walls. While it’s rare to see Venetian plaster used today, Venetian drywall looks just as good.
To get a Venetian drywall finish, you have to use a Venetian plaster putty compound, a mix of water, and fired marble dust. Dip a steel trowel into the plaster and apply it to the wall at an angle, working from the top left corner.
Make short X strokes, overlapping but of varying lengths if you don’t want a consistent pattern. After drying for five hours, apply a second coat and dry. Then sand the walls using 400-grit sandpaper. Finally, burnish the surface by holding your knife at a 30-degree angle and make long, bold strokes in any direction. Check out this video for a demonstration.
20. Bas-Relief Drywall Finish

Bas-Relief drywall finish is when there’s a sculpture built into the wall. Despite the intriguing look, this is not a typical wall texture for home renovations or new builds.
This technique is not suitable for DIYers due to the skill of craftsmanship and the risk of damage. But you may come across this style in older homes or museums. Even if you don’t use it, it’s cool to know about and see.
Drywall Texture Types FAQ
Now that we’ve looked at twenty common drywall texture types let’s look at a couple of common questions people have about texture.
What is textured drywall?
Textured drywall means that the walls are not smooth. Instead, they have a layer of texture, usually drywall mud, that creates a raised or rough surface. This texture applies through a sprayer or roller, and brushes, combs, and other tools can create unique patterns.
What is the most common drywall texture?
The most common type of drywall texture is the orange peel, which is number three on our list. However, in higher-priced homes, you may see knockdown texture (#6) used instead.
Conclusion
Texturing a wall is usually easier and faster than trying to achieve a perfectly flat, smooth wall texture. Some types are more common, like stomp, orange peel, and popcorn, while comb and lace styles create stunning unique textures. Regardless of the style, textured walls provide better light reflection and soundproofing.

